20
OPERATION
ADJUSTMENTS
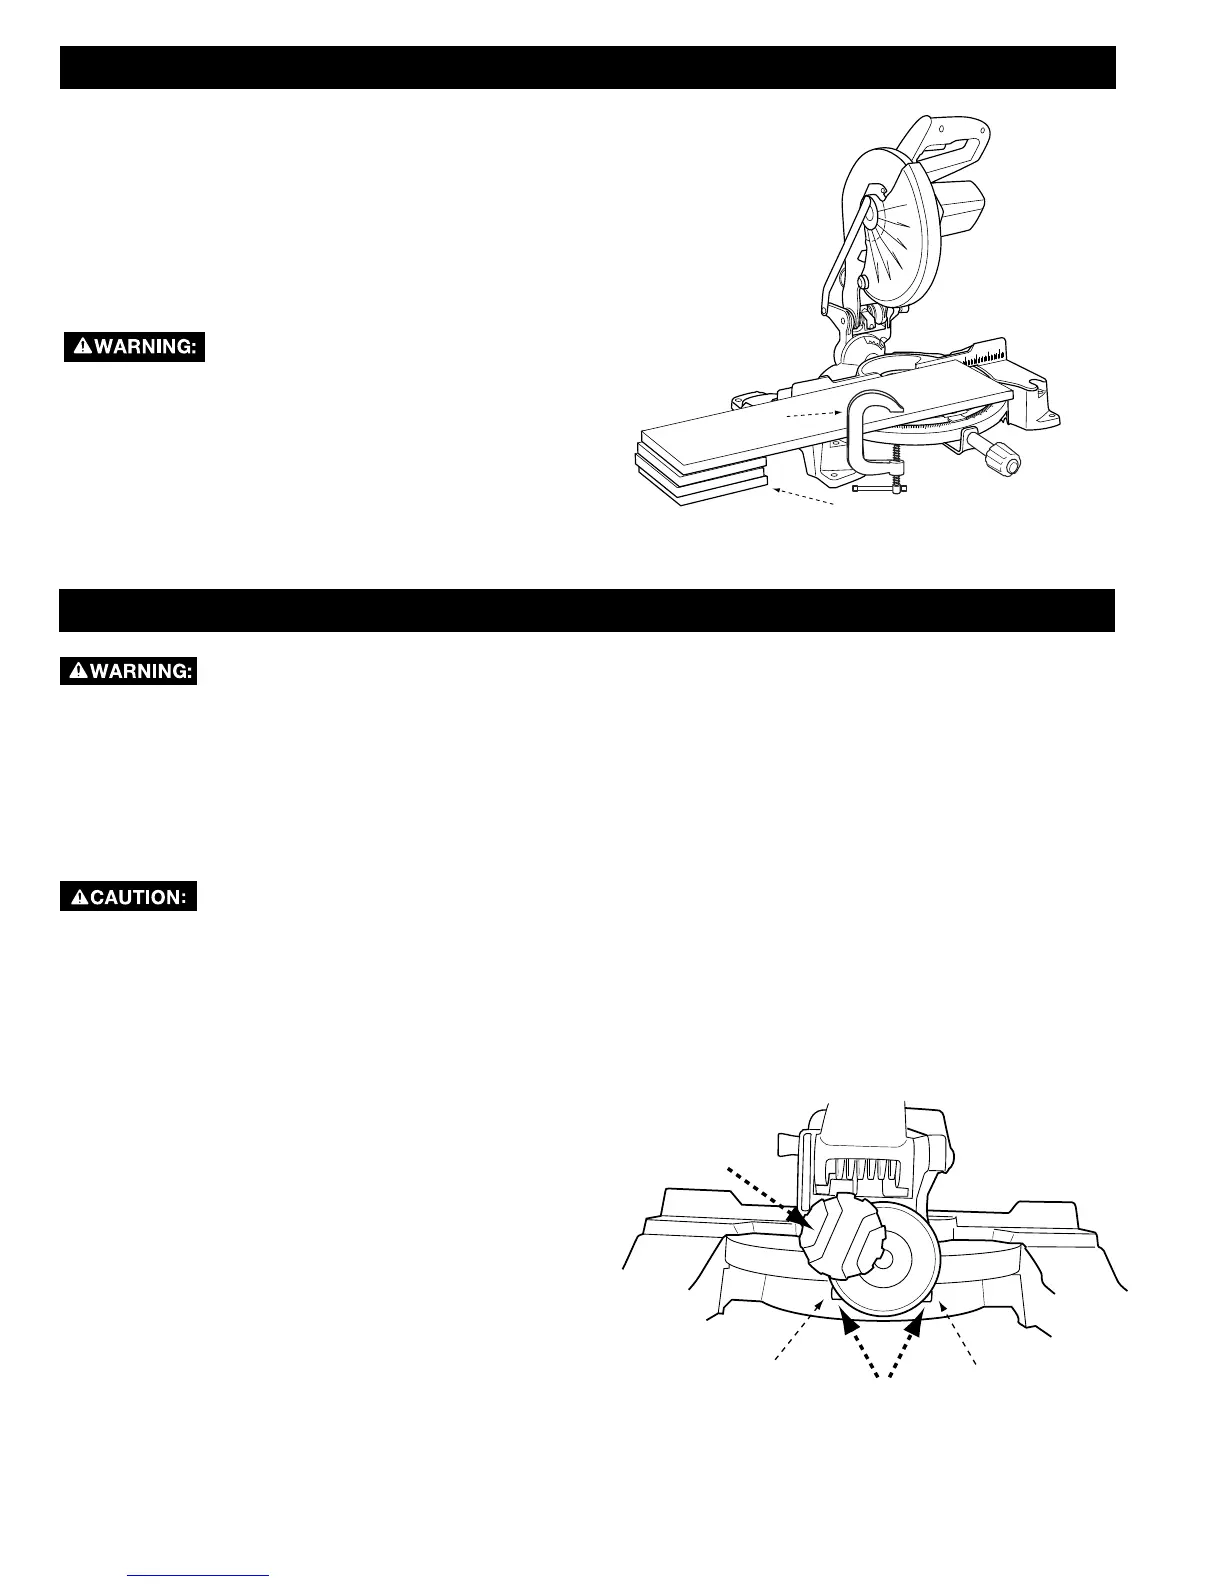
SUPPORTING LONG WORKPIECES
Long workpieces need extra support. Supports should
be placed along the workpiece so it does not sag. The
support should let the workpiece lay flat on the base of
the saw and work table during the cutting operation as
shown in Figure 20. Use the optional work clamp or a
C-clamp to secure the workpiece to the miter saw table.
Keep clamps away from the path of the
blade and blade guard assembly.
Before performing any adjustment,
make sure the tool is unplugged from
the power supply. Failure to heed this warning could
result in serious personal injury.
Your compound miter saw has been properly adjusted
at the factory. Due to shipping or normal use, it may
be necessary to re-adjust some of the settings. Check
the following adjustments periodically to assure proper
accuracy and safe operation.
Check for interference between the
blade and the throat plate, before
plugging the saw into the power source.
ARM PIVOT
The arm of the saw should raise and lower completely
and freely. In the lowered position and with the
lock pin removed, the arm should rise to the up
position by itself. If the saw arm does not raise by
itself or if there is play in the pivot joints, it will need
Company’s Customer Care Center at 800-223-7278.
POSITIVE STOP SCREW
The position of the positive stop adjustment screw
was set at the factory and normally will not require
readjustment. If the blade is not square to the
table, the positive stop adjustment screw must be
re-adjusted.
To adjust refer to Figure 21:
1. Unplug the saw.
2. Using the Phillips end of the blade wrench, loosen
the positive stop adjustment screw (A) by turning it
counterclockwise.
FIGURE 20
FIGURE 21
1
2
3
4
5
6
7
3. Loosen the bevel lock knob (B) by turning it
counterclockwise.
4. Square the blade to the miter table as described
TABLE, found on page 14.
5. Retighten bevel lock knob. Recheck blade-to-table
alignment.
6. The saw has two scale indicators, one on the bevel
scale and one on the miter scale. After squaring
adjustments have been made, it may be necessary
to loosen the indicator screws and reset them to
zero.
square to the table at 0° and 45° angles.
A
B
45º
0º
 Loading...