(2)
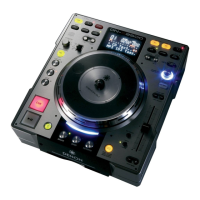
Playing the sample
• Press the PLAY/PAUSE button.
(
The PLAY/PAUSE button's LED lights.)
The sample is played.
(
3)
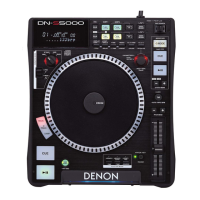
Stopping the sample
• Press the CUE button.
(
The CUE button's LED lights.)
The sample is stopped.
(4)
Changing the sample's pitch
• Press the TRACK >>l
button to increase the sample's playing speed,
the TRACK l<<
button to decrease it.
The sample playing speed changes in steps of 0.5% and the speed flashes
on the PITCH display section for approximately 3 seconds.
(
The sampler pitch range is ± 16%).
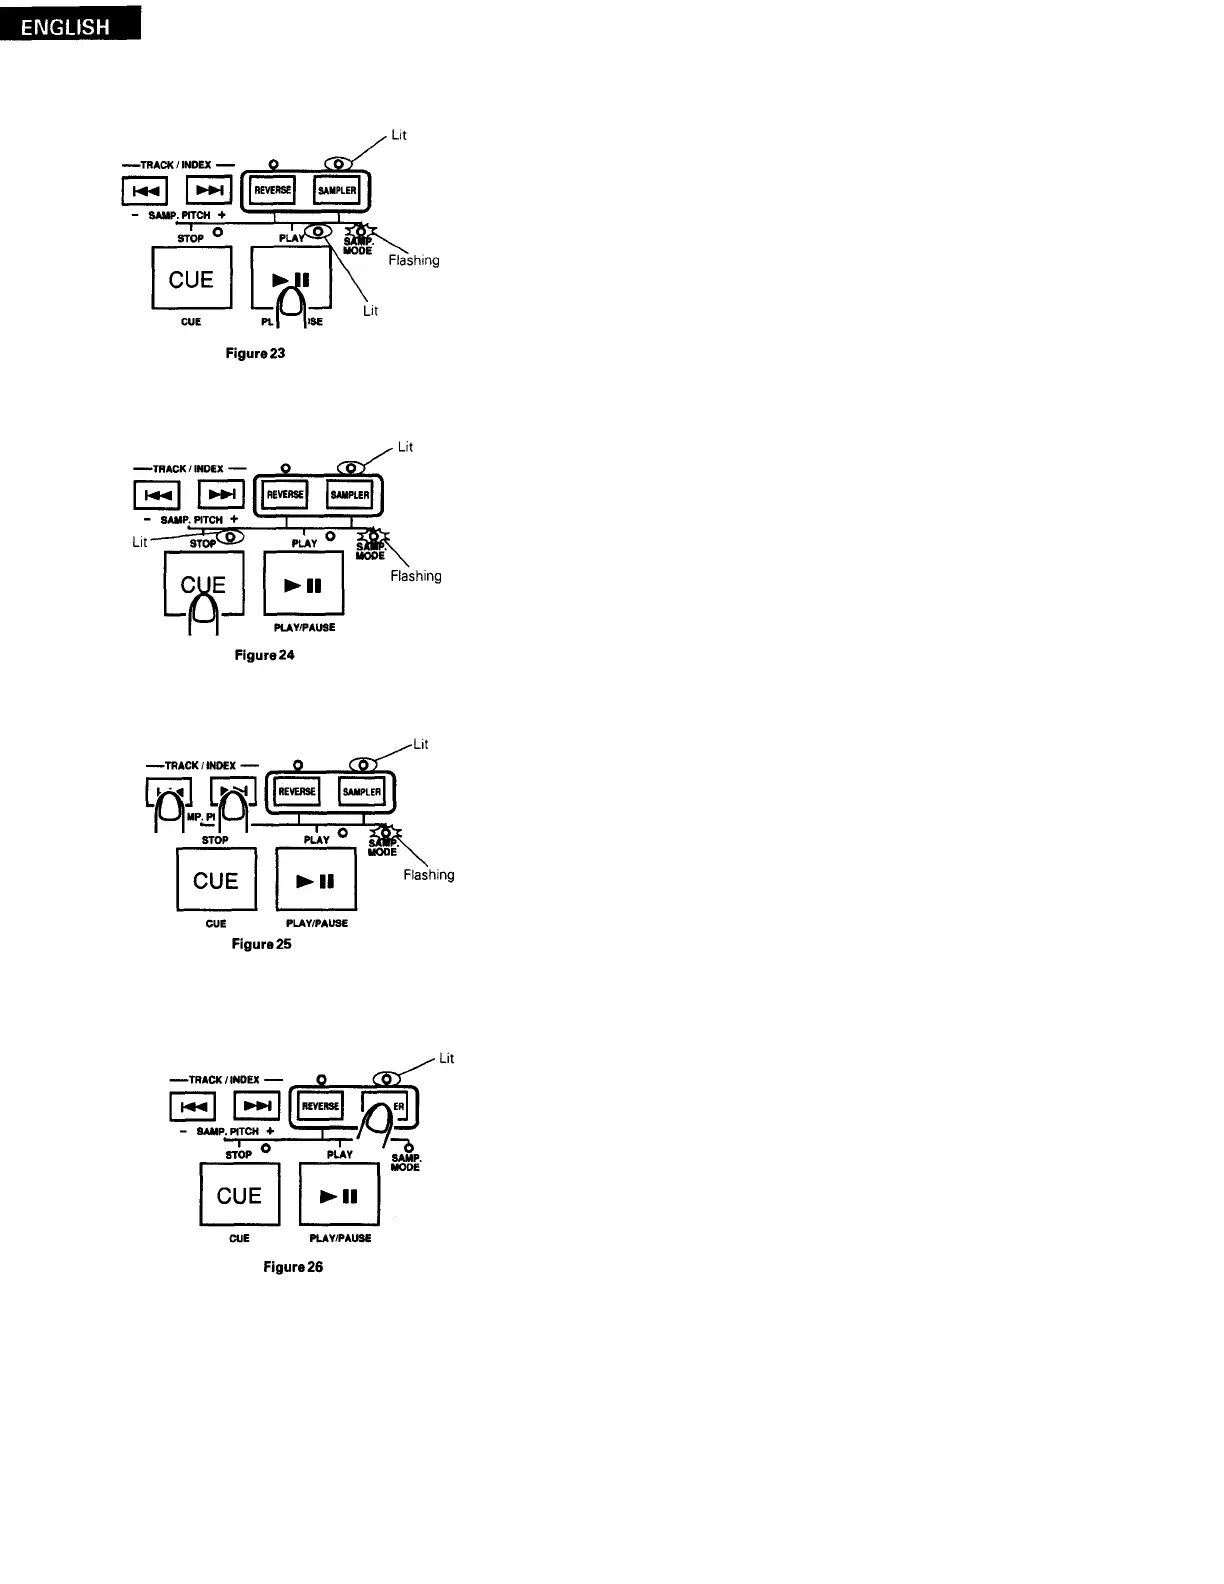
(5)
Setting the normal disc playback mode after recording a sample
• After the sample has been recorded, press the SAMPLER button.
(
The SAMP. MODE LED turns off.)
Normal disc playback is now possible.
The sample can be played again by pressing the SAMPLER button again.
(
The SAMP. MODE LED flashes.)
NOTE:
•
When the SAMP. MODELED is flashing, the following buttons function as sampler buttons, so they cannot be used
for their normal operations:
PLAY/ PAUSE, CUE, TRACK
>>l
,
TRACK
l<<
(
However, the TRACK
>>l
and
l<<
buttons can be preset to
be used as the normal track selection buttons. ITEM No. 2)
• The recorded sample is not cleared when the disc is removed from the player.
20
 Loading...