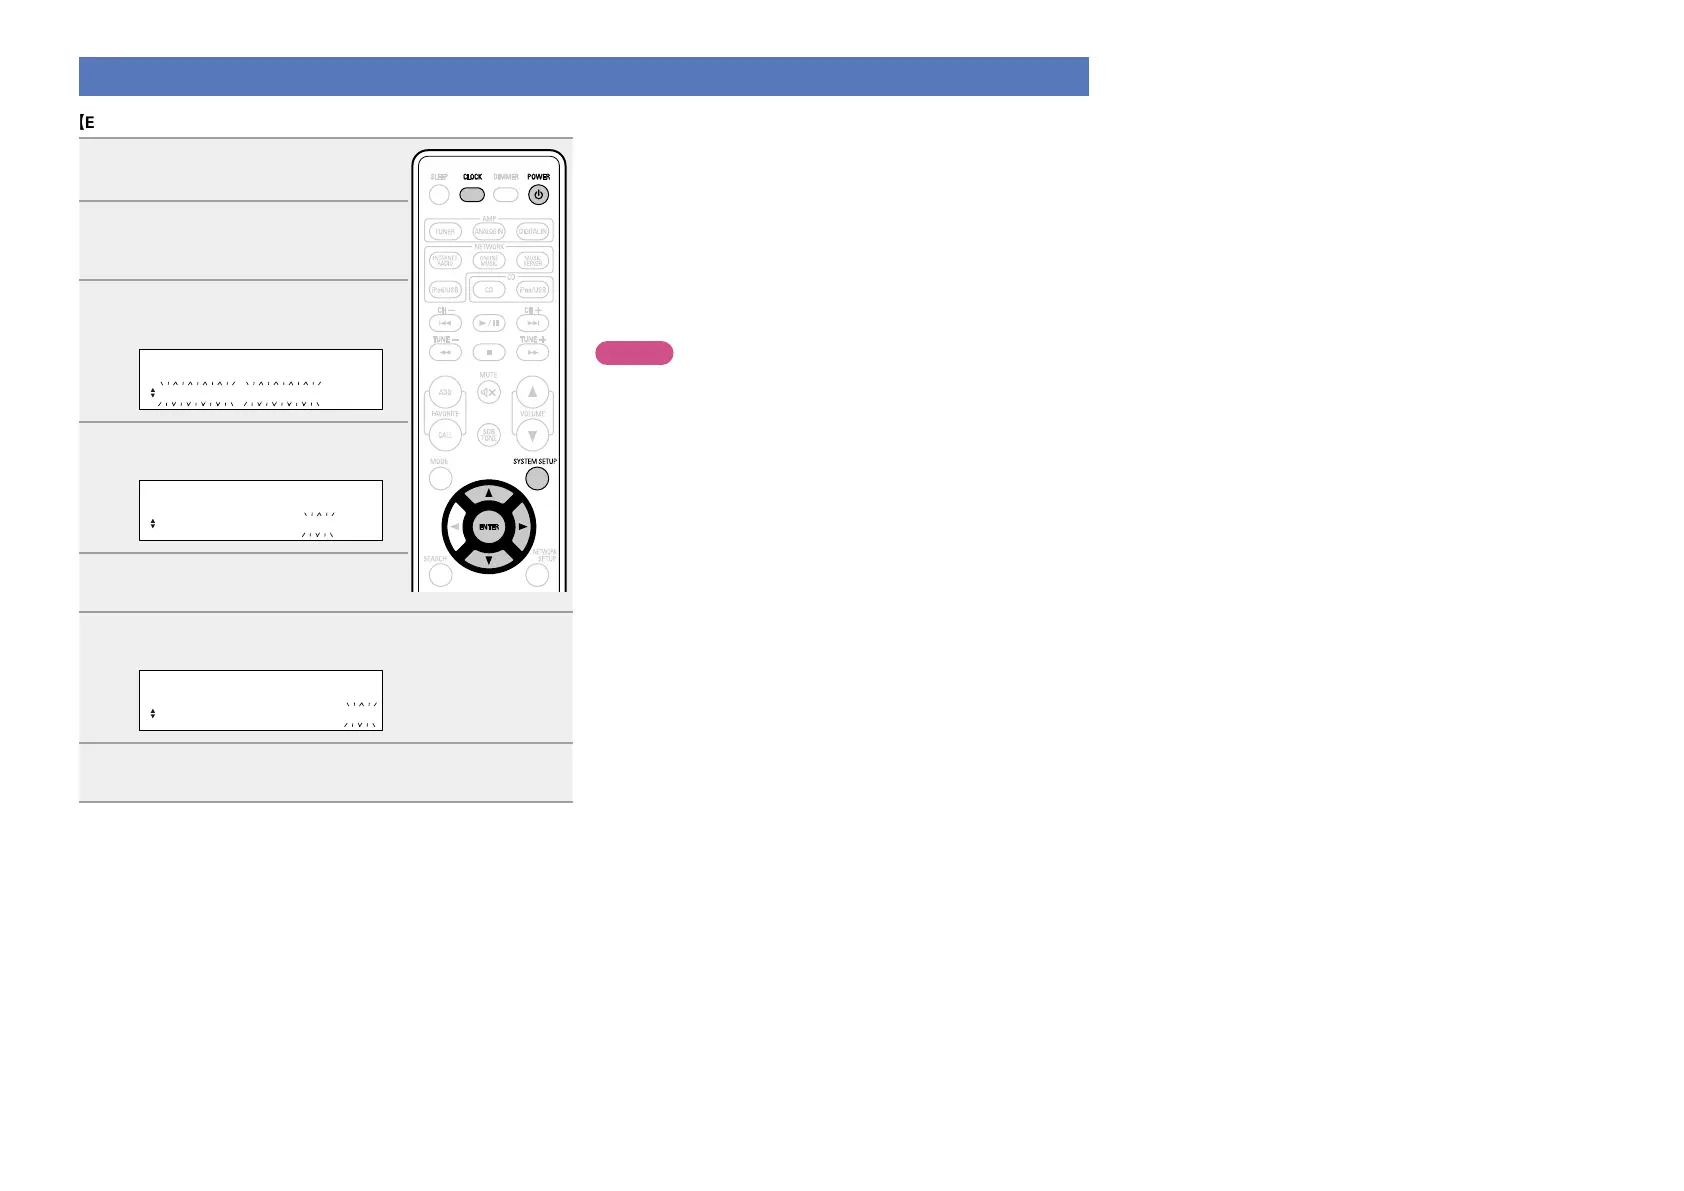
EasyManua.ls Logo

Denon DRA-F109 User Manual

Denon DRA-F109
33 pages
To Next Page IconTo Next Page
To Previous Page IconTo Previous Page
Page #13 background imageLoading...
Page #13 background image
10
Setting the current time (24-Hour display)
GExampleH Setting the current time to 10:15 am
1
Press POWER X to turn the
power on.
2
Press SYSTEM SETUP.
Various types of setting menus are
displayed.
3
Use ui to select “CLOCK
SETUP”, then press ENTER.
SETUP
CLOCK SETUP
4
Use ui to set the “hours”.
CLOCK SETUP
10:00
5
Press ENTER or p.
The “minutes” display flashes.
6
Use ui to set the “minutes”.
CLOCK SETUP
10:15
7
Press ENTER or p.
The current time is set, and the normal display reappears.
n Checking the current time when the power is on
Press CLOCK.
Press once more and the display returns to its original condition.
n Checking the current time when the power is
set to standby
Press CLOCK.
The current time is displayed for 10 seconds.
NOTE
The time cannot be set when in the standby mode. Turn on the power
first.
Preparations
Operations
Informations
Operations
CD

Other manuals for Denon DRA-F109

Questions and Answers:

Denon DRA-F109 Specifications

General IconGeneral
TypeDirect drive audio turntable
Hi-FiYes
OperationFully automatic
Product colorBlack
AC input voltage230 V
AC input frequency50 Hz
Power consumption (standby)0.3 W
Power consumption (typical)65 W
USB ports quantity-
Connectivity technologyWired
FM antenna ports quantity1
DisplayLED
Number of tuners1 tuner(s)
Receiver typestereo
Output impedance4 Ω
Audio output channels2.1 channels
Total Harmonic Distortion (THD)0.7 %
HDMI in0
Digital audio coaxial in2
Headphone connectivity6.3 mm
FM band range87.5 - 108 MHz
Supported radio bandsFM
Ethernet LANNo
Weight and Dimensions IconWeight and Dimensions
Depth250 mm
Width283 mm
Height82 mm
Weight2600 g

Summary

Safety Precautions

Important Safety Instructions

Essential safety guidelines and warnings for operation, electrical hazards, and fire prevention.

Warning Labels and Symbols

Explanation of symbols indicating dangerous voltage and important operating instructions.

Use and Installation Cautions

Preparations

Connecting the Speakers

Step-by-step guide to connecting speaker cables to the receiver, ensuring correct polarity.

Connecting the Power Cord

Procedure for connecting the unit to the AC power outlet, including model-specific notes.

Operations

Basic Operation

Fundamental operations including turning power on/off, setting time, and basic playback controls.

Troubleshooting

General and Tuner Issues

Solutions for common problems like no power, no sound, and tuner reception issues.

Related product manuals