DVM-500 User’s Guide Digital In-Car Video System
Digital Ally DVM User Guide Rev. F (334/1.6.2) Page 16 of 36
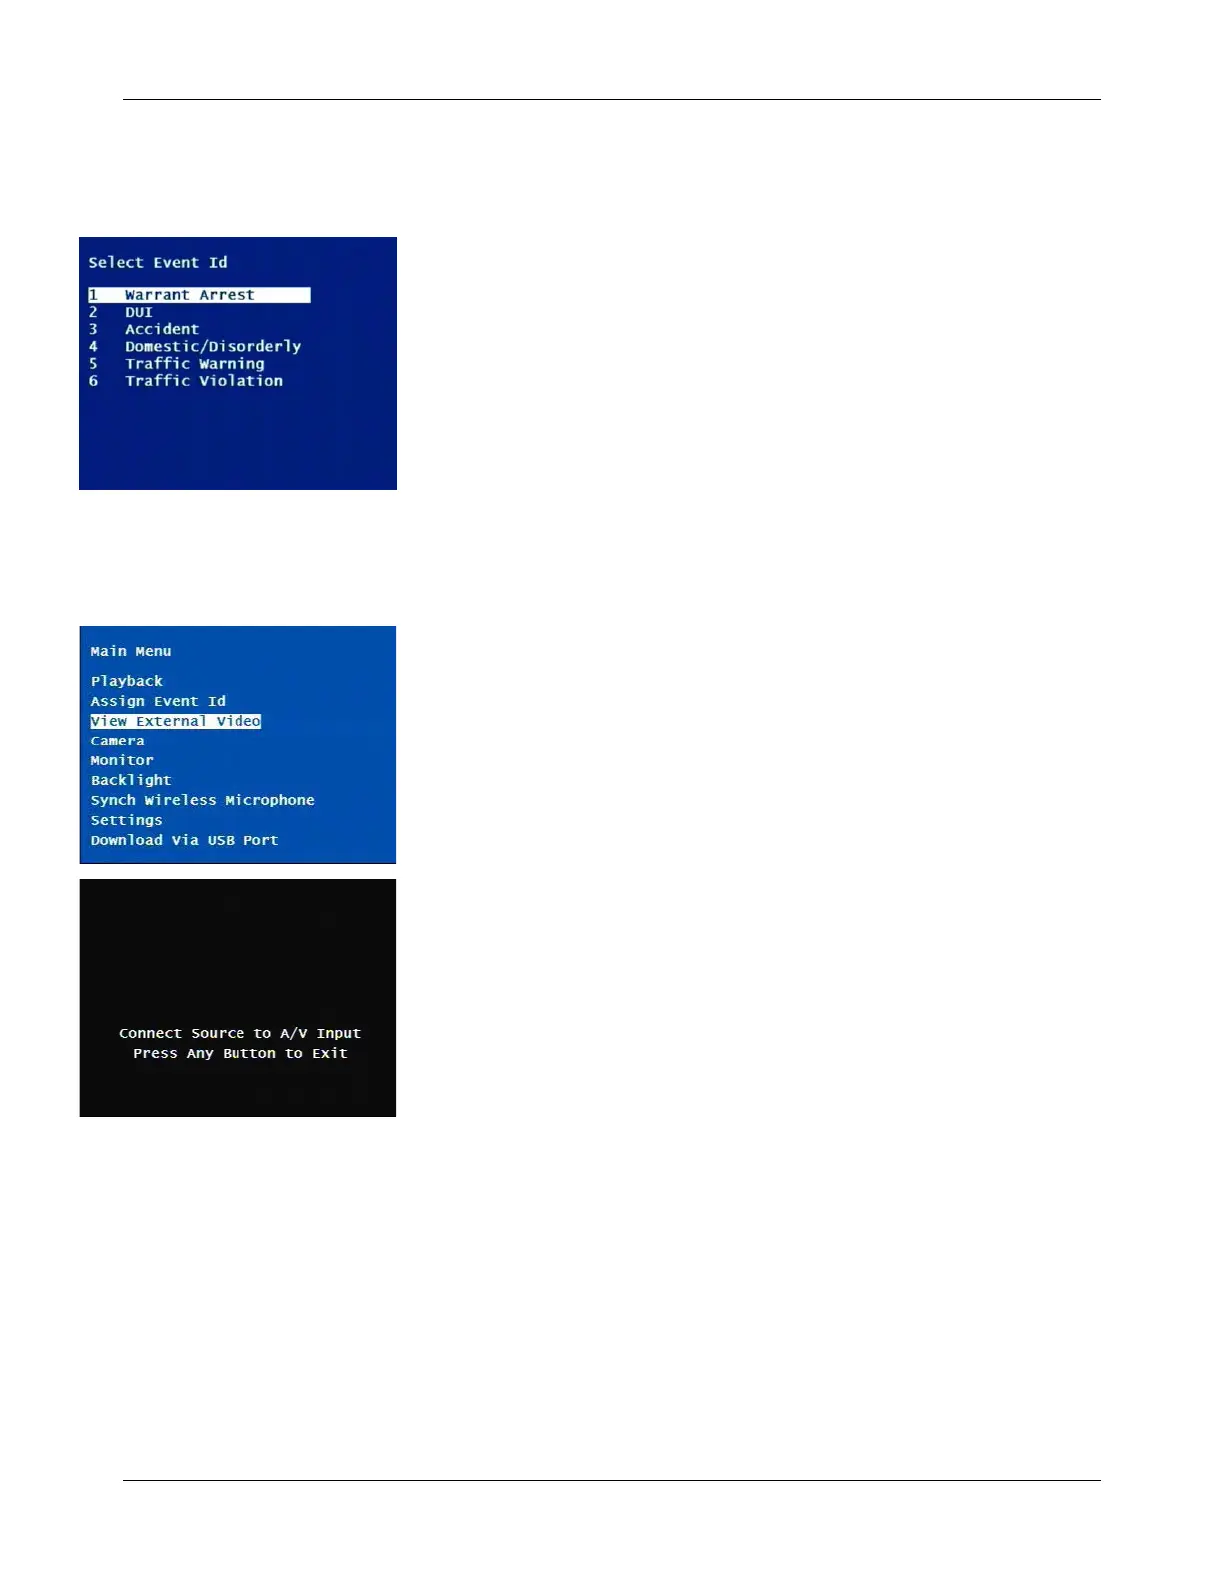
Assign Event ID Menu
Event IDs allows a user to classify recordings into categories; such as:
Traffic Stop, DUI, Accident, etc. Event IDs can be assigned on the DVM
by accessing the Assign Event ID Menu option. To use this option, Event
IDs must first be setup in VideoManager. (Once Event IDs are defined in
VideoManager, they are transferred to the CF card and then they will be
available on the DVM. Event IDs are updated on the card every time
recordings are uploaded from the CF card, when a card is Formatted or
when a card is activated from the Utilities menu in VideoManager.)
To assign an event ID, simply select the recording from the Assign Event
ID Menu and then select the desired event ID from the list.
View External Video
The DVF-500 (Digital Video Flashlight), can be attached to the A/V In port
on the DVM by using a 3.5mm male to male A/V cable. Please contact
Digital Ally, Inc. for availability of this cable.
External Video mode is entered by selecting the View External Video menu
item from the Main Menu. To exit External Video mode, press any button
to bring up the onscreen message, and then press the button again.
 Loading...