Digital Ally, Inc. | Installation Instructions
3-1
DVM-800 Installation Guide | 860-00185-00 Rev L
Go Back To Table of Contents
Step 1: Factory Mirror Removal
The current factory rear-view mirror must be removed from the windshield mounting
plate. There are several versions of mirror mounting systems. Below are the most
common methods of rear-view mirror removal. If you are unfamiliar with rearview
mirror removal, seek professional assistance.
Be very careful and do not use excessive force when removing the mirror from
the windshield. The mirror mounting plate may become separated from the
windshield and/or the windshield may break if excessive force is used.
Use one of the following methods that match the mirror mounting conguration of
your vehicle:
Screw Mount Rearview Mirror Removal
1. Using a Philips screwdriver or #20 Torx bit, loosen the screw in the
base of the mirror.
2. After loosening the screw, gently lift upward to slide mirror o of
mirror mount.
Wedge (Screwless) Mount Rearview Mirror Removal
1. Using a small 1/8” (4 mm) at-blade screwdriver, insert the at end into
the opening at the bottom of the mirror mount next to the windshield.
2. Slide the screwdriver into the center of the mirror mount until
resistance is felt.
3. Gently apply a small amount of additional upward force to lift away the
locking spring inside the mount.
4. While still applying upward pressure with the screwdriver, grasp the
mirror bracket and wiggle it from side to side. Lift the mirror up toward
the headliner and o the windshield mount button.
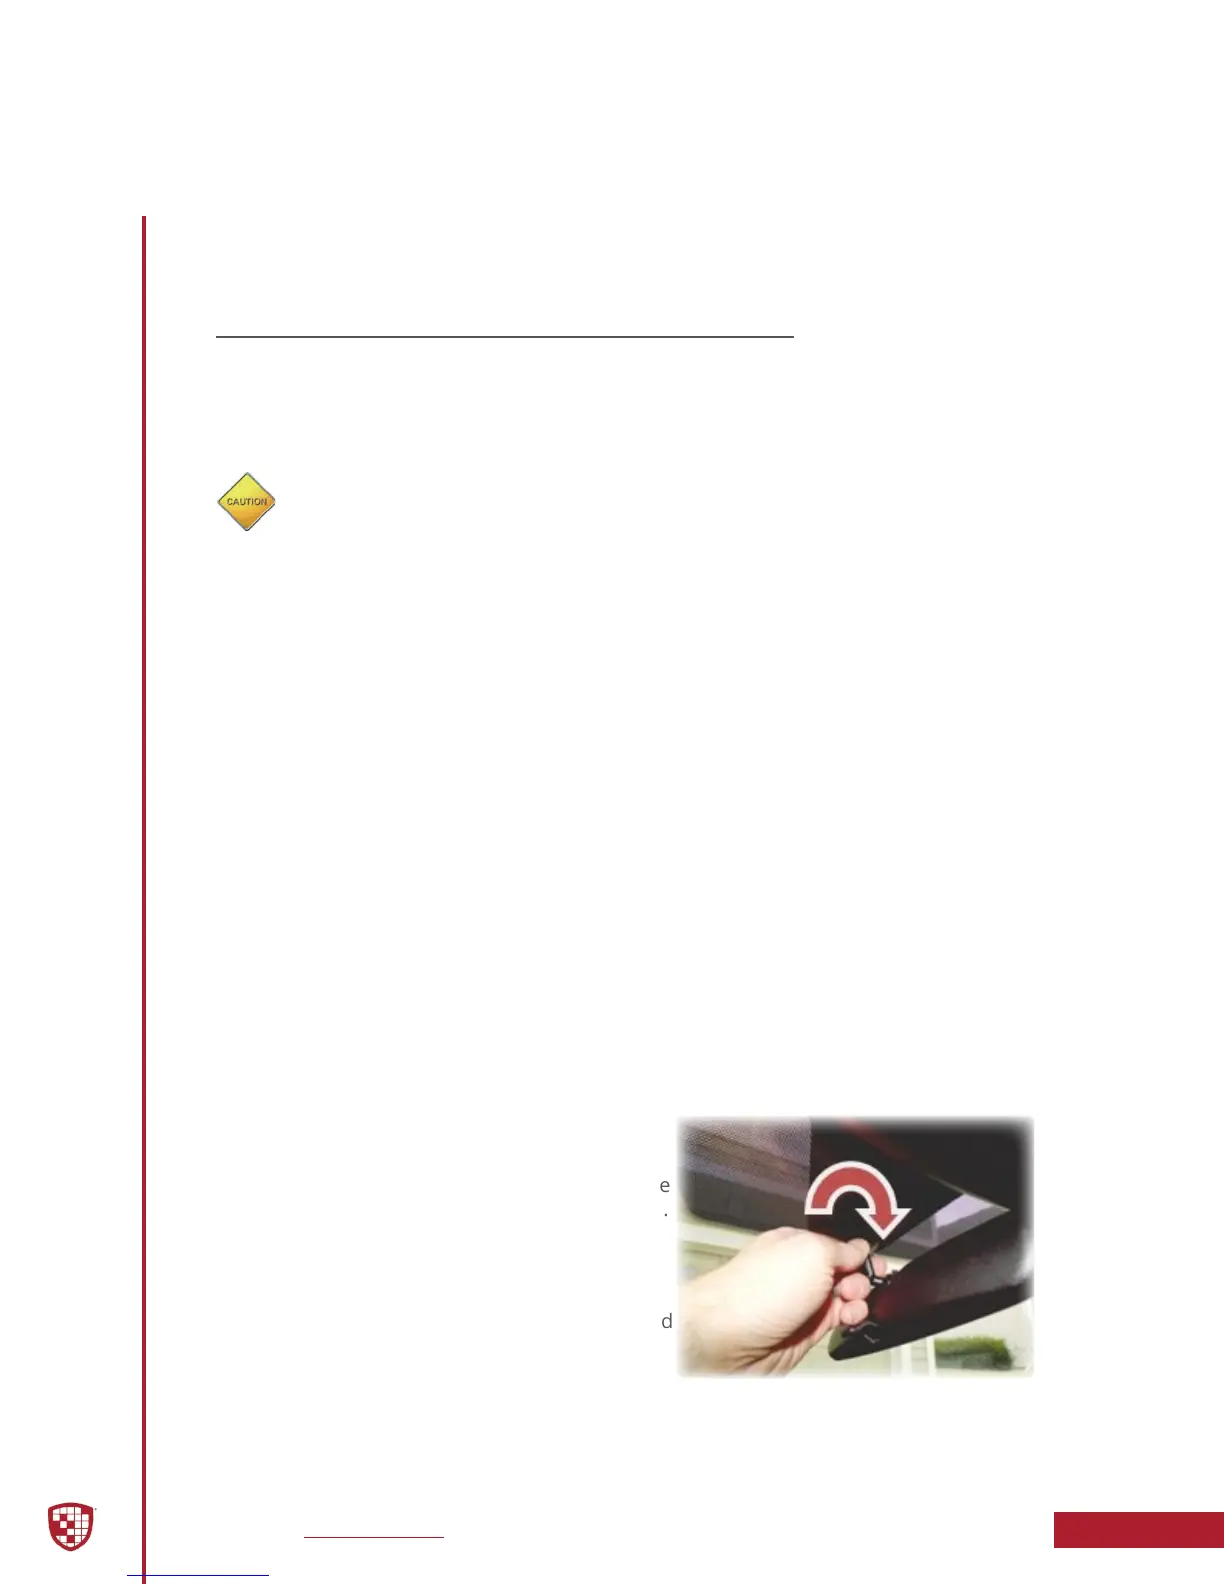
Cam Lock Rearview Mirror Removal
1. With your right hand, grip the mirror
and keep it stabilized.
2. With your left hand, grip the base of the
factory mount where it meets the glass.
3. Apply a small amount of inward
pressure toward the glass and rotate
the base clockwise.
4. The spring loaded factory mount should
release from the windshield puck.
Section 3
Installation Instructions
 Loading...