Digital Ally, Inc. | Installation Instructions
3-2
DVM-800 Installation Guide | 860-00185-00 Rev L
Go Back To Table of Contents
Step 2: DVM Installation
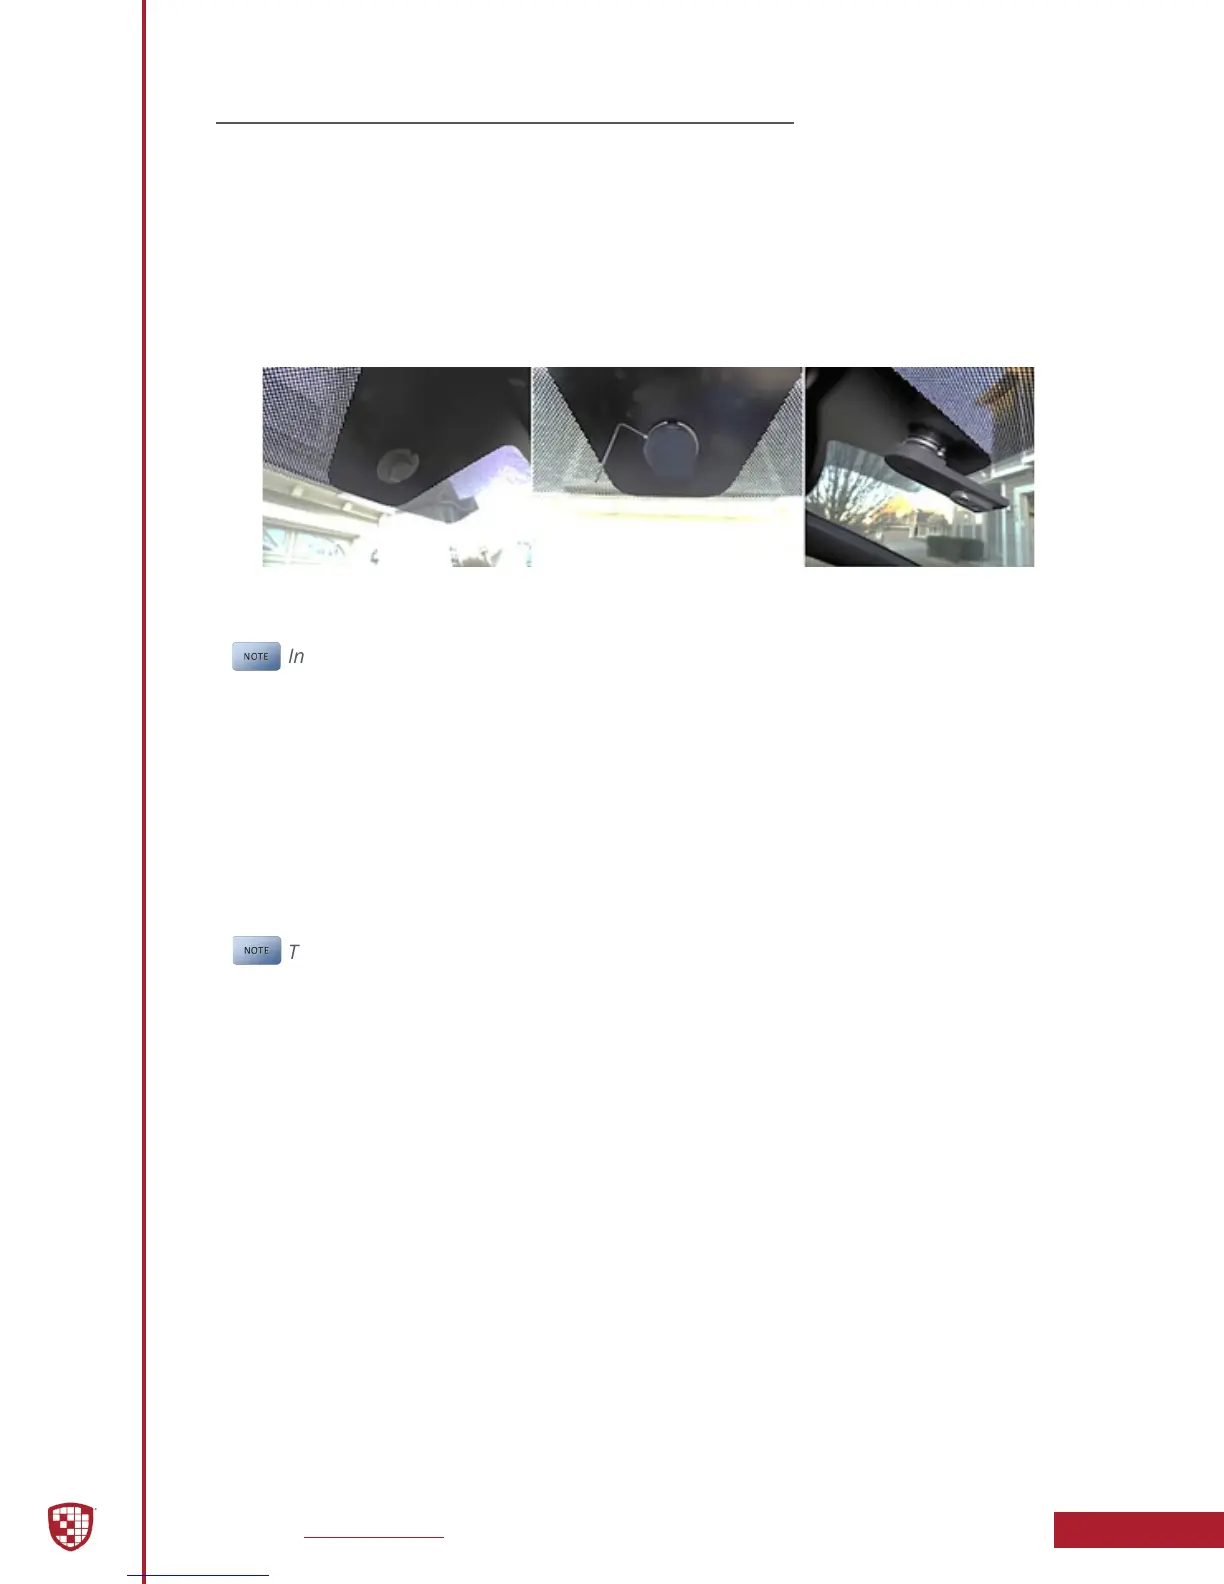
1. Install the provided Mirror Mount to the back of the DVM using 3 of the
supplied M4 x 6mm black screws. Using the longer 8mm black screw,
attach one end the Tether Cable to the Mirror Mount and DVM.
2. Slide the new DVM onto the existing windshield mounting plate and
secure your DVM to the vehicle windshield. For some 2011 and later
Dodge vehicles, attach and orient the optional adapter to factory
windshield as shown. Use Loctite™ #03346 glue to secure the adapter
to the factory windshield mount. If needed, attach optional the drop-
down bracket as shown.
3. Use a #20 Torx screw driver to tighten the mounting screw.
4. Adjust the viewing angle for the rearview mirror.
In some vehicles, the position of the manufacturer’s windshield mounting
plate may not allow for proper rearview DVM adjustment for some
individuals, especially when the vehicle is equipped with an overhead console
and/or interior emergency lighting. In these cases, the mounting plate
included with the DVM package must be glued to the windshield in a location
that will allow proper adjustment. Loctite #03346 glue is recommended.
Please follow the instructions on the Loctite package.
5. Securely attach the other end of the Tether Cable to the metal
structure of the vehicle above the DVM using either the supplied self-
drilling screw, or by drilling a hole and using the supplied bolt, nut, and
washer.
The Tether Cable is a safety feature to minimize the chance of personal injury
should the windshield be broken in an accident or if the DVM otherwise
becomes disengaged from the windshield.
6. Remove the protective lm cover from the:
◦ Internal Road Facing camera
◦ Internal Passenger Facing camera
 Loading...