Digital Ally, Inc. | Testing the Installation
4-1
DVM-800 Installation Guide | 860-00185-00 Rev L
Go Back To Table of Contents
Initial Power Up
1. Insert the SD card into the DVM.
2. Turn the vehicle ignition switch to the ON position. The vehicle does not have to
be running.
3. The DVM will begin the boot-up process; all 3-LEDs will light in sequence until
boot up is complete.
4. Once the boot-up process is complete, the Blue LED will be lit indicating the DVM
is powered on, is ready, and in standby mode.
5. Login to the DVM using the arrow buttons. The default administrator
password is 111111, the default user password is 222222. Press the button to
save your entry.
Record an Event
1. Press button.
2. The Red status indicator will illuminate to indicate the manual event is being
recorded.
3. After 10 seconds, press the button to stop the manual event record.
4. The Red status indicator will extinguish, indicating the DVM has returned to
standby mode.
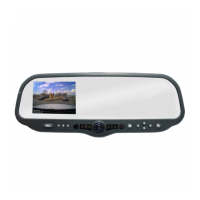
Viewing the Backup Camera
1. Start the vehicle and leave the transmission in Park. Allow the DVM to boot.
2. Apply the brake and put the transmission into Reverse gear.
3. The LCD will turn on and the live video from the backup camera will be displayed.
4. If congured as an Event Trigger, the Red status indicator will illuminate
indicating the back-up event is being recorded.
5. Put the transmission back into Park.
6. The LCD monitor will turn o.
Input Sensor & Wireless Microphone Tests
1. Remove the wireless microphone transmitter from the charging cradle and turn
the power switch ON. The Green LED should be lit solid.
2. Activate a trigger input device (such as emergency lights) to start a recording.
3. The Red status indicator on the DVM will ash to indicate the event is being
recorded, and the Green LED on the Wireless Microphone should start blinking.
4. Press the button on the DVM to stop the recording.
5. The Red status indicator will extinguish, indicating the DVM has returned to
standby mode.
6. Press the REC button on the wireless microphone. The system should again start
to record as previously in step 3.
7. Press the button on the DVM to stop the recording. The Ignition Shutdown
Timer will start when the vehicle ignition is turned o.
Section 4
Testing the Installation
 Loading...