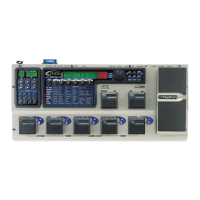
Card>>PC - Preparing a Card for the Computer
The GNX3’s recorder uses a proprietary format when recording audio to an external memory card. In
order to access tracks created using the GNX3’s recorder on a computer, it is necessary to save these
files in a format that can be read by an external card reader connected to a PC. Here are the steps for
preparing the card for this purpose:
1. Once recording is complete, press the SETUP button until the GNX3’s main display reads
CARD>>PC. This is the card preparation menu. The RECORD button will begin flashing at this time.
2. To begin the preparation procedure, press the RECORD button. The GNX3’s main display reads
BUSY as the card is being checked. The TIME display on the recorder panel will begin counting
backwards from 100 indicating the procedure’s progress. The GNX3’s buttons and footswitches are
disabled during this procedure and the outputs will be muted.
3. When the procedure is complete, the TIME display reads 0. The GNX3’s main display then reads
PC
READY
followed by REMOVE.
The card should be removed and inserted into a card reader connected to the PC and the GNX3’s
recorder data is accessible.
WARNING: If any recorded material or Setup utilities are added, deleted, or modified on
the external memory card, the
CARD>>PC procedure must be performed before removing
the card from the GNX3 and inserting it into an external card reader. If this procedure is
not performed, recorded data may be lost.
Erase
To quickly erase all recorded data from either internal or external memory, the GNX3’s setup menu
provides an erase function. If a memory card is not present in the memory card slot, the erase function
erases the GNX3’s internal recording memory. If a card is present, the external memory card is only
erased. To erase either internal or external memory, follow these steps:
1. Press the SETUP button until the display reads
erase?.The recorder’s RECORD button begins
flashing prompting the user to press it to begin erasing.
2. Press the RECORD button. The display reads
SURE?,prompting the user that the next press will
begin the memory erase procedure. To abort formatting, press EXIT.
3. Pressing the RECORD button a second time to begin the formatting procedure. The GNX3’s main
display reads
erasing during this time. The GNX3’s buttons and footswitches are disabled during
this procedure.
4.When the recording memory is completely erased, the display shows
reading,indicating the
GNX3 is reading the erased memory. The GNX3 returns to the preset screen where you can
begin recording.
Using External SmartMedia™ Memory Cards
The GNX3 recorder’s memory can be increased by using an optional external SmartMedia™ memory card.
On the back panel is a card slot for adding memory. The GNX3 supports memory cards from 16Meg to
128Meg in size. The table below shows the amount of record time each of the currently available cards will
provide:
Card Size CD Normal Economy
16Meg 3 track minutes 6 track min 12 track min
32Meg 6 track minutes 12 track min 24 track min
64Meg 12 track minutes 24 track min 48 track min
128Meg 24 track minutes 48 track min 96 track min
45
Recorder

 Loading...