28
Removing and replacing components
Soft power button
The Soft power button assembly includes the Soft power button, and the SW and SW
LED cables. For more information about the Soft power button, see page 6.
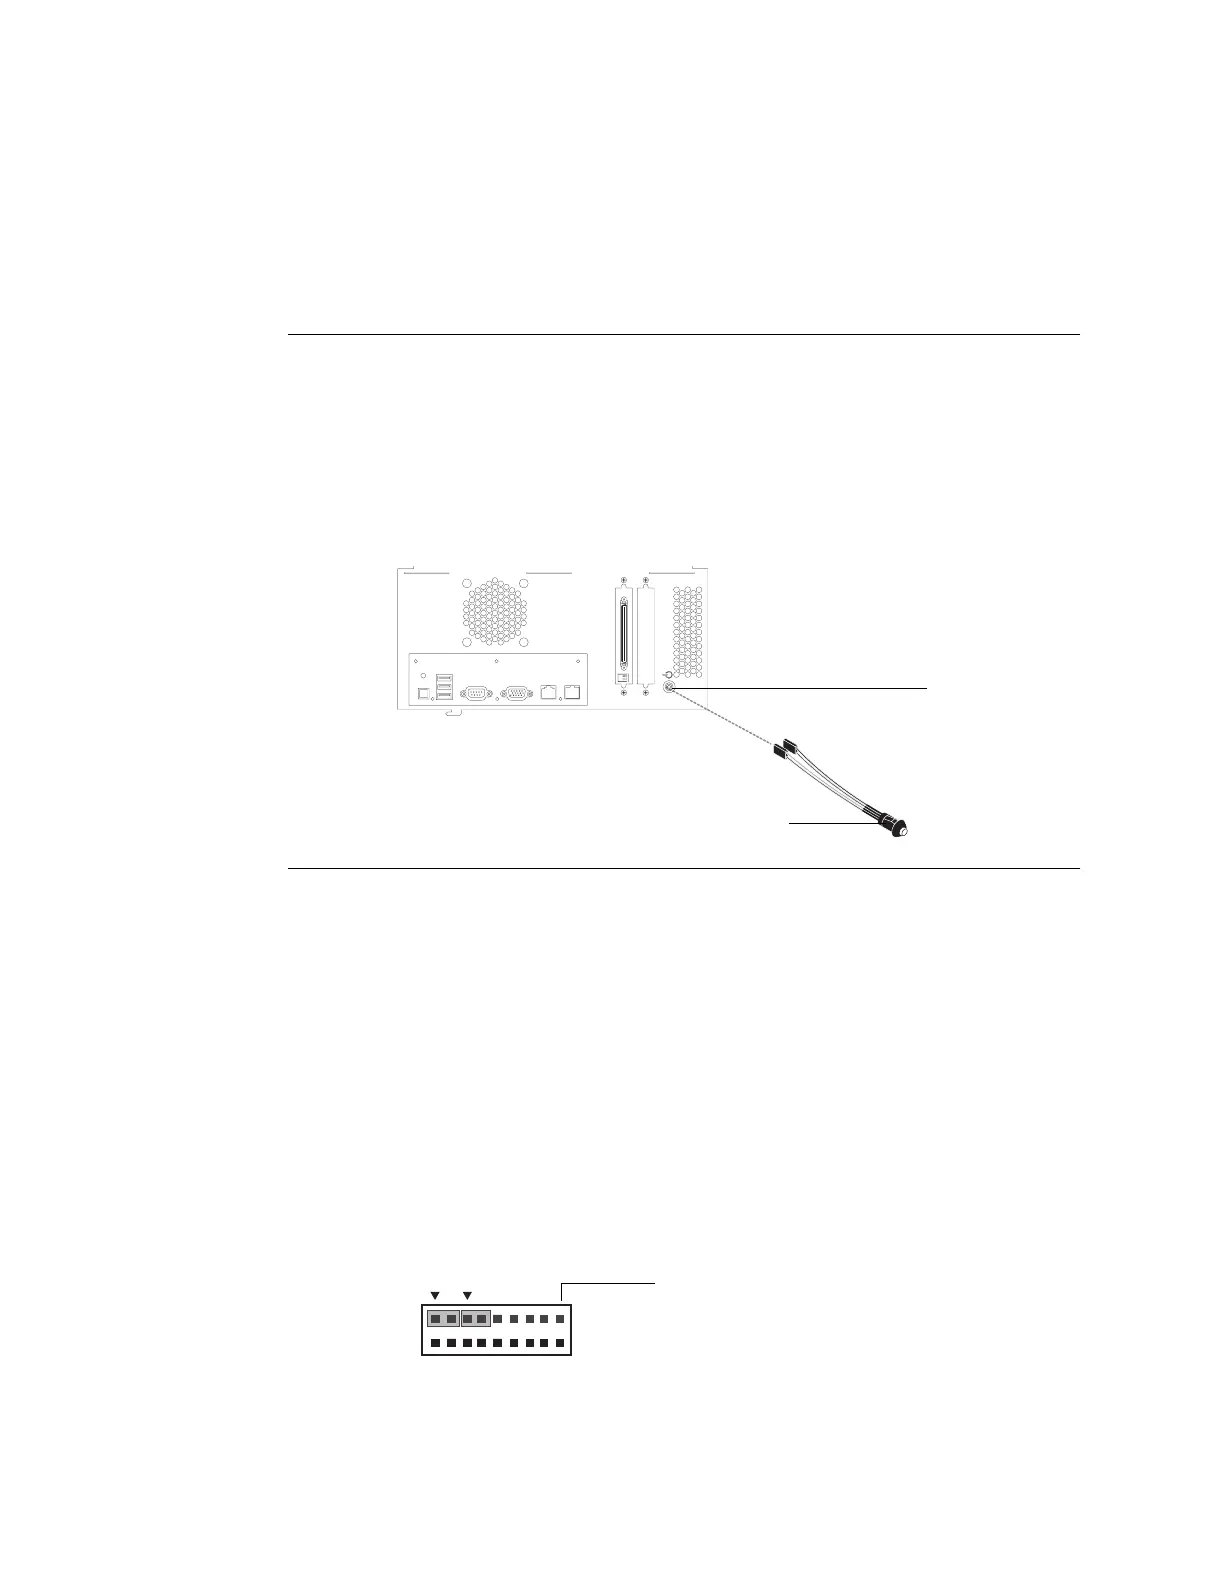
TO REMOVE THE SOFT POWER BUTTON ASSEMBLY
1. Remove the Fiery X3eTY from the print engine, as described on page 9.
2. Remove the Soft power button cables (SW and SW LED) from J9 on the motherboard.
3. Use needlenose pliers to pinch the beveled sides of the button casing, and push the
button assembly out through the cutout in the chassis.
Carefully pull the Soft power cables, one pair at a time, through the cutout.
TO REPLACE THE SOFT POWER BUTTON ASSEMBLY
1. Carefully insert the Soft power button cables through the cutout in the chassis.
Insert the cables, one pair at a time, through the cutout.
2. Push the button assembly firmly into the cutout until the assembly is locked in place.
Make sure that the beveled sides of the button casing are completely secured to the inside
of the chassis.
3. Connect the Soft power button cables to the correct pins on J9:
• SW LED cable—pins 2 and 4
• SW cable—pins 6 and 8
Align the triangle on each cable connector with the correct pin, as shown in the
following figure.
4. Reassemble the Fiery X3eTY and verify its functionality (see page 34).
Cutout
Pinch beveled sides to unlock button from chassis.
2
1
18
17
SWSW LED
J9 on the motherboard

 Loading...