37
1
2
3
4
How to active
6.5 Main parameters setting
More detailed information can be found in “Use instructions” (User Manual).
To set the main parameters (frequency, power, and audio level) put the key switch in
LOCAL mode (blue LED lit). The window for setting appears automatically.
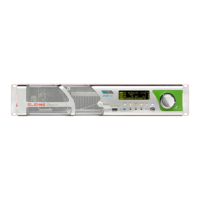
The parameters shown are the following:
1 Leds (left side)
• ITLK (Interlock)_ when lit indicates that the interlock contacts are open;
• -3dB _ when lit indicates a power loss below 3 dB (<50% of target);
• CLIP _ when lit indicates the clipper action caused by an audio overdriving;
• NOAU (No Audio) _ when lit indicates no signal beyond the preset limits.
2 Horizontal menu tabs (bottom)
• MENU _ Selecting this item, you can access the list of all available windows.;
• RF ON/OFF _ to turn on, or put on stand-by the system;
• REST _ to reset alarms;
• 0μS/25μS/50μS/75μS _ to set the preemphasis level;
• MUTE/MPX/STEREO/MONO _ to set the audio signal type;
• PF1/PF2/PF3/PF4/PF5/PF6_ to set the profiles parameters.
3 Adjustable parameters (center)
• FRQ _ target frequency;
• LEV _ target audio level;
• TRG _ target output power (RF);
• FWD _ forward power, which must be equal to that set in the target (not editable);
• REF _ reflected power, which must be zero or low value (not editable).
4 Vu-Meter (right side)
They measure the audio signal, which should be sufficient to achieve the level of 0dB.
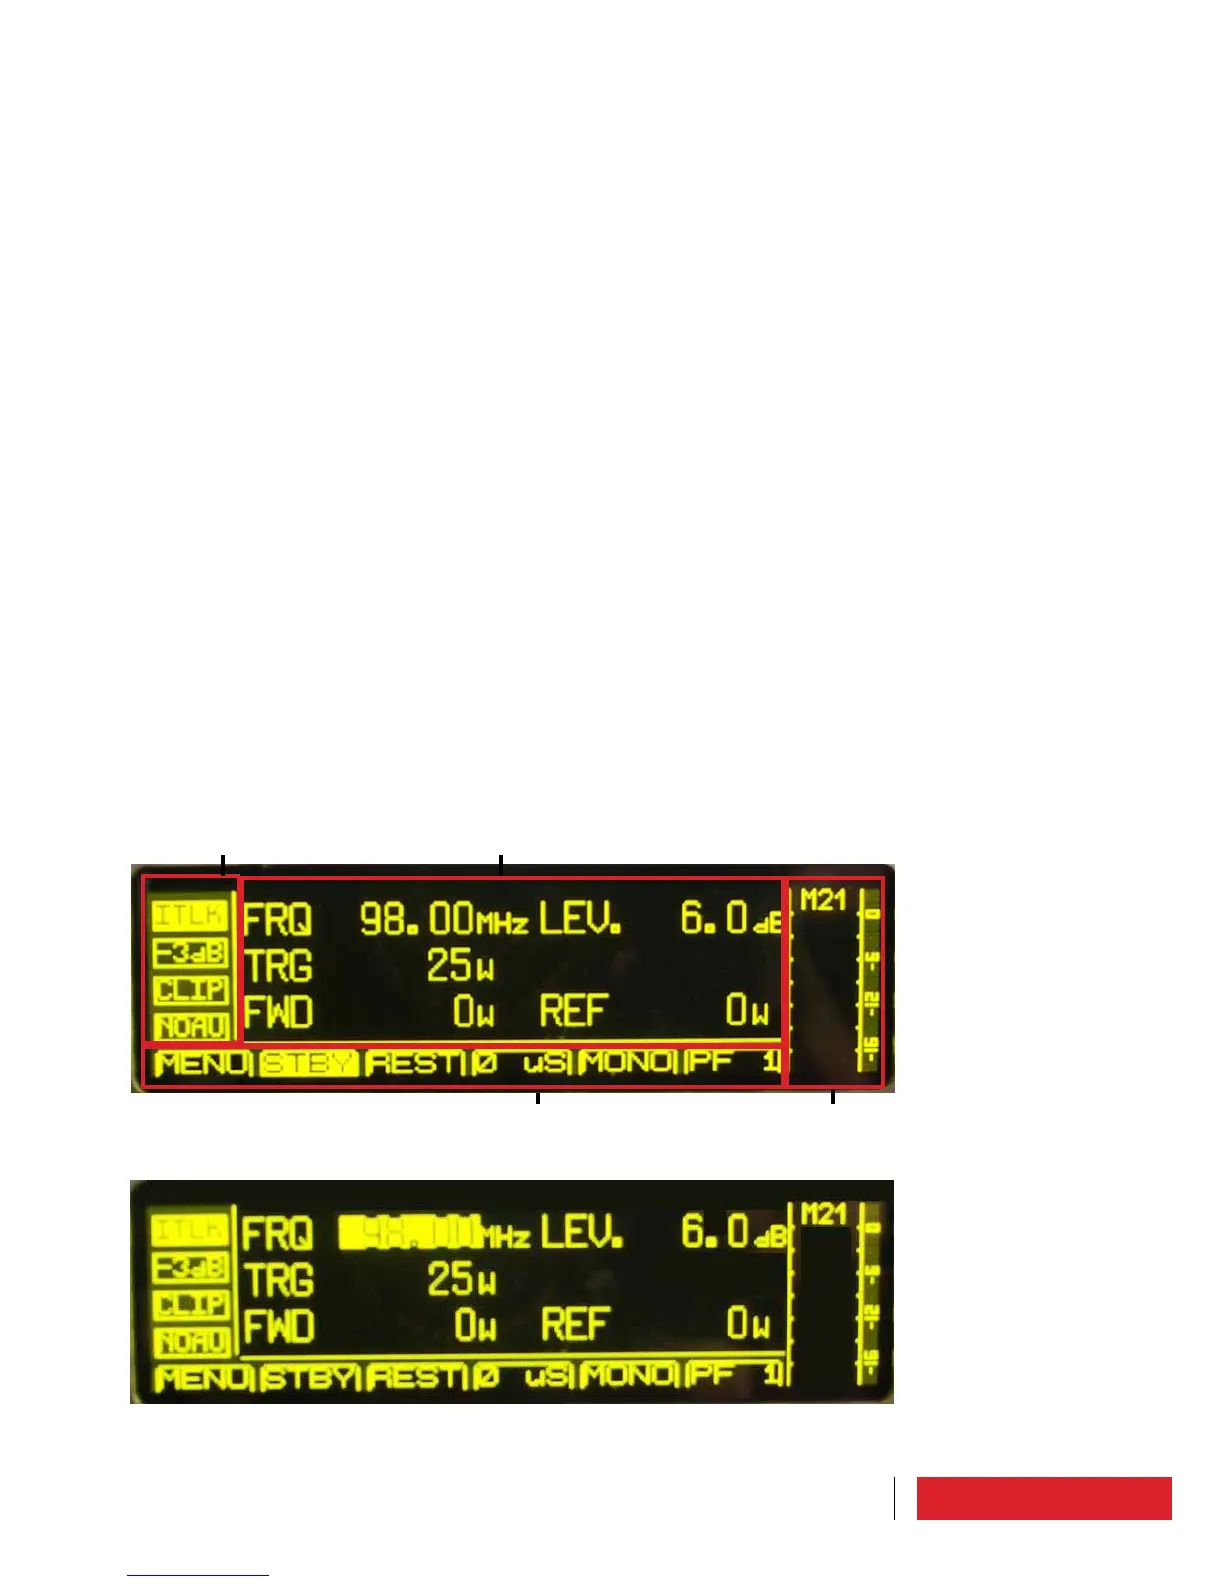
6.5.1 Frequency setting
To set the frequency rotate the encoder up to highlight the field “frequency”.
Press once to enter in the mask for frequency adjustment.
The field “frequency” is now highlighted and editable: rotate clockwise/counterclockwi-
se the encoder, respectively, to increase decrease the frequency value.
 Loading...