Quick Start
Commissioning
32 Digistart IS User Guide
www.controltechniques.com Issue: 4
5. Keypad and Status
5.1 Keypad
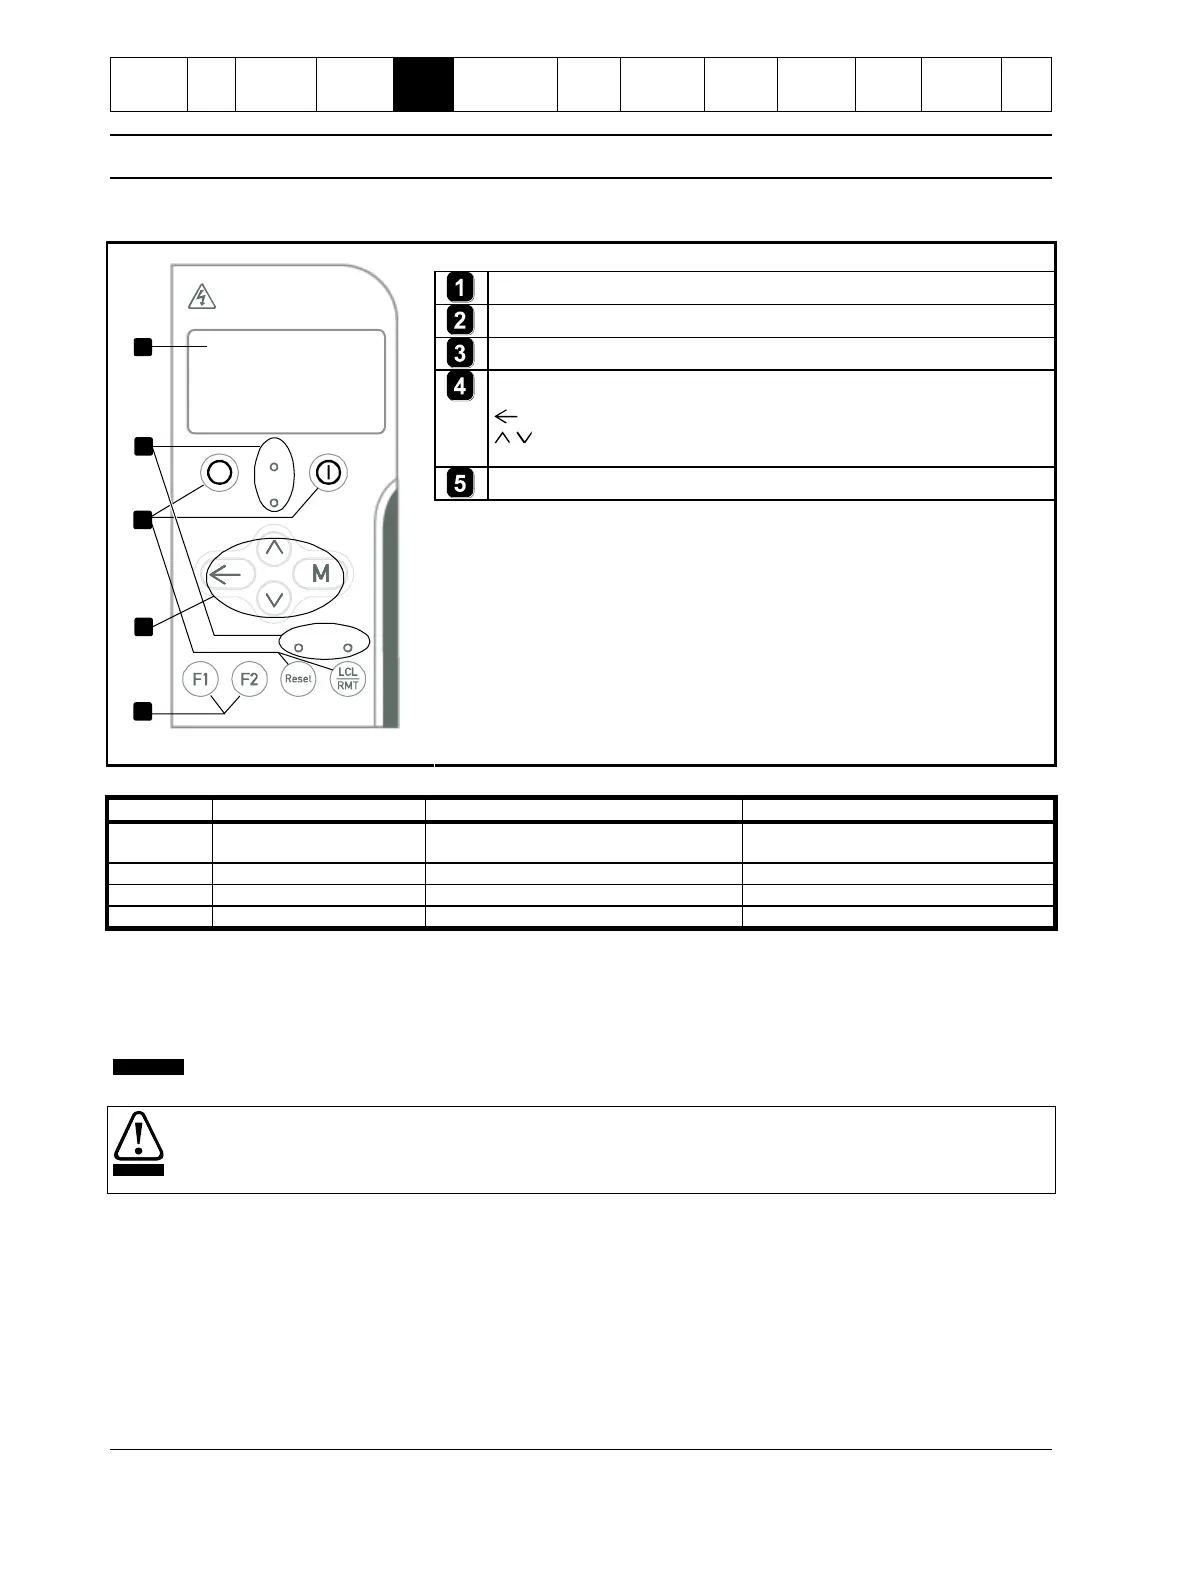
Figure 5-1 Keypad and display
08349.A
Stop
Start
Run
Ready
Trip Local
LCL
RMT
Stop
Start
Run
Ready
Trip Local
2 min
1
3
5
4
2
Four-line display for status and programming details.
Soft starter local control buttons.
Menu navigation buttons.
M: Enter a menu or parameter, or save a parameter change.
: Exit the menu or parameter, or cancel a parameter change.
: Scroll to the next or previous status screen, menu or parameter, or
change the setting of the current parameter.
Shortcut buttons for quick access to common tasks.
Table 5-1 Feedback LEDs
Restart delay or motor temperature check
or DI4 not closed (default setting)
Not running, starting or stopping
5.2 Removing and replacing the keypad
The keypad can be removed from the soft starter and mounted remotely on a panel using the remote mounting kit.
The keypad stores a backup copy of the parameters in the soft starter, so one keypad can be used to program multiple Digistart IS
starters.
The keypad can be removed or replaced while the starter is running. It is not necessary to remove mains or control
voltage.
It is the installer's responsibility to ensure that any enclosure which allows access to models IS2x0145B to IS4x1000B
and IS3x0255N to IS561600N while the product is energized, provides protection against contact and ingress
requirements of IP20.
5.2.1 Removing the keypad
The keypad is attached to the body of the soft starter by a DB9 serial connector and two screws. The screws are concealed behind
a snap-on faceplate.
To remove the keypad:
1. Models IS1x0023B to IS4x1000B: open the Digistart IS's door.
Models IS3x0255N to IS561600N: remove the Digistart IS's front cover.
2. Insert a small screwdriver under the faceplate, at the base of the keypad, and use the screwdriver to lever the faceplate off
the keypad.
3. Lift the faceplate off completely.
4. Remove the two screws holding the keypad in place.
5. Lift the keypad gently off the soft starter. Pull the keypad forwards, to avoid damaging the DB9 connector.
 Loading...