Install a Replacement Microinverter
A. When the replacement microinverter is available, verify that the AC branch circuit breaker
is de-energized.
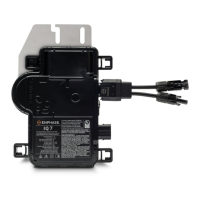
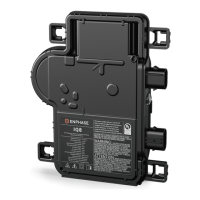
B. Mount the microinverter bracket side up and under the PV module, away from rain and
sun. Allow a minimum of 1.9cm between the roof and the microinverter. Also allow 1.3cm
between the back of the PV module and the top of the microinverter
WARNING: Risk of equipment damage. Mount the microinverter under the PV
module.
• Install the microinverter under the PV module to avoid direct exposure to rain,
UV, and other harmful weather events.
• Always install the microinverter bracket side up.
• Do not mount the microinverter upside down.
• Do not expose the AC or DC connectors (on the Enphase Q Cable connection,
PV module, or the microinverter) to rain or condensation before the connectors
are mated.
C. Torque the mounting fasteners to the values shown. Do not over torque.
• 6 mm mounting hardware: 5 N m
• 8 mm mounting hardware: 9 N m
• When using earthing mounting hardware, use the manufacturer’s recommended
torque value
D. If you are using bonding hardware, the old bonding hardware should be discarded, and
new bonding hardware must be used when installing the replacement microinverter.
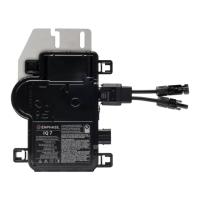
E. Connect the microinverter to the Q Cable connector. Listen for a click as connectors
engage.
F. Connect the DC leads of each PV module to the DC input connector of the microinverter.
G. Re-mount the PV module above the microinverter.
H. Energize the AC branch circuit breaker and verify operation of the replacement
microinverter by checking the Status LED on the connector side of the microinverter.
I. Use the Installer Toolkit mobile app to delete the old microinverter serial number from the
Enphase Envoy-S database. In Installer Toolkit, once connected to the Envoy:
a. Tap Micros > Manage.
b. Tap the checkbox to the right of the microinverter serial number replaced.
c. Tap to delete the microinverter from the Envoy-S database.
 Loading...