20
HIGH WALL CONFIGURATION
HPAC 2.0 can be installed close to the floor or near the ceiling (high wall). The unit is factory configured for floor and high wall
installation, where the air flow is directed upwards. This works well for heating and cooling in floor installations and cooling
only in high wall installations (coanda eect).
If installing as a high wall and using for heating as well as cooling, the direction of the air flow must be modified by adjusting
the position of the air louver, so that air blows downwards instead of upwards.
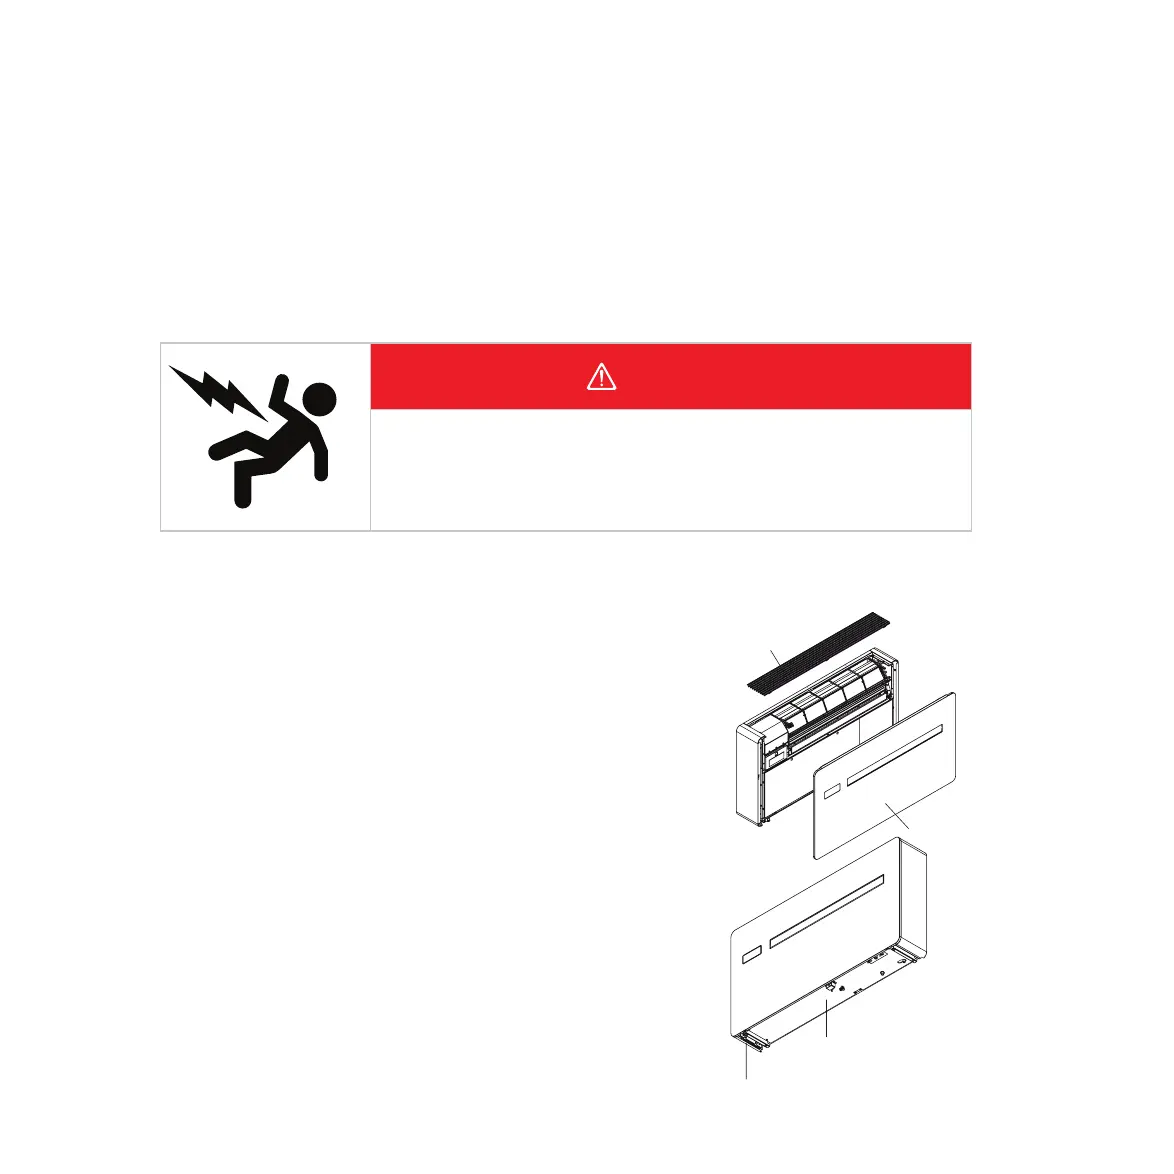
STEP 1 Disconnect the power
STEP 2 Remove the upper grill
STEP 3 Remove the front cover panel by unscrewing the two
screws in the upper part
STEP 4 Position the bottom cover and install it with the screws
supplied. When mounting the unit on the upper part of
the wall, order the optional bottom cover decorative kit
code GB0737.
WARNING
ELECTRICAL SHOCK HAZARD
Turn o all electrical power before opening the unit. Failure to
disconnect may result in property damage, injury or death.
2
5
3
4
Modification from lower wall to the upper wall installation if using for heating and cooling.
 Loading...