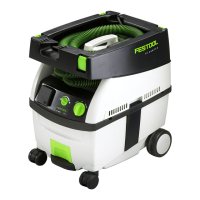
Changing Forward/Rearward Direction
Sometimes you may prefer to have the boom arm facing
forward, such as when the vacuum is parked under a work
table. Other times you may wish to have it facing rearward
for maximum reach. Changing directions requires reversing
the outriggers and rotating the boom pivot limit stop.
1. Remove the cross braces from one of the outriggers.
2. Rotate the outriggers and cross braces to the appropri-
ate direction, as shown below, and reconnect the cross
braces.
Forward Facing Boom Arm
Rearward Facing Boom Arm
3. Remove the thumbscrew, washer, and thumb nut from
the boom pivot.
4. Rotate the boom pivot 180°, and reinstall the thumb-
screw, washer, and thumb nut.
Thumbscrew,
Washer, &
Thumb Nut
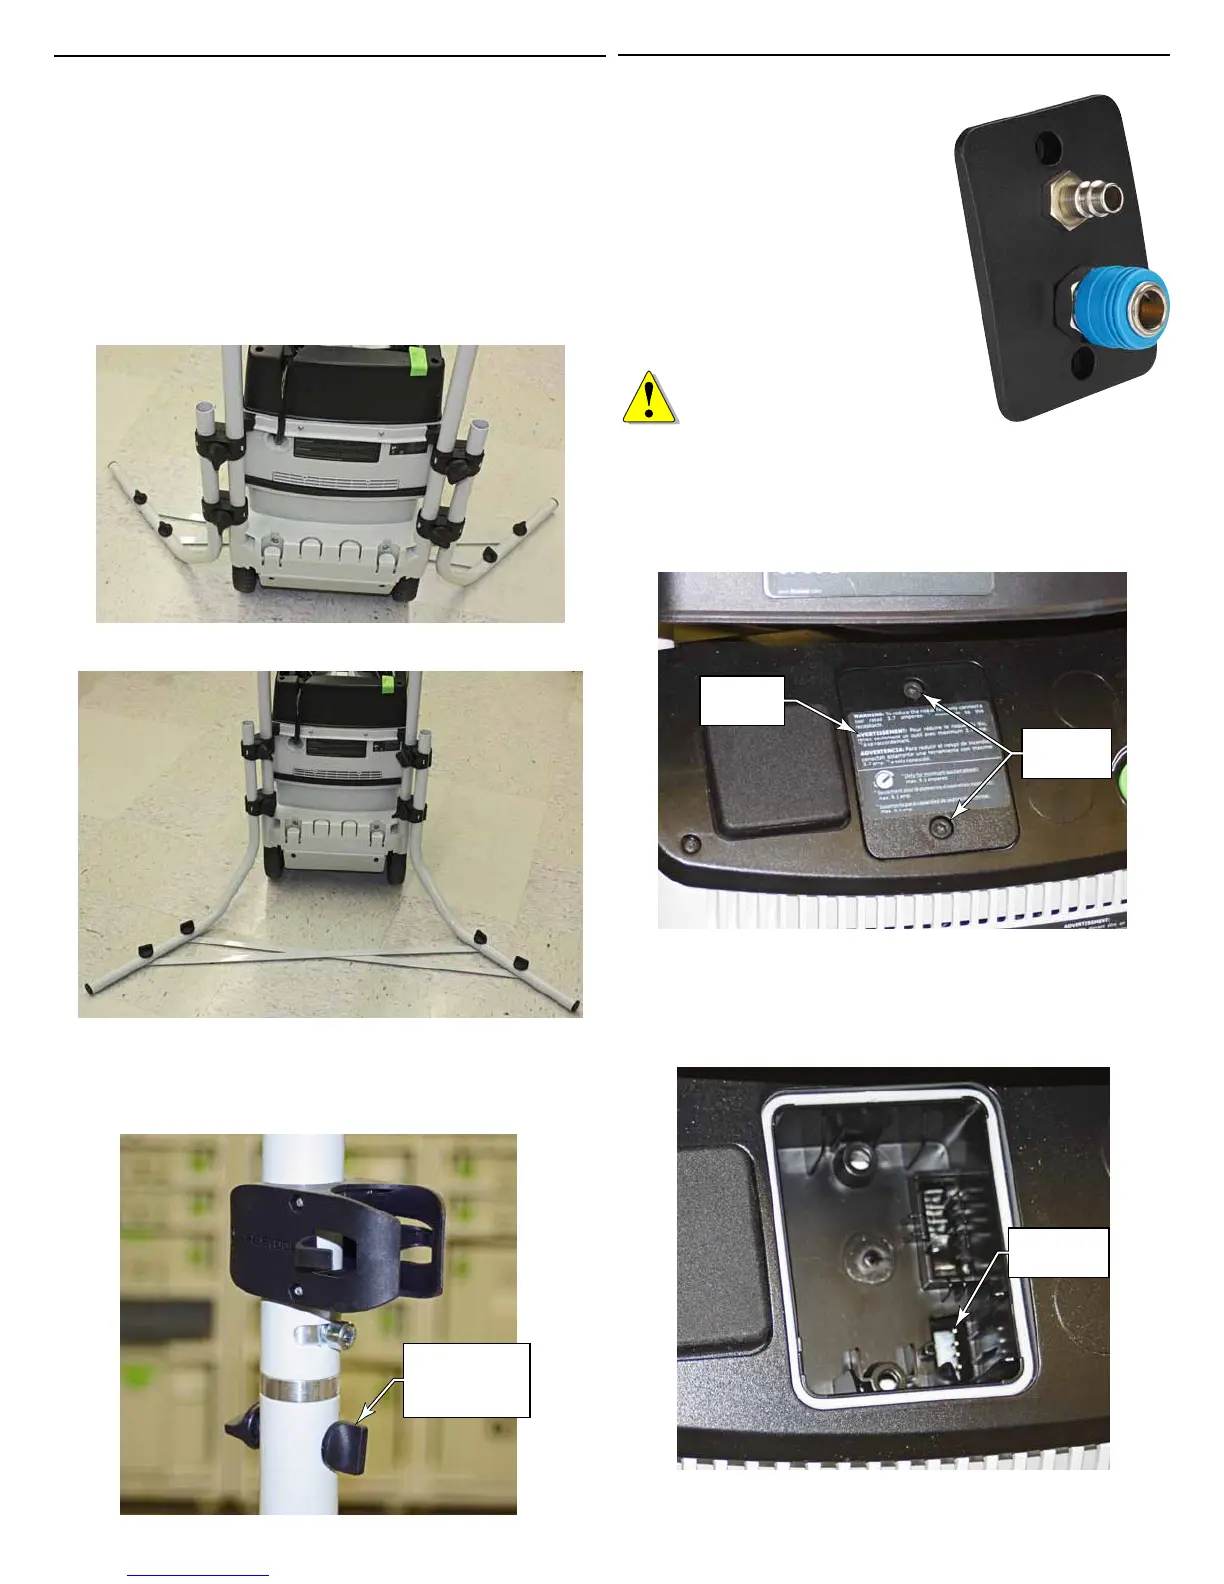
Pneumatic Control Module
When used with pneumatic tools,
such as the LEX sanders, the vac-
uum can be controlled to start and
stop when the tool starts and stops.
The optional compressed air module
mounts in the auxiliary panel of the
the module to trigger the operation
of the vacuum. The inlet connector
on the module connects to your
existing compressor, and the outlet
connects to the tool.
CAUTION: Risk of electric
shock. Unplug the vacuum
from electrical power before
completing this procedure.
1. Unplug the vacuum for safety.
2. Using an M5 hex key, remove the two mounting screws
that secure the module blanking cover to the vacuum’s
control panel, and remove the cover.
Mounting
Screws
Blanking
Cover
3.
panel, making sure the moulded connector on the back of
the module aligns with the electrical connector inside the
panel.
4. Secure the module using the original mounting screws.
Electrical
Connector
 Loading...