14
!0 ATTACH ANTI-TIP BRACKET
IMPORTANT!
Ensure the refrigerator door is closed when rolling into cabinetry.
DO NOT attempt to open the door until refrigerator is fully installed.
The anti-tip bracket and fittings supplied must be fitted to the wall of finished enclosure
to withstand 220 lbs (100kg) load.
Ensure that anti-tip bracket is installed correctly to prevent the refrigerator tipping
forward when door is open.
WARNING!
Read the following reminders before fastening with masonry plugs and/or screws:
Ensure the screws avoid electrical, gas and water conduits.
Ensure the surface of the bracket is fastened to withstands a 220.5 pound (100kg) load.
Ensure light-weight masonry material such as cinder block and new concrete
(nocuringtime) are not used in installation.
Do not use metallic materials that may corrode, stain and/or damage the enclosure.
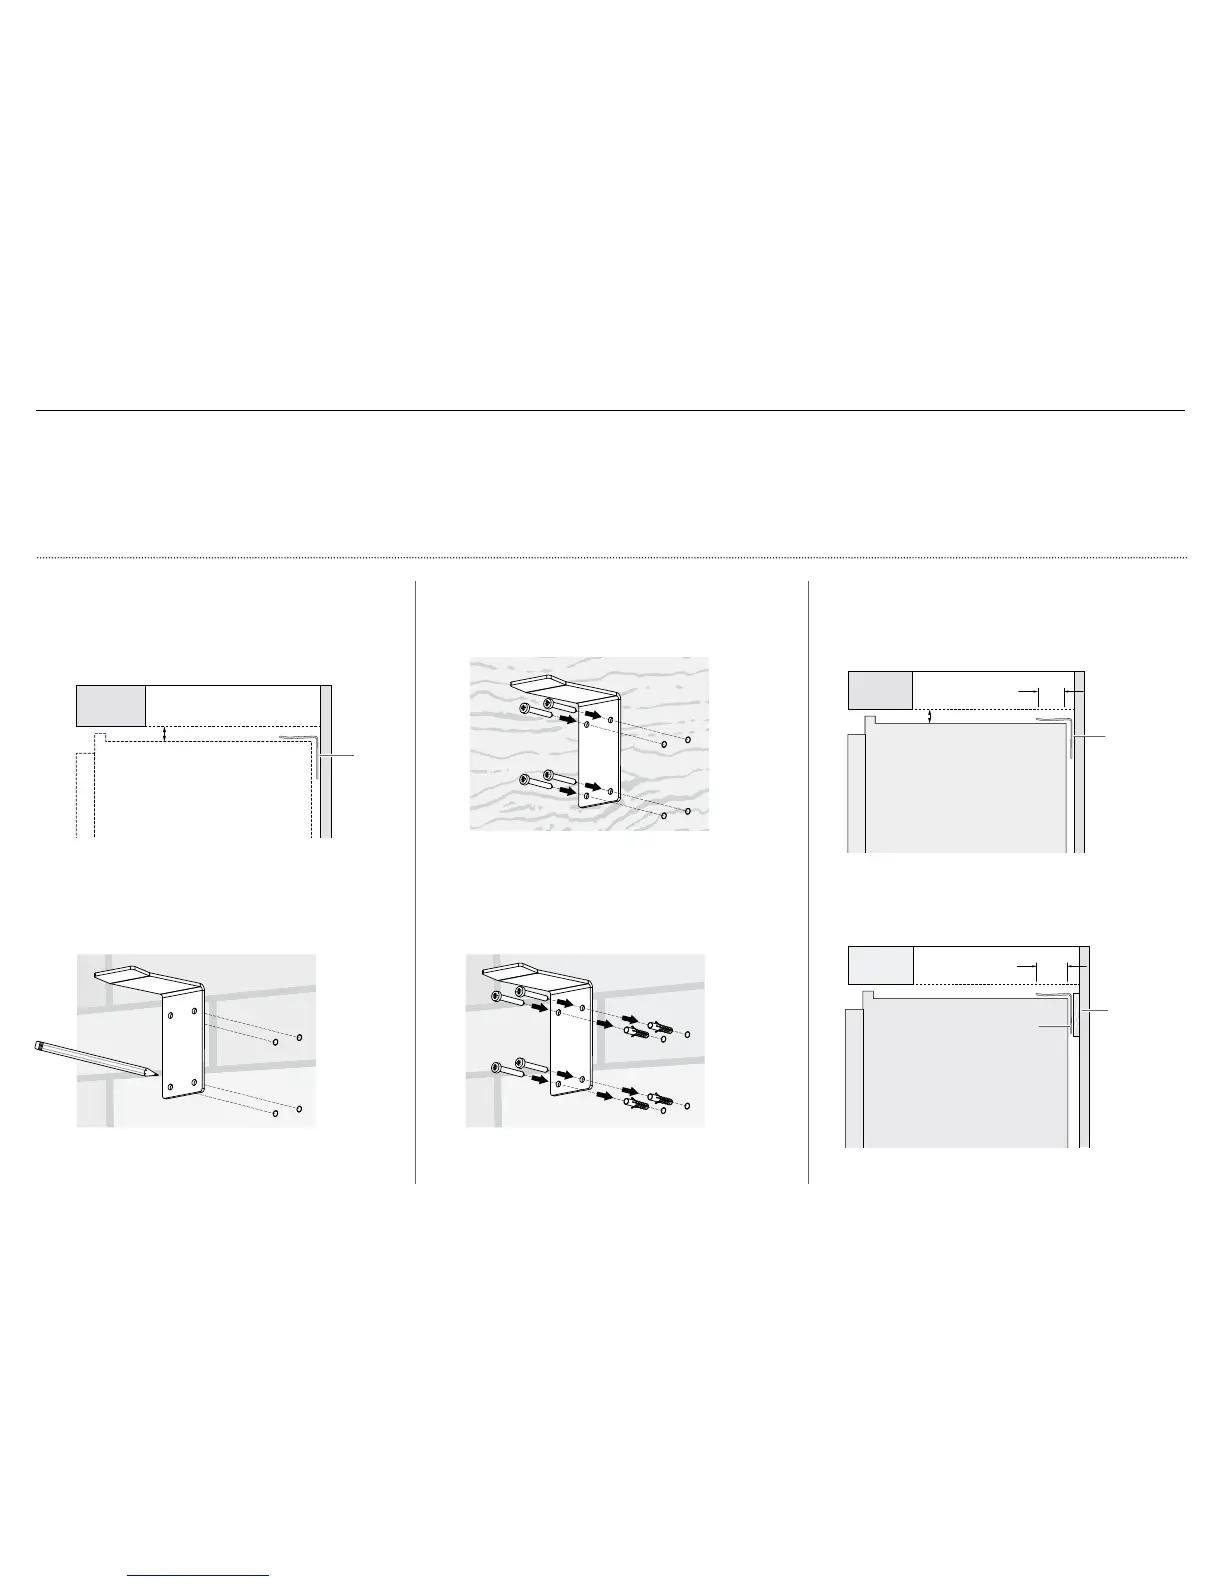
1
Project the end of the above finished enclosure to the
center of the back wall and measure 11/4” (31mm)
vertically from the projection line (A).
– This will locate the contact surface between
thebracket and the top surface at the back end
oftherefrigerator.
IMPORTANT!
When positioning the refrigerator in the cabinetry,
ensure that the bracket overlaps the refrigerator
byaminimum 2 3/8" (60mm) for a secure hold.
If the minimum 2 3/8" (60mm) overlap cannot be
achieved, installa solid spacer to the wall stud behind
the bracket.
2
Mark the screw locations of the anti-tip bracket on the
wall based on the most central wall stud (B).
– If there are no wall studs, the bracket can be
installed to solid brick walls with masonry plugs.
(However,notrecommended to be used on
perforatedbrick or hollow concrete bricks.)
Spacer
Bracket
Bracket
Bracket
23/8” min.
(60mm) overlap
23/8” min.
(60mm) overlap
3
Drill Ø 1/4” x 13/8” (Ø 6mmx35mm) deep screw holes
tothe marked locations.
4
For wooden/plaster board wall installation:
Fix the bracket to the wall #10x40 pan head
Phillipsscrews (4x), and screw tightly (C).
5
For solid wall installation:
Hammer masonry plugs (4x) into the wall until flush.
Fix the bracket to the wall with #10x40 pan head
Phillips screws (4x), and screw tightly (D).
A
B
23/8” min.
(60mm) overlap
C
D
 Loading...