PC Specialist's Handbook ErgoPro m664-series
Edition 1 - Release 1 - March 1998 Page 1-9
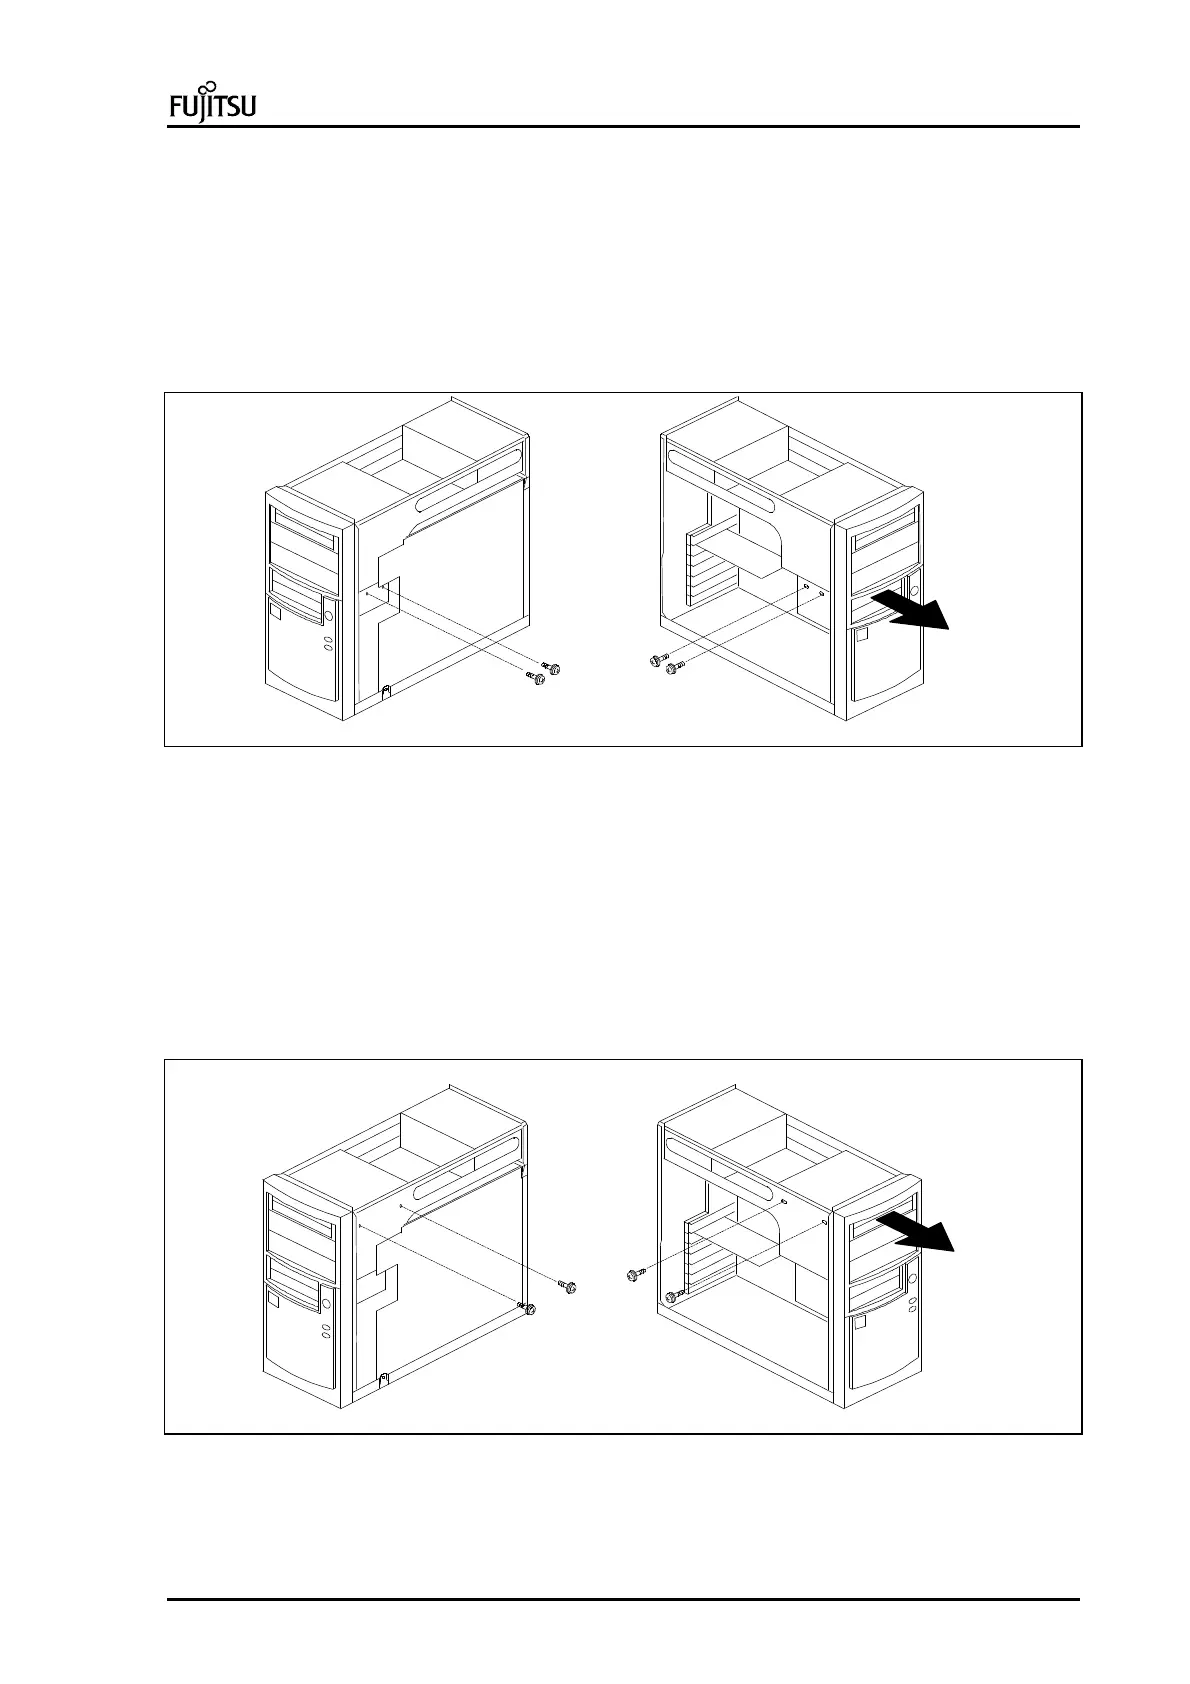
Removing and installing the Floppy Disk drive
If you have installed a CD-ROM, or replaced an existing floppy drive, check the parameters in the SETUP.
To remove the Flopppy Disk drive, do as follows:
1. Remove the system cover (see page 1-6)
2. Disconnect the power and data cables from the devices attached to the mass memory carriage.
Disconnect data cables also from the System Board.
3. Open screws (A) that hold Floppy Disk drive both side of the mass memory carriage.
4. Push Floppy drive towards to the Front Panel of the system unit (B) and pull it off.
A
A
A
A
B
Picture 11: Removing the Floppy Disk drive
Removing and installing the CD-ROM drive
If you have installed a CD-ROM, a Hard Disk or replaced an existing floppy drive, check the parameters in the
SETUP.
To remove the CD-ROM drive, do as follows:
1. Remove the system cover (see page 1-6)
2. Disconnect the power and data cables from the devices attached to the CD-ROM drive. Disconnect
data cables also from the System Board.
3. Open screws (A) that hold CD-ROM drive both side of the 5,25” device slot.
4. Push CD-ROM drive towards to the Front Panel of the system unit (B) and pull it off.
A
A
A
A
B
Picture 12: Removing the CD-ROM drive
 Loading...