Chapter 4 Various Ways to Scan
46
Appendix
Glossary
Contents
TOP
How to Load
Documents
How to Use the
Operator Panel
Various Ways to
Scan
Daily Care
Troubleshooting
Operational
Settings
Replacing the
Consumables
Scanner
Overview
Index
Introduction
Using a Button on the Scanner to Start Scanning
The scan/stop button on the scanner can be configured to
perform scanning.
To configure this setting, you first need to assign an
application to be started up with the scan/stop button.
Computer setup
1 Check that the scanner is connected to the computer,
then turn on the scanner.
For details about how to connect the scanner to the computer, refer to
the Quick Installation Sheet.
For details about how to turn on the scanner, refer to "1.3 Turning the
Power ON/OFF" (page 16).
2 Display the [Control Panel] window.
Windows Vista/Windows Server 2008/Windows 7
Click the [Start] menu [Control Panel].
Windows Server 2012/Windows 8
Right-click the Start screen, and select [All apps] on the app bar
[Control Panel] under [Windows System].
Windows Server 2012 R2/Windows 8.1
Select [↓] on the lower left side of the Start screen [Control
Panel] under [Windows System].
To display [↓], move the mouse cursor.
3 Click [View devices and printers].
The [Devices and Printers] window appears.
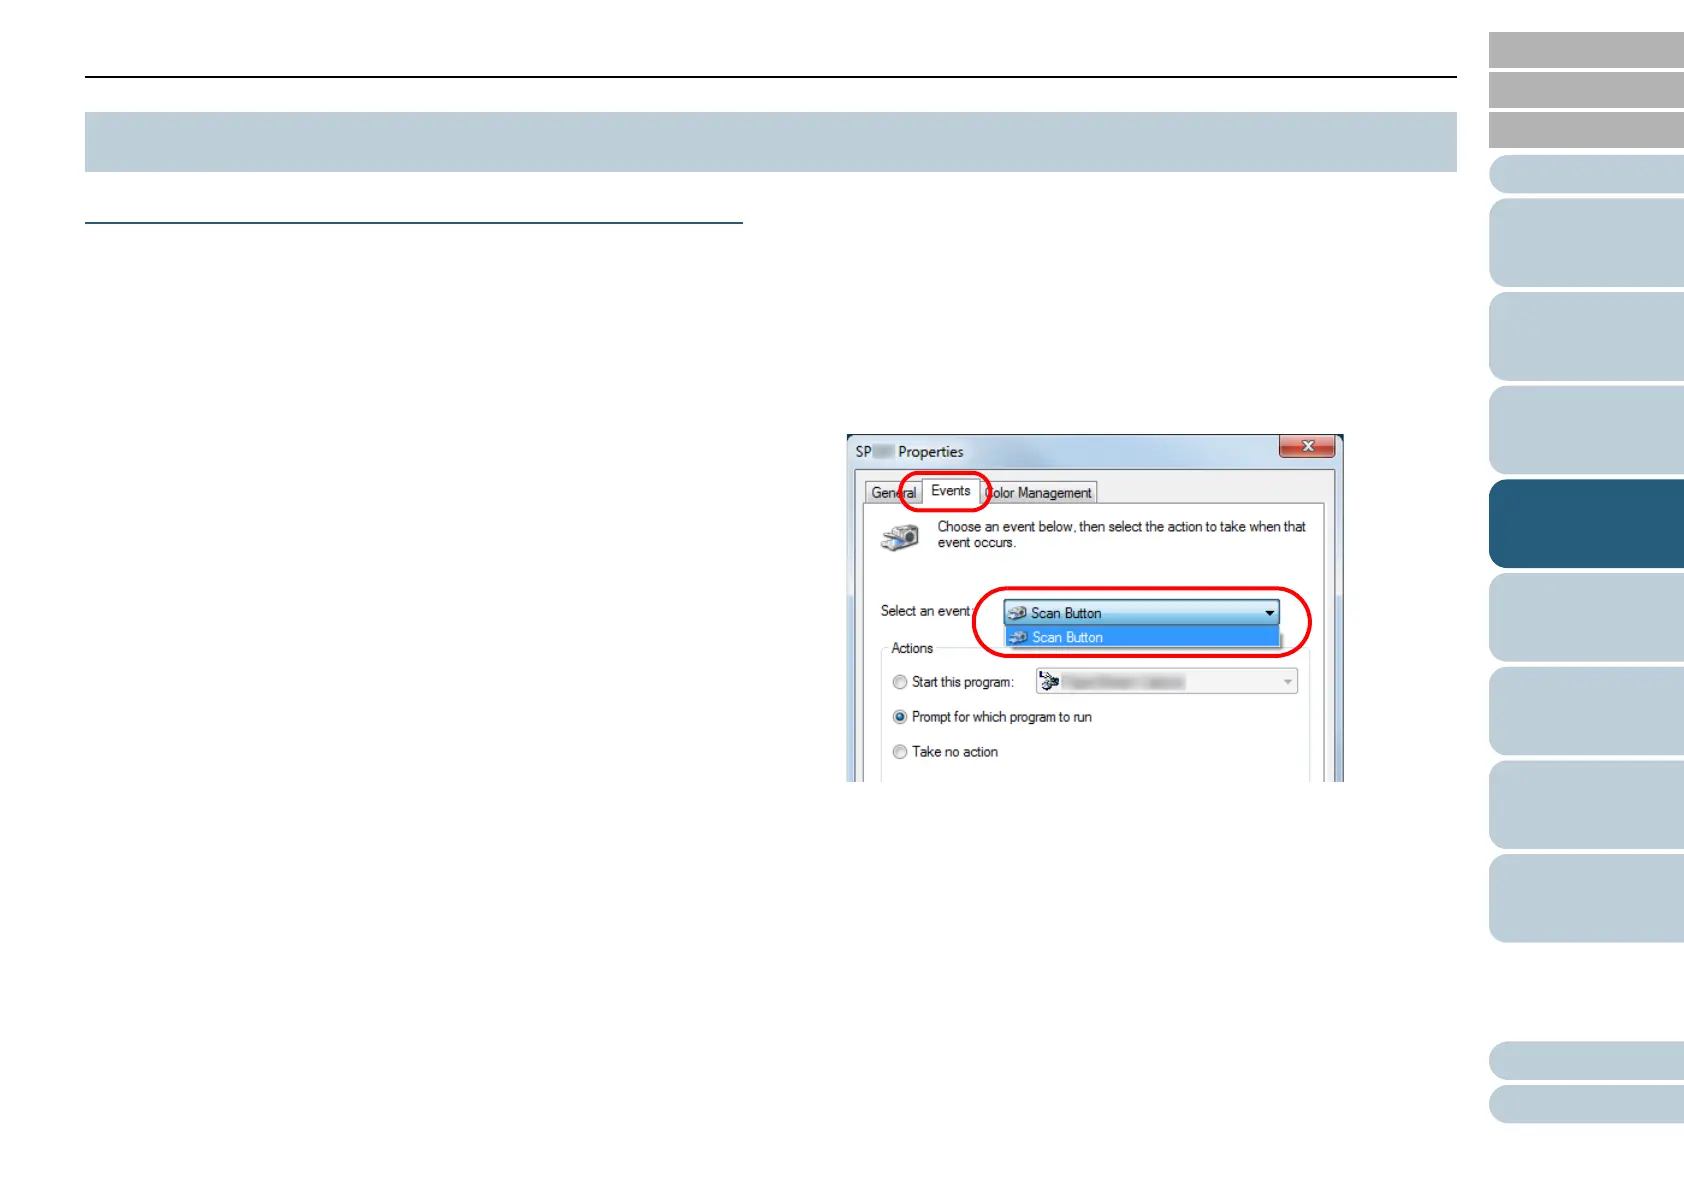
4 Right-click on the scanner icon, and select [Scan
properties] from the displayed menu.
The properties dialog box of the scanner appears.
5 Click the [Events] tab and select an event.
From the [Select an event] drop-down list, select an event from which
you want to launch an application.
In this function, the following events can be selected:
Scan Button (when the scan/stop button is pressed)
4.3 Customizing the Scanner Settings
 Loading...