Section 3 - Monitor Functions
3
3. Monitor Functions
RADIAL VIBRATION - Radial vibration is defined as shaft dynamic motion in a direction
perpendicular to the shaft centerline. The Dual Vibration Monitor displays values for two
channels (Channel A and B).
PROBE GAP VOLTAGE - Probe gap is measured as a negative dc voltage that is directly
proportional to the gap distance between the face of a proximity probe and the surface
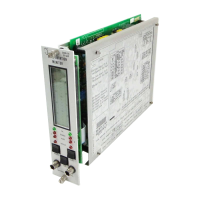
being monitored. Probe gap value for each channel is displayed on the front panel meter
by pressing the GAP switch.
OK - When the Proximitor output voltage is within its upper/lower limits, the transducer is
defined as OK. The OK detection circuit controls the channel OK LED and the monitor
relay drive to the system Relay.
OK RELAY - The OK Relay is located on the Power Input Module. Every channel in the
rack must be OK or bypassed to energize the OK Relay.
TIMED OK/CHANNEL DEFEAT - Timed OK/Channel Defeat prevents faulty transducer
wiring from causing false alarms. If the probe input signal level on a given channel is not
within upper/lower OK limits, that channel OK LED goes off, the BYPASS LED goes on, the
channel is disabled, and the OK Relay deenergizes. Once the channel input signal level is
restored within the upper/lower OK limits for at least 30 seconds, the channel OK LED will
start flashing at 1 Hertz (Hz) to indicate the OK state is restored, the BYPASS LED goes off,
and monitoring is enabled. You must press the RESET switch on the front panel of the
System Monitor to stop the OK LED from flashing (it will then remain on steadily). If the
channel remains in the not OK state, set the Channel Bypass switch on the monitor
circuit board to put the channel "out of service". You can then operate the monitor as a
single-channel monitor, and the OK Relay will return to an OK state (energized). Without
this feature, the OK Relay could not be reactivated. In the Timed OK/Channel Defeat and
Channel Bypass modes, the recorder output is clamped to zero vibration value and the
display is clamped to zero.
VIBRATION ALARM - Pressing the ALERT or DANGER switches on the front panel of the
monitor displays the Alert (first-level alarm) or Danger (second-level alarm) vibration
setpoints on the front panel meter. When the radial vibration signal level is equal to or
exceeds preset Alert setpoints for the selected time delay, the ALERT LEDs come on and
the appropriate Alert Alarm relay contacts are activated. When the radial vibration
signal level exceeds preset Danger setpoints, the DANGER LEDs come on and the
appropriate Danger alarm relay contacts are activated.
 Loading...
