GE
Direction 5370626-100, Revision 18 LOGIQ e/LOGIQ e Vet/LOGIQ i/Vivid e Basic Service Manual
4-24 Section 4-3 - General Procedure
4-3-11 CWD Functional Check
4-3-11-1 Preparations
1.) Connect 3S-RS/6S-RS/6Tc-RS Probe to the system, see in Chapter 3 Installation.
2.) Turn ON the scanner (if it isn’t turned on already).
4-3-11-2 Activating CW Doppler
To activate CW Doppler Mode:
Ensure that the appropriate CW probe is connected.
• For LOGIQ e, LOGIQ e Vet and LOGIQ i, press F6 on the keyboard to enter CW mode. F6 is the
predefined function key for CW, which can be configured in Utility/Config -> Admin -> Function Key
preset menu.
• For LOGIQ e R7.x.x and LOGIQ e Vet R7.x.x, press F9 on the keyboard to enter CW mode.
• For Vivid e, press CW Key on the keyboard.
The Doppler Spectrum appears, along with the CW Top/Sub Menu Menu.
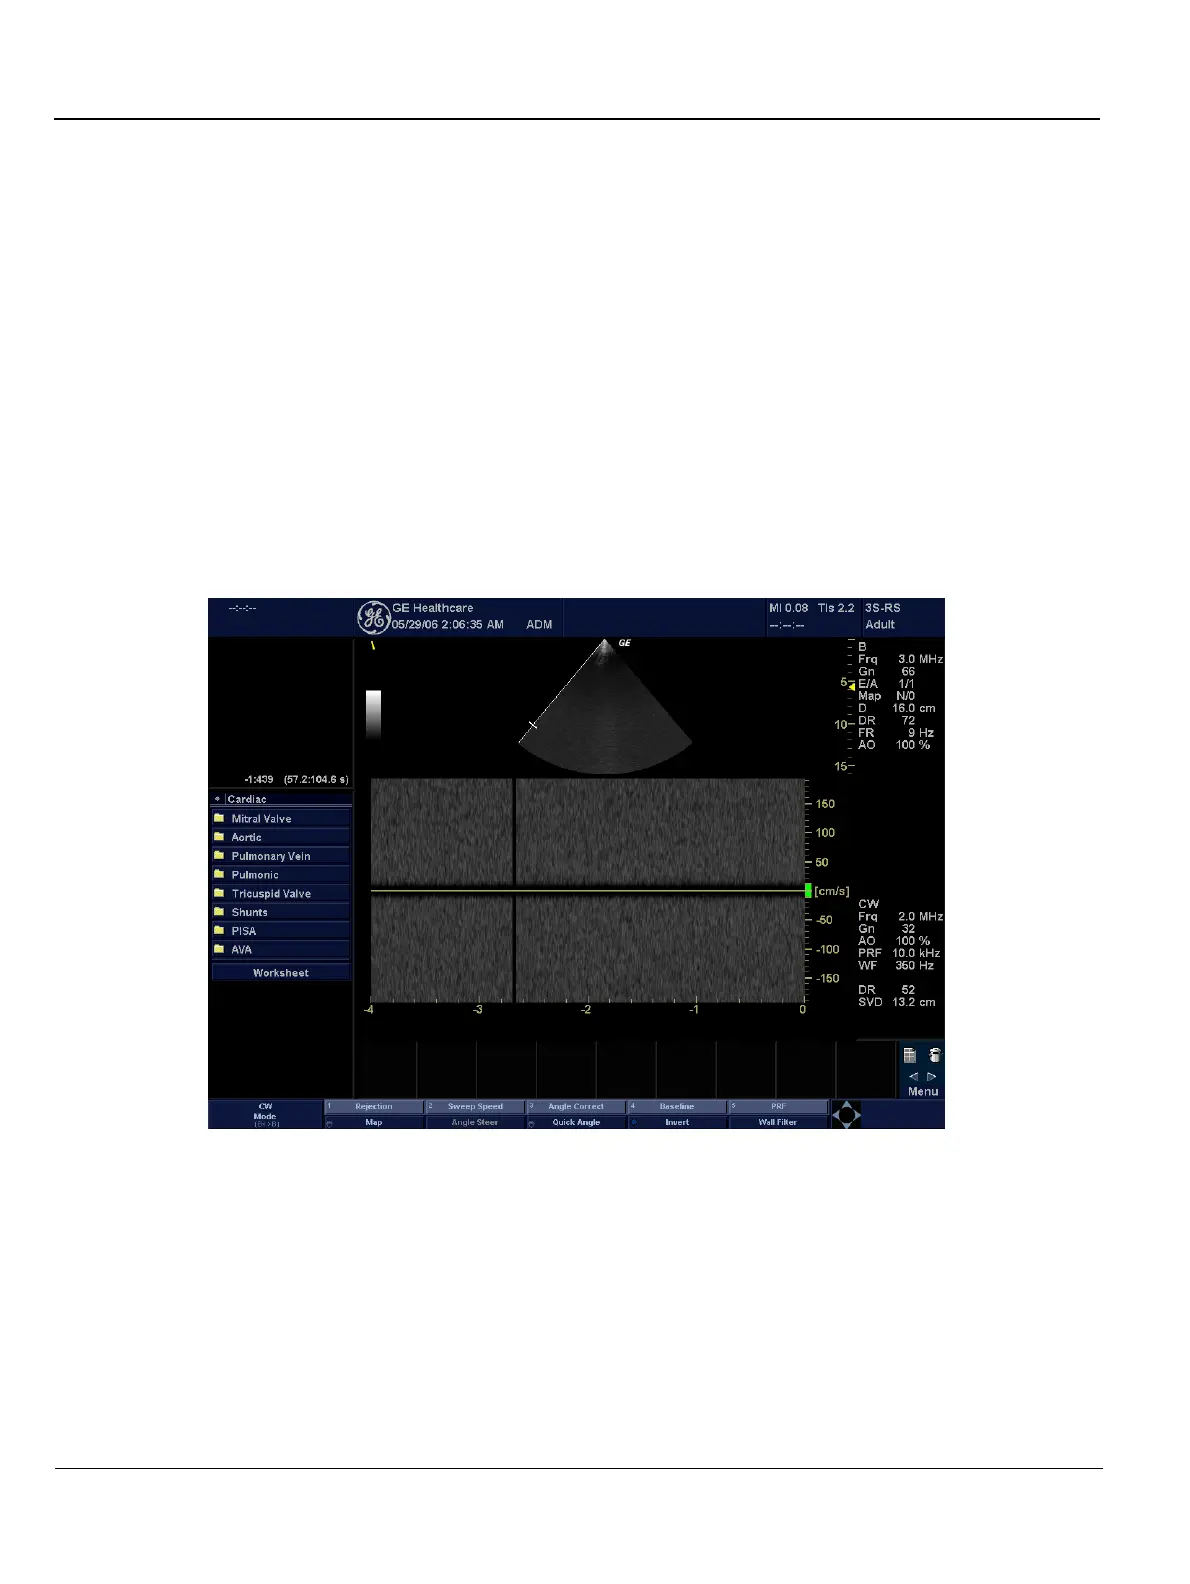
Figure 4-1. CWD Screen
The following CW parameters are displayed: Frequency, Gain, Acoustic Output, Scale, Wall Filter and
Dynamic Range.
4-3-11-3 Exiting CW Doppler
To exit CW Doppler Mode,
• For LOGIQ e, LOGIQ e Vet and LOGIQ i, press F6.
• For LOGIQ e R7.x.x and LOGIQ e Vet R7.x.x, press F9.
• For Vivid e, press CW.
 Loading...


