Gendex Dental Systems
C-4
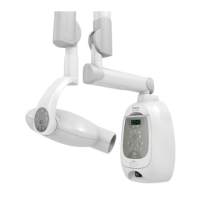
ORALIX AC SYSTEM
SETTING TO WORK
5. ELECTRICAL CHECKS
5.1. CHECK OF THE MAINS VOLTAGE MEASURING CIRCUIT
1) Using an AC voltmeter (accuracy =/<1%) verify on TIMER AC terminal blocks shown in BZ-4 that the
mains voltage is at its nominal value.
2) Boot the “DVM routine (Digital Voltmeter) on the Timer (see paragraphs 5.2 and 5.3 of this Section) and
verify that the mains voltage value measured by the Timer is the same as that measured with the AC
Voltmeter at point 1.
If not, proceed to an adjustment of the mains voltage measuring circuit as described in Section F.
5.2. TEST AND DIAGNOSTIC ROUTINE: DENSOMAT
5.2.1. Test of LEDs/Keys and Display functionality (Test mode routine)
The “Test mode routine” is booted by pressing the “Vx” key and “Bitewing” key simultaneously at power on.
NOTE
During all the test and the diagnostic routines X-RAY emission is inhibited.
All segments of display light up, then software version is visualized: Ux.x
When the “Test mode routine” is active all LEDs of keyboard must be on (except the X-ray on LED): the
operator can press all keys sequentially and verify that the correspondent LED is switched OFF.
NOTE
The Tubehead 1 and Tubehead 2 LEDs work in toggle mode so that they cannot both be
switched on (or off) at the same time.
The display shows the key's code according to the following table.
Pressing “P” key exits and automatically enters in the “Tubehead Voltage Select routine”.
KEY CODE KEY FUNCTION KEY CODE KEY FUNCTION
S1 S+ S11 UPPER PREMOLAR
S2 S- S12 UPPER MOLAR
S3 TUBEHEAD 1 S13 LOWER INCISOR
S4 TUBEHEAD 2 S14 LOWER CANINE
S5 NOT PRESENT S15 LOWER PREMOLAR
S6 SMALL PATIENT S16 LOWER MOLAR
S7 MEDIUM PATIENT S17 BITEWING
S8 LARGE PATIENT S18 VX
S9 UPPER INCISOR S19 PREP (handswitch)
S10 UPPER CANINE
 Loading...