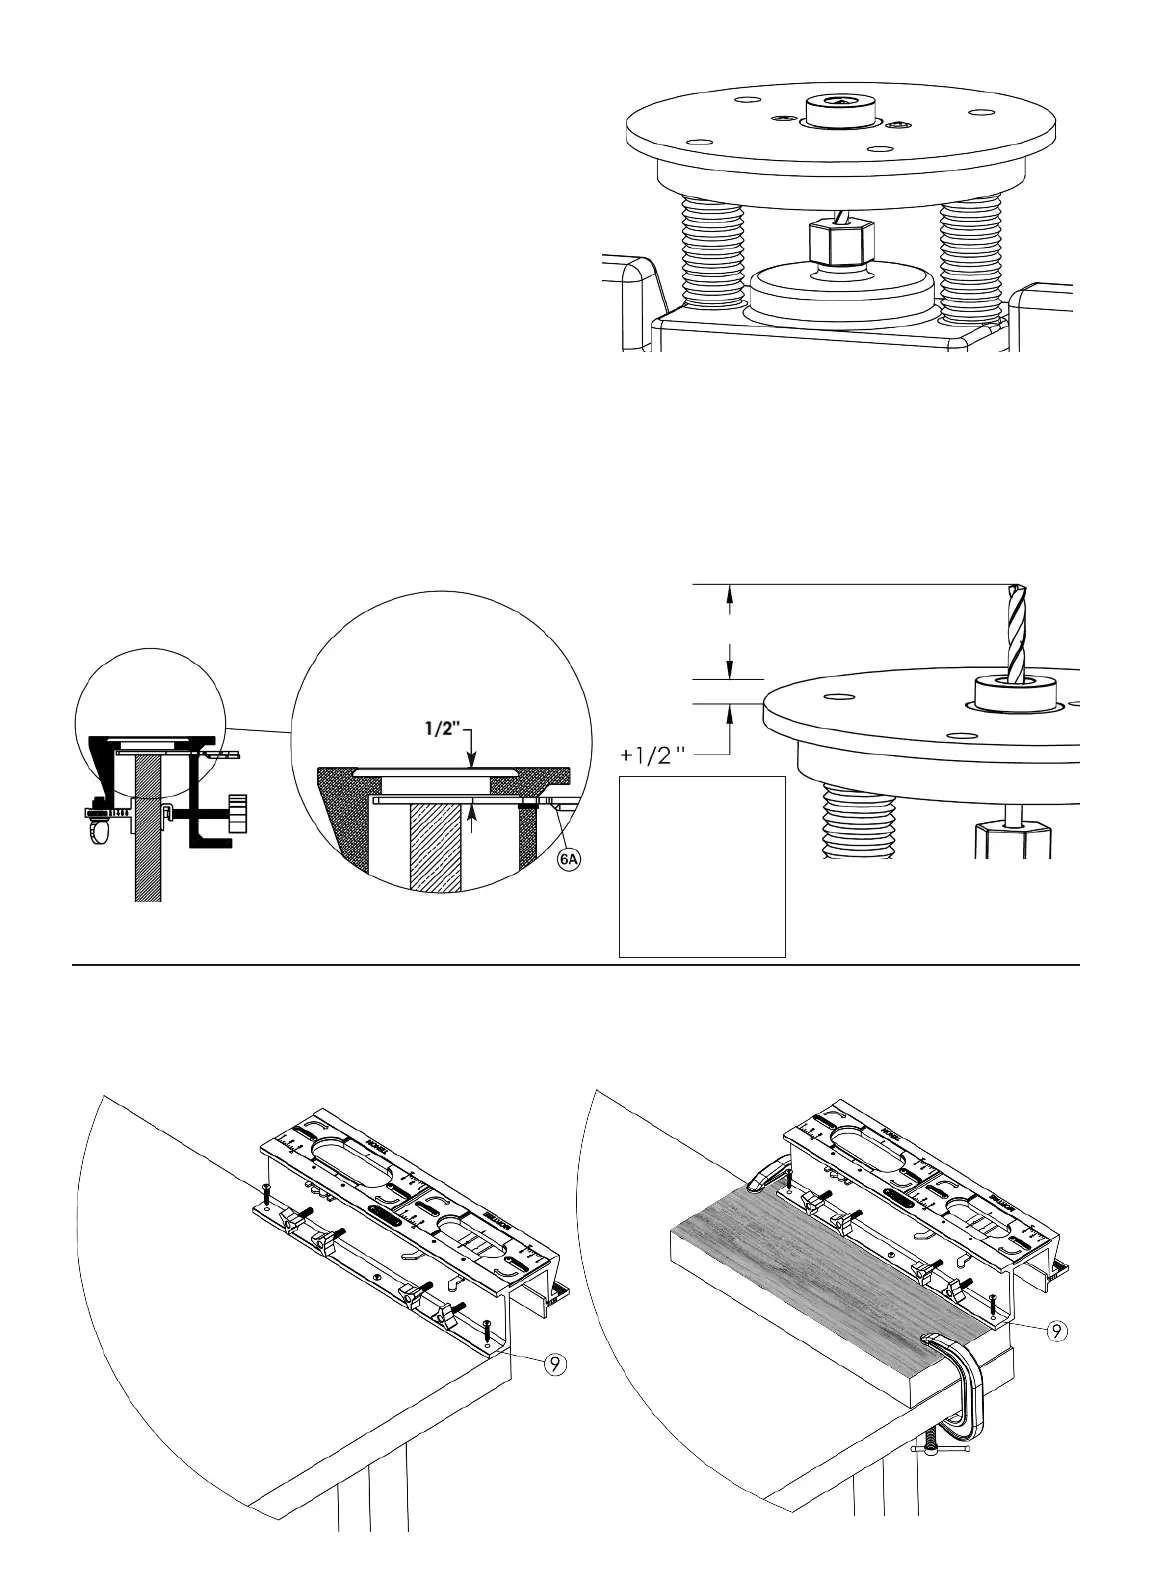
BRAZO DE POSICIONAMIENTO
EN POSICIÓN DESPLEGADA
FRESADORA EN LA POSICIÓN
DE MÁXIMO HUNDIMIENTO
DE LA CARA DE LA
BASE DE LA PLACA,
A LA PUNTA DE
LA BROCA
CORTADORA,
ES IGUAL A LA
PROFUNDIDAD
DE LA JUNTA,
MÁS 1/2”
BANCO DE TRABAJO
BANCO DE TRABAJO
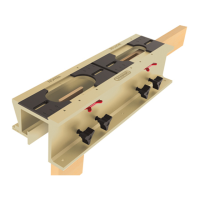
Una vez completada la operación de centrado,
remueva el perno de centrado de la fresadora
y reemplace con la broca buriladora
(Figura 6).
Fijando la profundidad del Corte
• Fije la profundidad de su fresadora de superficie para obtener la profundidad deseada de su
mortaja y espiga.
• Cuando la pieza esté correctamente montada en la plantilla, su orilla superior estará 1/2" debajo
la superficie superior (de trabajo) de la plantilla (Figura 7A)
• Por consiguiente, aumente 1/2" a la profundidad deseada de la mortaja y espiga cuando fije la
profundidad “descendiente” de la fresadora (Figura 7B)
MONTANDO LA PLANTILLA
La Plantilla de Mortaja y Espiga puede montarse directamente al borde de un banco de trabajo
utilizando la pestaña de montaje integral [9] (Figura 8A) o asegurarla a un tablero de montaje, y
fijarse a un banco de trabajo (Figura 8B).
Figura 6
Figura 7A
Figura 8A
Figura 8B
Figura 7B
PROFUNDIDAD DE LA JUNTA
20
 Loading...