DOOR PANEL INSTALLATION
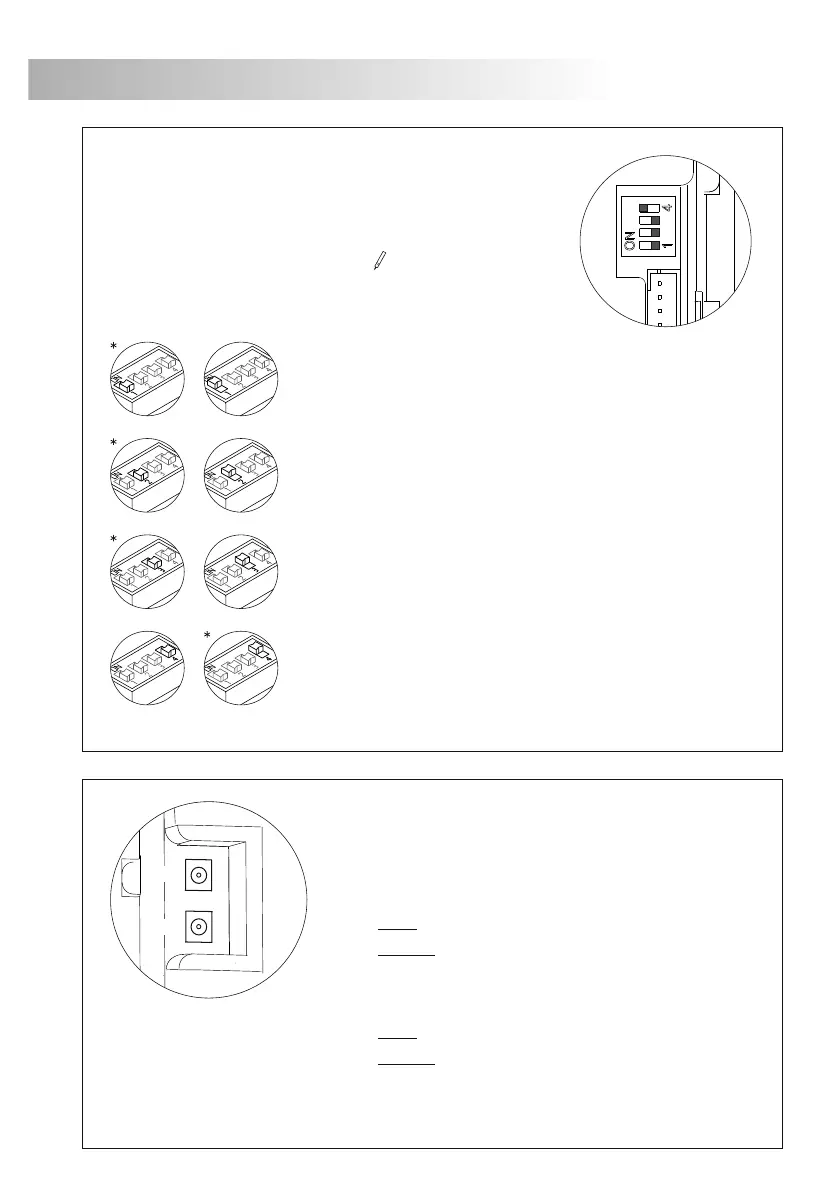
escription of the configuration dip switch of the
D
sound module.
Set the switch to ON for telephones programming.
Once the programming is finished, return the switch to OFF position.
The programming method is described in page 69.
64
Set the switch to OFF if it is the main door panel. Every system must have
only a main door panel; the rest must be slave door panels (ON). Set
as the main door panel the most remote from the backbone. If in the
system it has installed a digital converter CD-2PLUS, the max. number
of door panels will be of 2 and they must be configured as slave.
Set the switch to ON in case of call forwarding from the door panel to
the porter's exchange (when it is activated). Set the switch to OFF if
this function is not required (it needs a CD-2PLUS converter and that
door panel capture is activated in the porter's exchange).
Set the switch to ON so that the tones emited by the door panel are
HIGH or set it OFF if the volume should be LOW.
escription of the self-testing leds.
D
The self-testing leds are placed
the back of the module.
at the upper left side of
Red led
Fixed: More than one door panel set as master.
In case of short-circuit, if it is removed
before 2 minutes (approx.), the door
panel will automatically reset; in case
of more than 2 minutes, it is necessary
to switch it off and then switch it on
again.
Green led
Fixed: Correct operation.
Blinking: Programming in progress of the door panel
(2nd configuration dip switch in ON).
Blinking: There is a short-circuit in the installation*
between bus wires or there isn't any door
panel configured as master.
*
*Factory default
DOOR PANEL INSTALLATION
63
inal adjustments.
F
If after starting the system it
volume isn't correct, proceed with the necessary
adjustments as shown in the drawing.
's considered that the audio
.
IMPORTANT: Before closing the door panel(s), do a test
call and check all self-testing leds (page 63) don't show
any error.
lace the nameplate labels.
P
Open the label holder.
Place the label and
close.
Once finished the works of wiring, configuration and
final adjustments, fix the frame in the embedding
box with the supplied screws.
lose the frame.
C
The SW1 configuration dip-switch is located at the upper right
side of the back of the module.
For dip switch settings, use the tool that is supplied with the
sound module.
Red
Green
 Loading...