POWER SUPPLY INSTALLATION
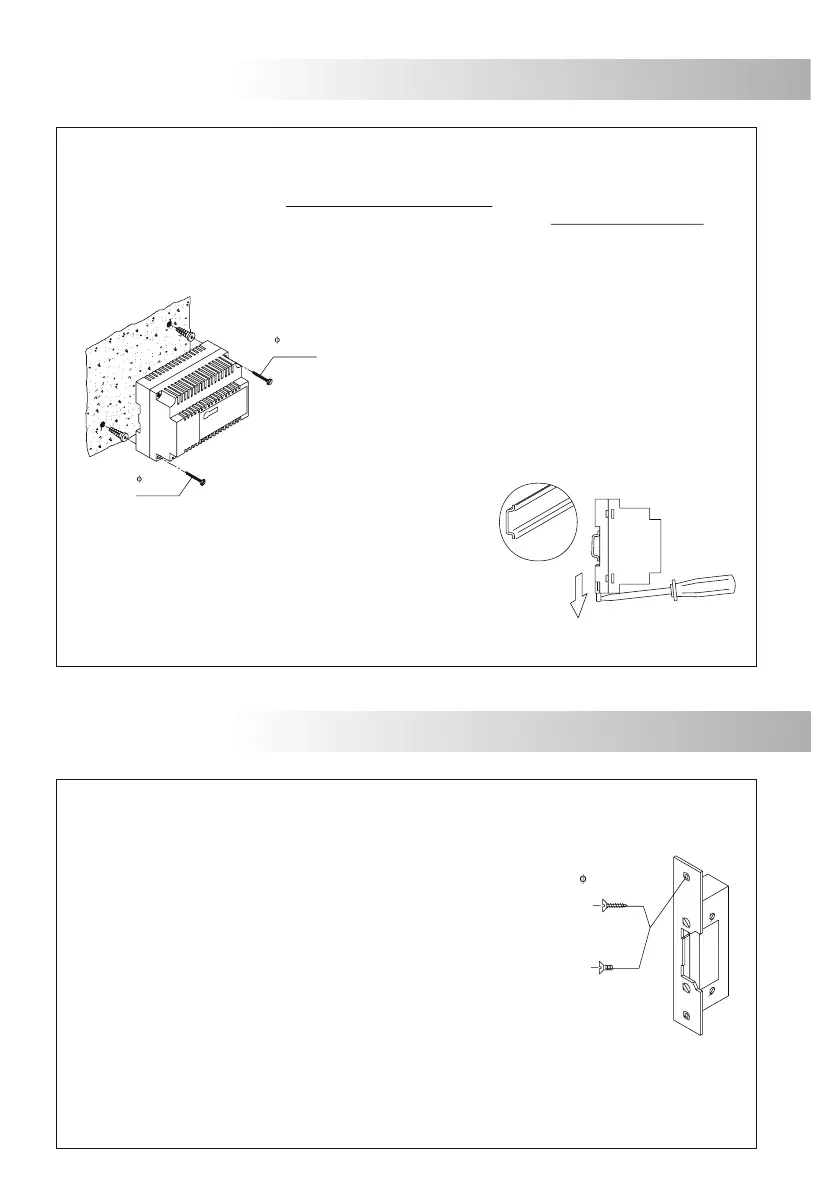
LOCK RELEASE INSTALLATION
ock release installation.
L
If the lock release is installed in a metal door, use a
and tap the hole.
In case of wood door, use a mm drill.
Ø3,5mm
drill
Ø 3
nstalling the FA-PLUS/C ver. 938072 power supply.
I
IMPORTANT: the lock release must be of 12V a.c. or d.c (see pages 73 to 76).
66
DIN 46277
To avoid damage, the power supply has to be firmly fixed.
Remember the current regulation forces you to protect
the power supply with a thermo-magnetic circuit
breaker.
To install the power supply on the wall, drill two holes of 6mm
and insert the wall plugs. Hold the power supply by means of
the specified screws.
Ø
The power supply can be installed on a DIN 46277 guide
by simply pressing it. To disassemble the power supply,
use a plain screwdriver to lever it, as it is shown on the
picture.
The FA-PLUS/C power supply uses 6 units over DIN guide.
Place the protection cover once the input terminals are wired.
Install or modify the equipment without the power connected.
The installation and handling of these equipments must be performed by authorised personnel.
Install the power supply in a dry and protected place without risk of drip or water projections.
Avoid to place it near to heating sources, in dusty locations or smoky enviroments.
Do not block ventilation holes of the unit so that air can circulate freely.
M 4 x 8
3,5 x 25
DIN-7972
DIN-963
3,5 x 45
DIN-7971
3,5 x 45
DIN-7971
DOOR PANEL INSTALLATION
65
lose the door panel.
C
oor panel assembly.
D
In assemblies of a single door panel, it is ready from factory
to be mounted.
IMPORTANT:
To make these adjustments of joining several door panels, see the
document that is supplied with the door panel and follow the
steps that are described in the section "Mechanical assembly
for double door panel" and once finished the adjustments stick
the adhesive gasket (that is supplied with the push buttons
module) in the rod of joining modules.
If the door panel to installing is of more than one module it will be
necessary make some adjustments to join a door panel with
other one.
Fix the door panel by using the supplied screws.
Finish the door panel assembly by placing the closing
heads, put the head on one side and then make a slight
pressure on the other end, to its correct placement.
 Loading...