Repair
26 3A2989V
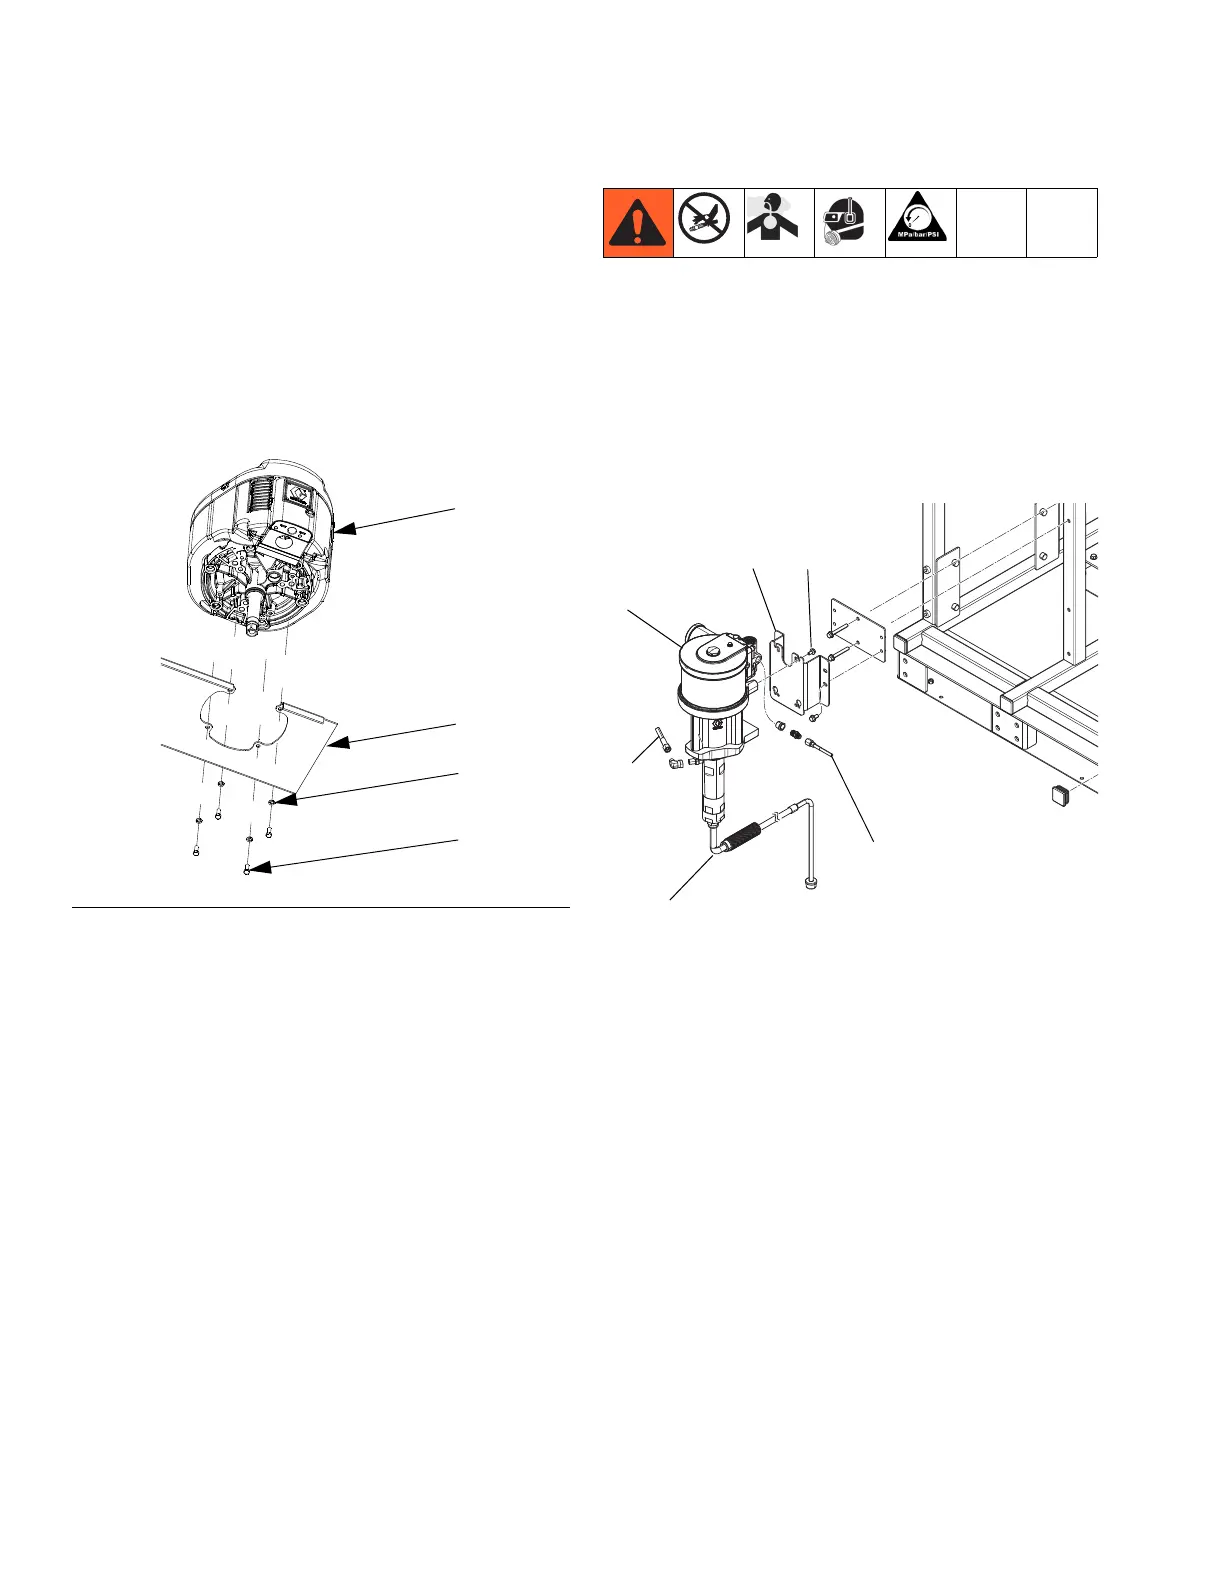
Remove Air Motor
1. Follow Pressure Relief Procedure, page 7.
2. Disconnect displacement pump from air motor. See
steps 2 and 3 under Remove Displacement Pump,
page 25.
3. Disconnect sensor cable, air line, and ground wire
from air motor.
4. Remove mounting screws (5) and washers (4) hold
ing air motor (2 or 3) to mounting bracket.
5. Refer to NXT Air Motor manual 311238 to service or
repair the air motor.
6. Reconnect ground wire and sensor cable. Follow
steps in reverse order to reinstall air motor.
Pail Feed RAM Pump Assembly
(Feed Module)
NOTE: See Pail Feed RAM Pump assembly (227) in
parts breakdown beginning on page 56.
See Supply Systems manual 313527 for service and
repair instructions and parts.
Flush Pump
1. Follow Pressure Relief Procedure, page 7.
2. Disconnect pump inlet line (154) and air lines (57,
60) from flush pump.
3. Disconnect fluid outlet line.
4. Remove four screws (153) that attach flush
pump (8) to bracket (152) and remove flush pump.
5. Refer to Merkur Pump Assembly manual 312794 to
service or repair flush pump 257463.
6. Follow steps in reverse order to reinstall flush pump.
F
IG. 7
2 or 3
5
4
Bracket
r__312359_313289_32
 Loading...