25
HARDI
®
FOAM MARKER STANDARD VERSION
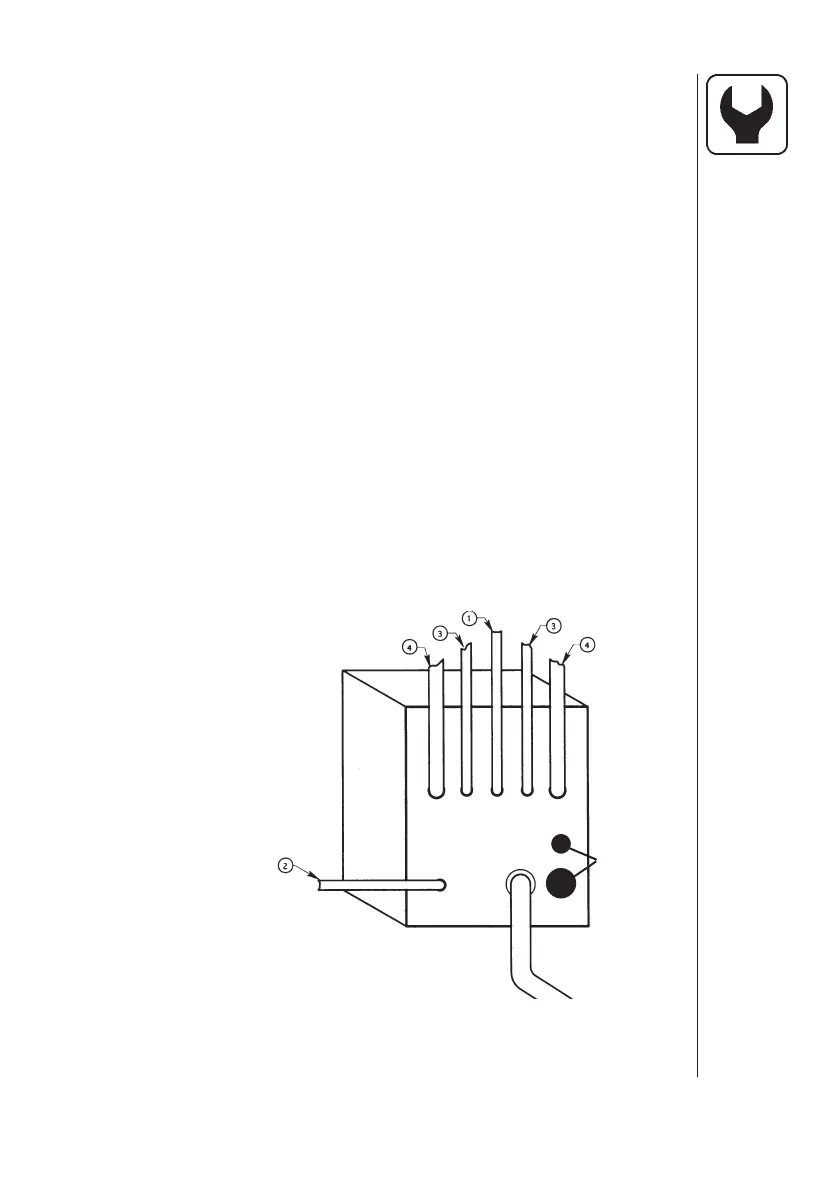
9.0 INSTALLATION OF HOSES
NOTE: There are two sizes of hoses used, 8mm and 10mm.
Refer to (Fig. 23)
Hose #1 (8mm) is routed to the top of the solution tank, this hose pres-
surizes the solution tank.
Hose #2 (8mm) is run from the bottom of the solution tank, this hose
brings foam solution from the tank to the compressor box.
Hose #3 (8mm), Brings foam solution from the compressor box out to the
foam generators on the outer wing. (Refer to Fig. 26 for installa-
tion of hoses in foam generator).
Hose #4 (10mm), Brings pressurized air from the compressor box out
to the foam generators on the outer wing. (Refer to Fig. 26 for
installation of these hoses in foam generator).
1. To install the hoses, press the end of the hose fi rmly into fi tting. Pull
gently to insure security.
2. To remove the hoses, push
the collar on the fi tting back
fi rmly and pull hard on the
hose.
3. After routing the hoses as
de scribed, fasten them to the
frame and boom with sup-
plied straps (being careful not
to collapse the hoses).
NOTE: Make sure your
chosen route of the
hose will not interfere
with any operations of the
sprayer. For example boom lift,
boom breakaway etc.
Fig. 23
MULTI CABLE TO
CONTROL BOX &
POWER SUPPLY
COMPRESSOR
BOX
PLUGS
 Loading...