Network Speed Dome User Manual
7. Click to save the settings.
5.3.2 Configuring Face Detection
Purpose:
After the face detection is enabled, a face appears in the surveillance area, it will be
detected and certain actions may be triggered by the detection.
Steps:
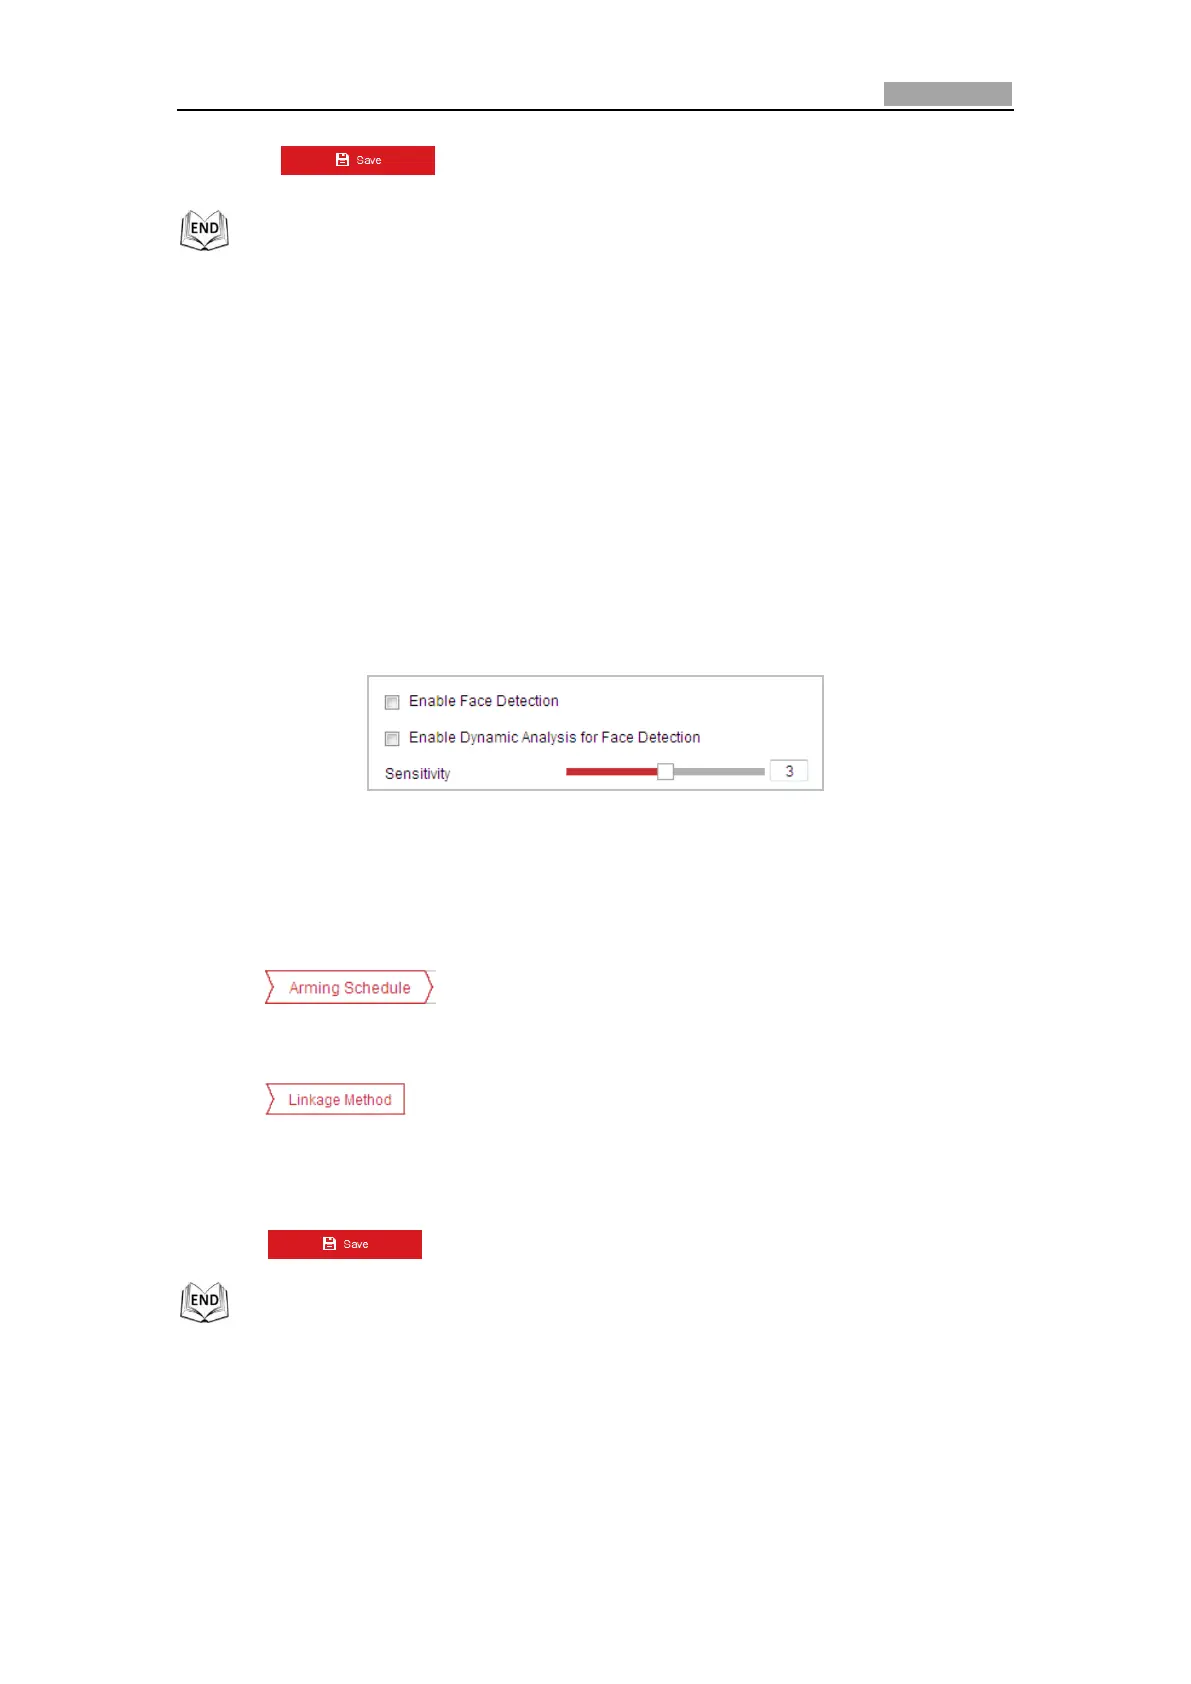
1. Check the Enable Face Detection checkbox.
2. (Optional) You can check the Enable Dynamic Analysis for Face Detection
checkbox if you want the detected face get marked with rectangle in the live view.
Figure 5-24 Configuring Face Detection
3. Configure the sensitivity for face detection.
Sensitivity: Range [1-5]. The value of the sensitivity defines the size of the object
which can trigger the alarm, when the sensitivity is high, a very small object can
trigger the alarm.
4. Click tab to enter the arming schedule setting interface. The
time schedule configuration is the same as the settings of the arming schedule for
motion detection. Refer to Step 2 in Section 5.2.1 Configuring Motion Detection.
5. Click tab to select the linkage method taken for the video loss
alarm, Notify surveillance center, send email, upload to FTP, trigger channel, smart
tracking and trigger alarm output are selectable. Please Step 3 in Section 5.2.1
Configuring Motion Detection.
6. Click to save the settings.
5.3.3 Configuring Intrusion Detection
Intrusion detection can set an area in the surveillance scene and once the area is
 Loading...