Digital Video Recorder User Manual
40
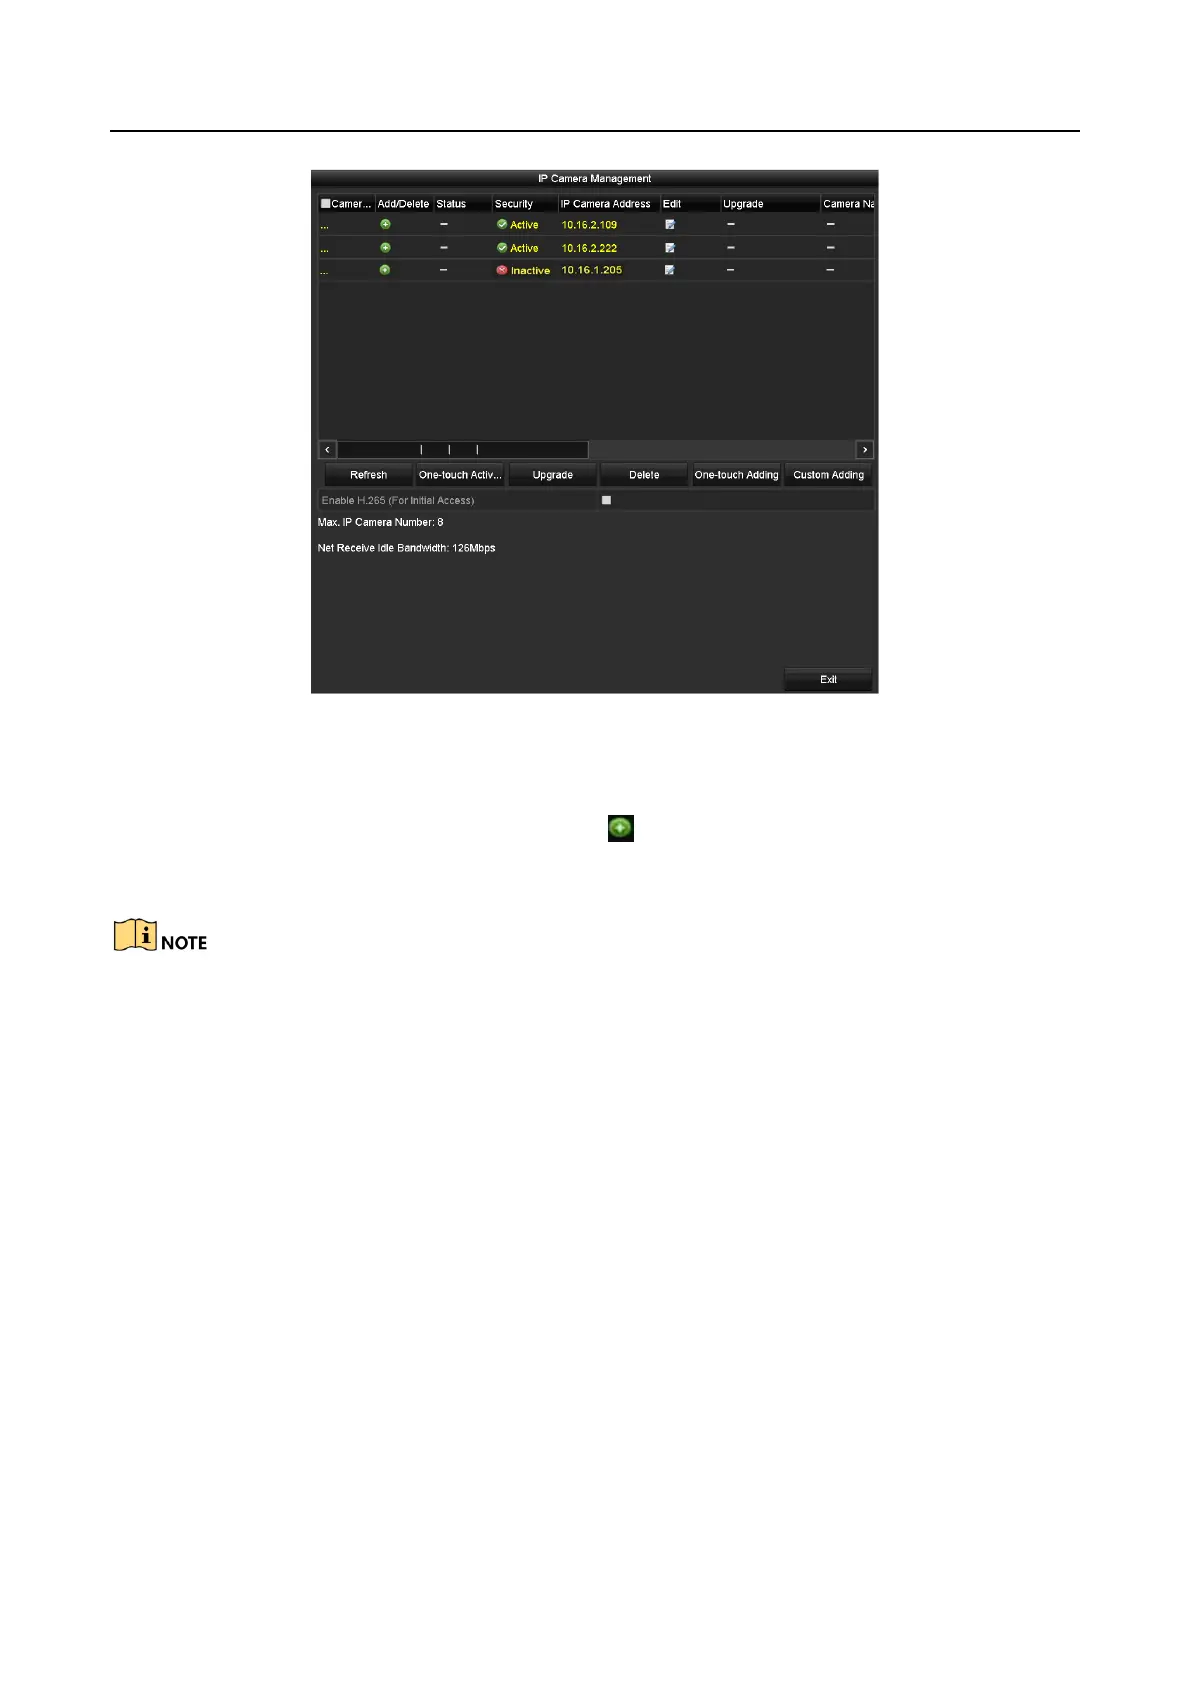
Figure 2-36 IP Camera Management Interface
Step 2 The online cameras with same network segment will be detected and displayed in the
camera list.
Step 3 Select the IP camera from the list and click to add the camera (with the same admin
password of the DVR’s). Or you can click the One-touch Adding button to add all cameras
(with the same admin password) from the list.
Make sure the camera to add has already been actiavted by setting the admin password, and the admin
password of the camera is the same with the DVR’s.
Step 4 (Optional) Check the checkbox of Enable H.265 (For Initial Access) for the connected IP
camera supporting H.265. Then the IP camera will be encoded with H.265.
Step 5 (For the encoders with multiple channels only) check the checkbox of Channel Port in the
pop-up window, as shown in the following figure, and click OK to add multiple channels.
 Loading...