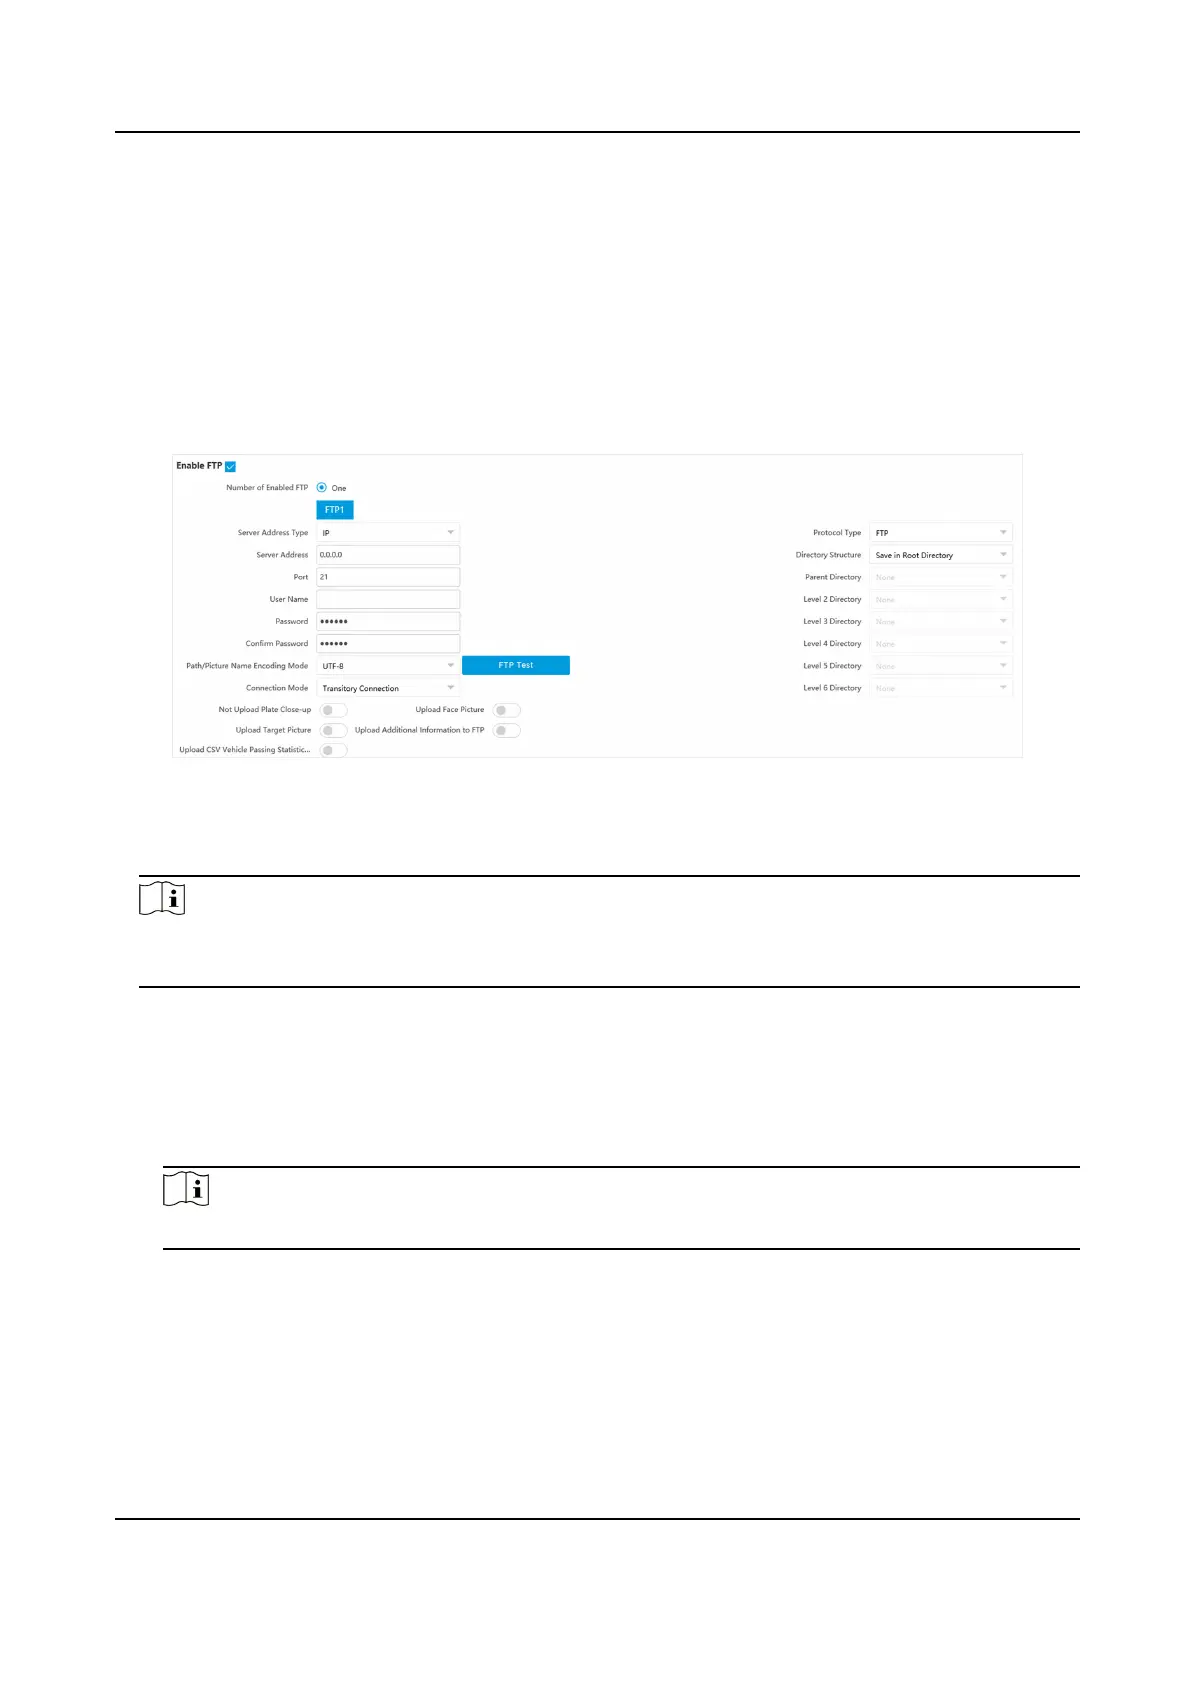
4.1.2 Set FTP
Set FTP parameters if you want to upload the captured pictures to the FTP server.
Before You Start
Set the FTP server, and ensure the device can communicate normally with the server.
Steps
1.
Go to
Conguraon → Network → Data Connecon → FTP .
Figure 4-2 Set FTP
2.
Check Enable FTP.
3.
Select Number of Enabled FTP.
Note
You can only enable one FTP if the device does not support the violaon capture. If more than
one FTP is enabled, you should set upload data type for each FTP according to your needs.
4.
Set FTP Parameters.
1) Select Sever Address Type and enter corresponding informaon.
2) Enter Port.
3) Enter User Name and Password, and conrm the password.
4) Select Protocol Type.
5) Select Directory Structure.
Note
You can customize the directory structure according to your needs.
6) Select Connecon Mode.
Transitory
Connecon
The connecon is temporarily made for one data transmission task. Aer this task, the
connecon will be broken.
Persistent Connecon
Network Trac Camera Operaon Manual
14

 Loading...