SVC 6-35
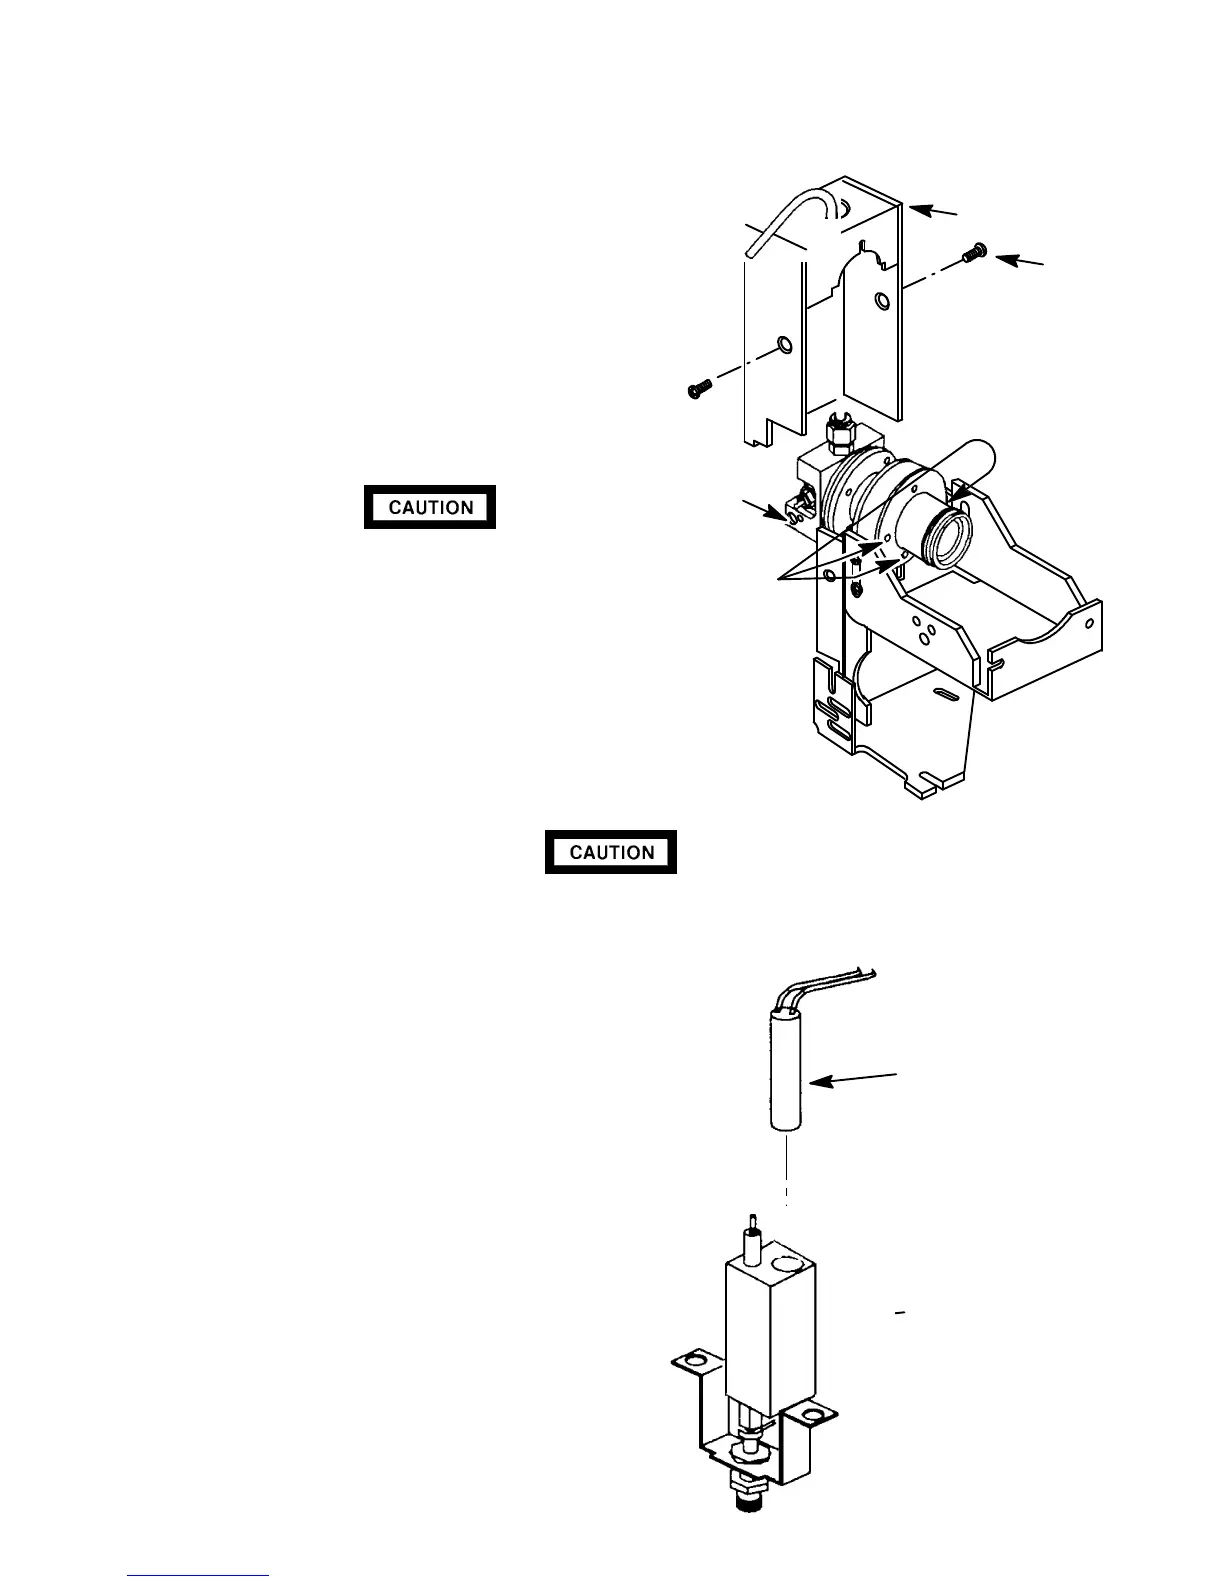
9. Remove the exhaust tube from the detector using a 9/16-inch wrench.
10. Remove the chimney assembly by removing
the two screws securing it to the chimney back.
11. Loosen the three screws which secure the
clamp which secure the detector to the chim-
ney back.
12. Use a 9/16 inch wrench to loosen the brass nut
holding the weldment exit tube to the jet weld-
ment. It will be necessary to hold the jet assem-
bly with a 1/2-inch wrench to prevent rotation.
Handle the heater and sensor cartridges with
care to prevent breakage. The cartridges
(particularly the smaller sensor cartridge) are
fragile.
13. Pull the heater and temperature sensor car-
tridges from the detector weldment assembly.
14. Carefully lift the detector, vertically, from the
transfer tube, so as not to damage the fused
silica liner.
Handle the heater and sensor cartridges with care to prevent breakage. The
cartridges (particularly the smaller sensor cartridge) are fragile.
15. Remove the second heater cartridge from the
lower heater block.
16. Install the replacement heater cartridge in the
lower heater block.
17. Install the assembled detector weldment as-
sembly vertically onto the transfer tube weld-
ment, being careful not to damage the fused
silica
liner.
18. Install the heater and temperature sensor car-
tridges into the detector weldment.
19. Secure the weldment exit tube to the jet assem-
bly with by holding the jet weldment with a
1/2-inch wrench, and tightening the nut which
secures the weldment with a 9/16-inch
wrench.
HEATER CARTRIDGE
LOWER HEATER BLOCK
TRANSFER TUBE WELDMENT
CHIMNEY
SCREW
CLAMP
SECURING
SCREWS
HEATER/
SENSOR
OPENINGS
Artisan Scientific - Quality Instrumentation ... Guaranteed | (888) 88-SOURCE | www.artisan-scientific.com

 Loading...