SVC 4-22
10. At the lower right edge of the cover, press from right-to-left until the right side hinge releases.
11. With the lower right side of the cover pushed in, lift the right side of the cover and slide it to the
right to remove the top cover and lid shaft as a unit.
12. If an autosampler is installed on the instrument,
it will be necessary to remove it and its mount-
ing bracket to allow removal of the left side cov-
er as follows:
a. Remove the autosampler tray from its
mounting bracket by first simultaneous-
ly lifting and turning the two tray locks
which hold it in position, then sliding
the tray away from the instrument.
b. Lift the autosampler tray from its mount-
ing bracket and set it aside.
c. Remove the autosampler bracket by
removing the 6 screws securing it to
the instrument.
13. Remove the two screws securing the left
side panel along its bottom edge.
14. Slide the left side panel towards the rear
of the instrument and lift.
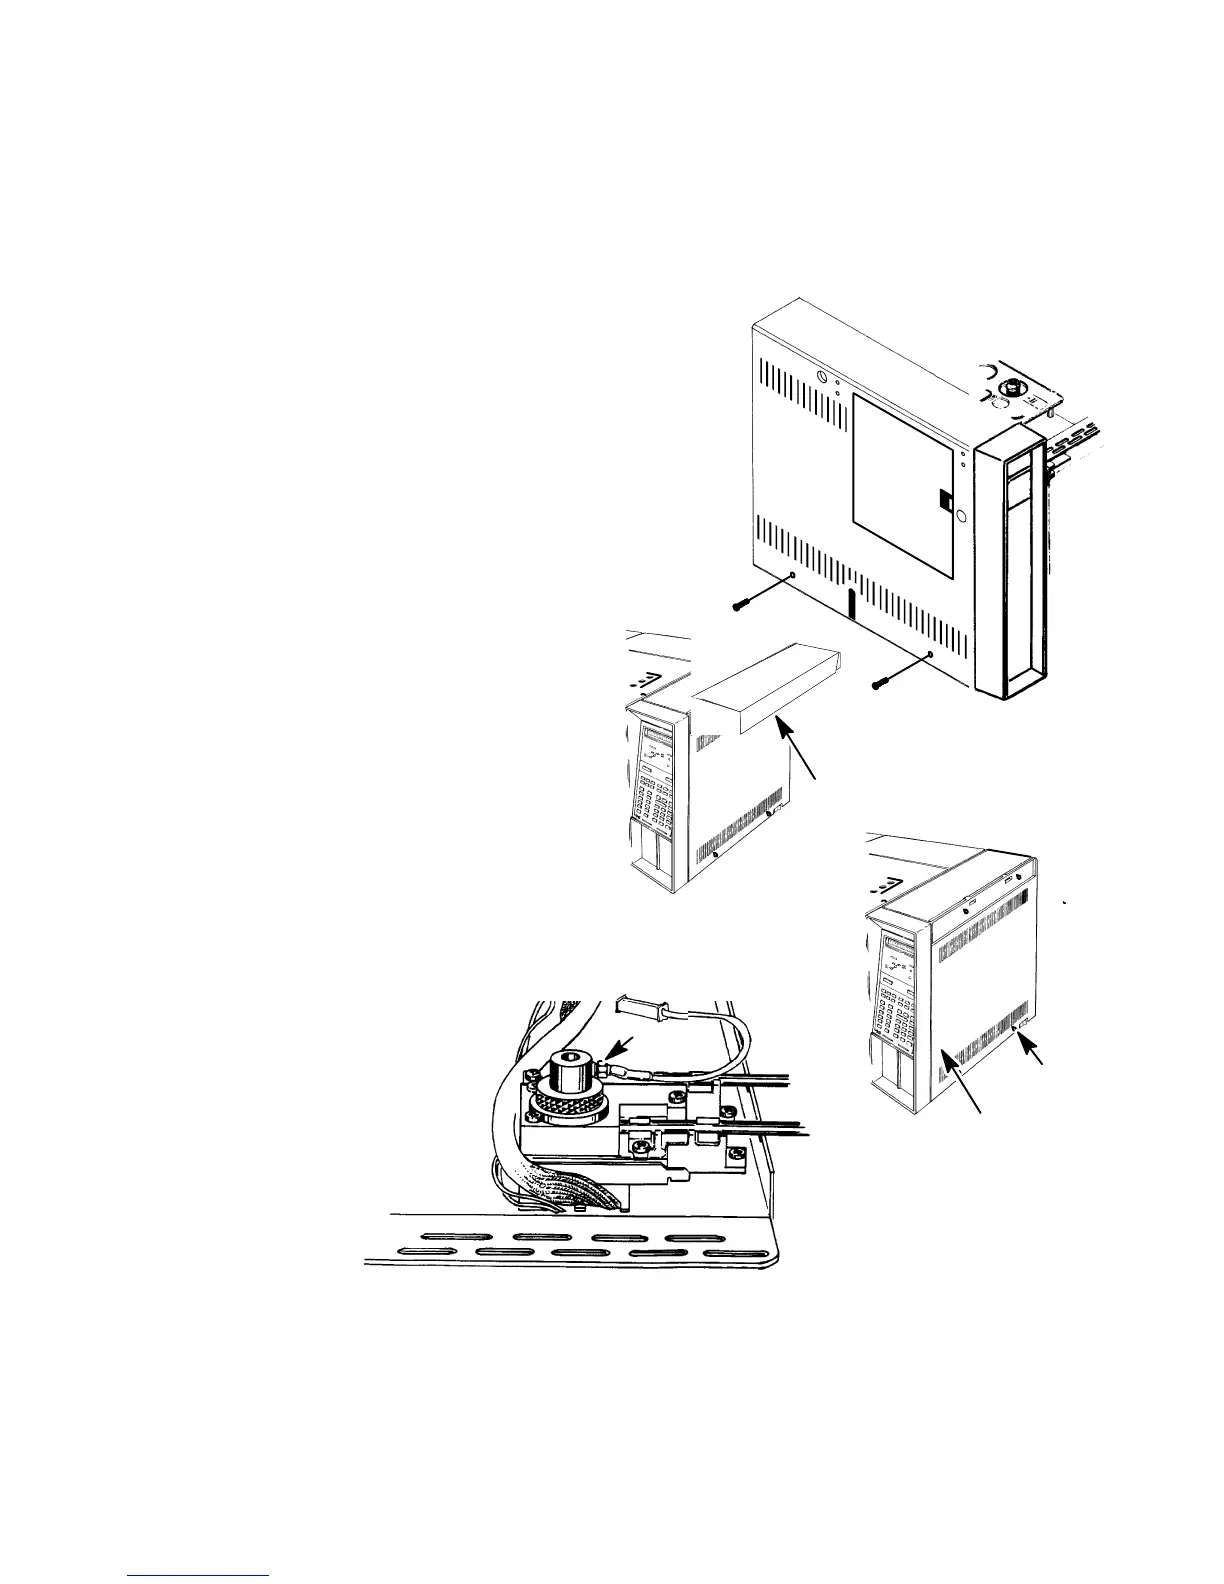
15. Remove the electronics carrier top cover.
16. Remove the right side panel by
removing four screws: two each
along its top and bottom edges.
17. Disconnect the ignitor wire
lead connector at the mating
connection adjacent to the
ignitor.
ELECTRONICS
CARRIER TOP
COVER
SCREWS
SCREWS
RIGHT SIDE PANEL
IGNITOR
Artisan Scientific - Quality Instrumentation ... Guaranteed | (888) 88-SOURCE | www.artisan-scientific.com

 Loading...