Processor
Description Spare part number
Intel Core i7-4770s (3.1-GHz, 8-MB L3 cache) 732507-001
Intel Core i5-4670s (3.1-GHz, 6-MB L3 cache) 732506-001
Intel Core i5-4570s (2.9-GHz, 6-MB L3 cache) 732505-001
1. Prepare the computer for disassembly (see Preparing to disassemble the computer on page 34).
2. Remove the access panel (see
Access panel on page 40).
3. If installed, remove the graphics heat sink (see
Graphics heat sink on page 62).
4. Remove the processor heat sink (see
Processor heat sink on page 63).
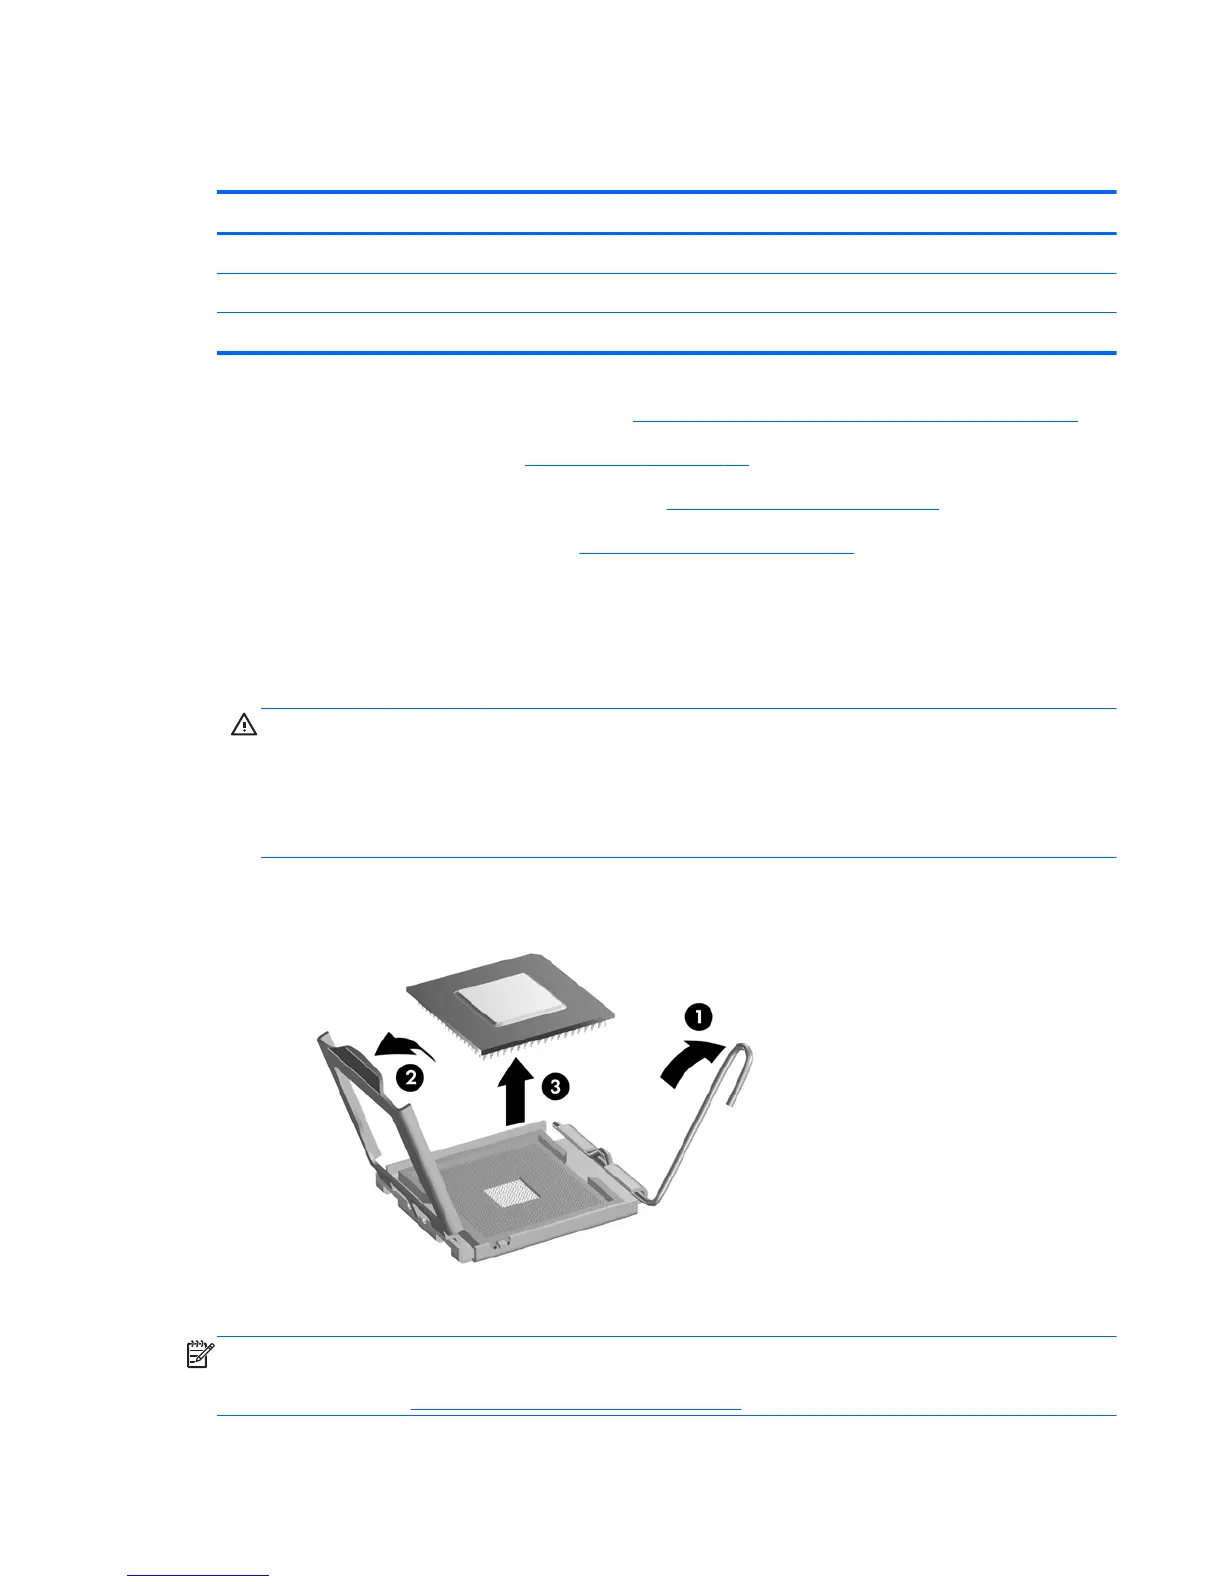
5. Rotate the locking lever to its full open position (1).
6. Raise and rotate the microprocessor retainer to its fully open position (2).
7. Carefully lift the processor from the socket (3).
CAUTION: Do NOT handle the pins in the processor socket. These pins are very fragile and
handling them could cause irreparable damage. Once pins are damaged it may be necessary to
replace the system board.
The heat sink must be installed within 24 hours of installing the processor to prevent damage to
the processor’s solder connections.
NOTE: After installing a new processor onto the system board, always update the system ROM to
ensure that the latest version of the BIOS is being used on the computer. The latest system BIOS can be
found on the Web at: http://h18000.www.hp.com/support.
Processor
65
 Loading...