After installing the cables, ensure that the power switch on all displays is in the on position (|). Turning
the Power Switch ON does not turn the display on. This is especially important if you will be mounting
the displays where access to the power switches is difficult.
Figure 3-39 Turn On Power Switch
The last step, after all the cables are connected and making sure the Power Switch is turned ON, is to
plug the AC power cord into a power source.
Mounting the display
The display can be mounted on a wall or a stand. If the mounting hardware permits, it can be
mounted in landscape or portrait orientation.
CAUTION: Always use the handles to lift the display, as the bezel is not meant to take its weight.
CAUTION: Two people are needed to safely mount the display.
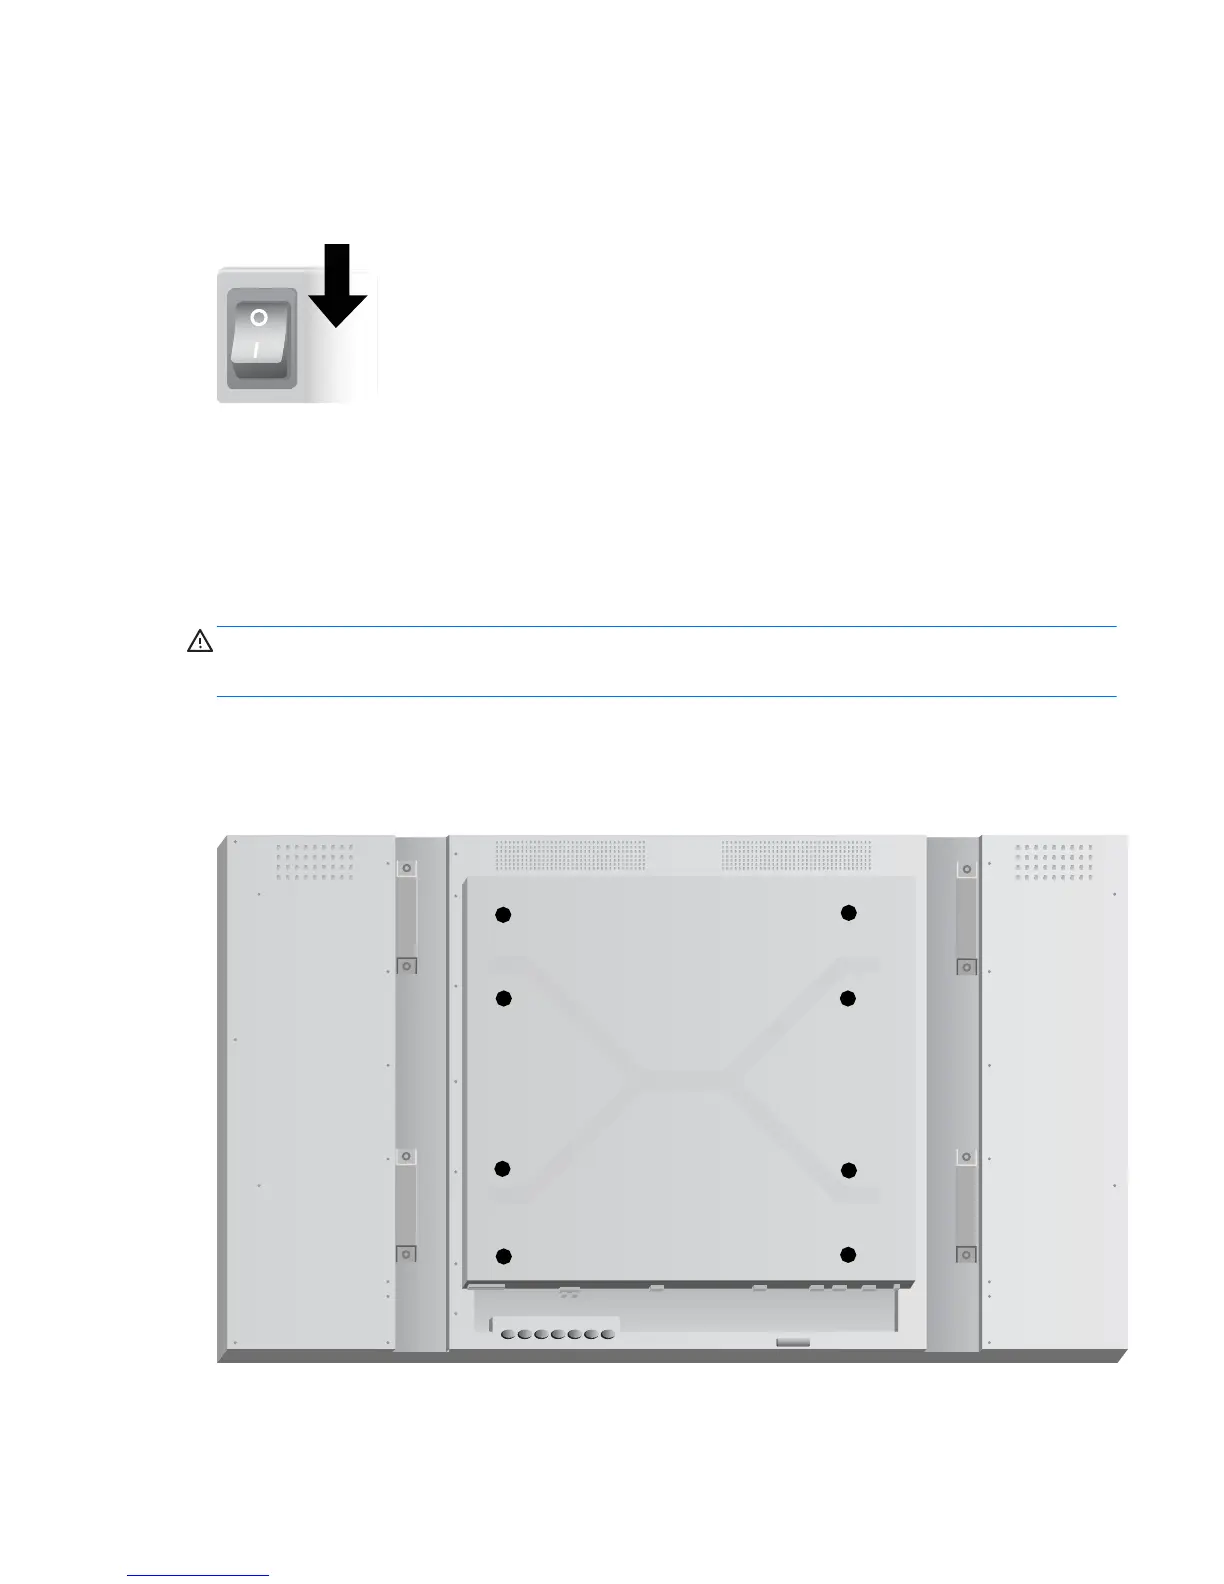
This product supports a VESA FDMI (Video Electronics Standards Association Flat Display Mounting
Interface)-compliant mounting device. The mounting devices can be purchased separately from HP.
Two hole patterns are available, holes on 400 mm centers (1) and holes at 400 mm x 200 mm (2).
Figure 3-40 VESA mounting holes
1
22
1
2
1
1
2
It is recommended that the 400 mm x 400 mm mounting pattern be used whenever possible.
ENWW Mounting the display 27
 Loading...