EasyManuals Logo

HP Omnibook XE3 Service Manual

HP Omnibook XE3
116 pages
To Next Page IconTo Next Page
To Previous Page IconTo Previous Page
Page #41 background imageLoading...
Page #41 background image
HP Omnibook XE3 (Technology Codes GE and GD) Removal and Replacement 2-19
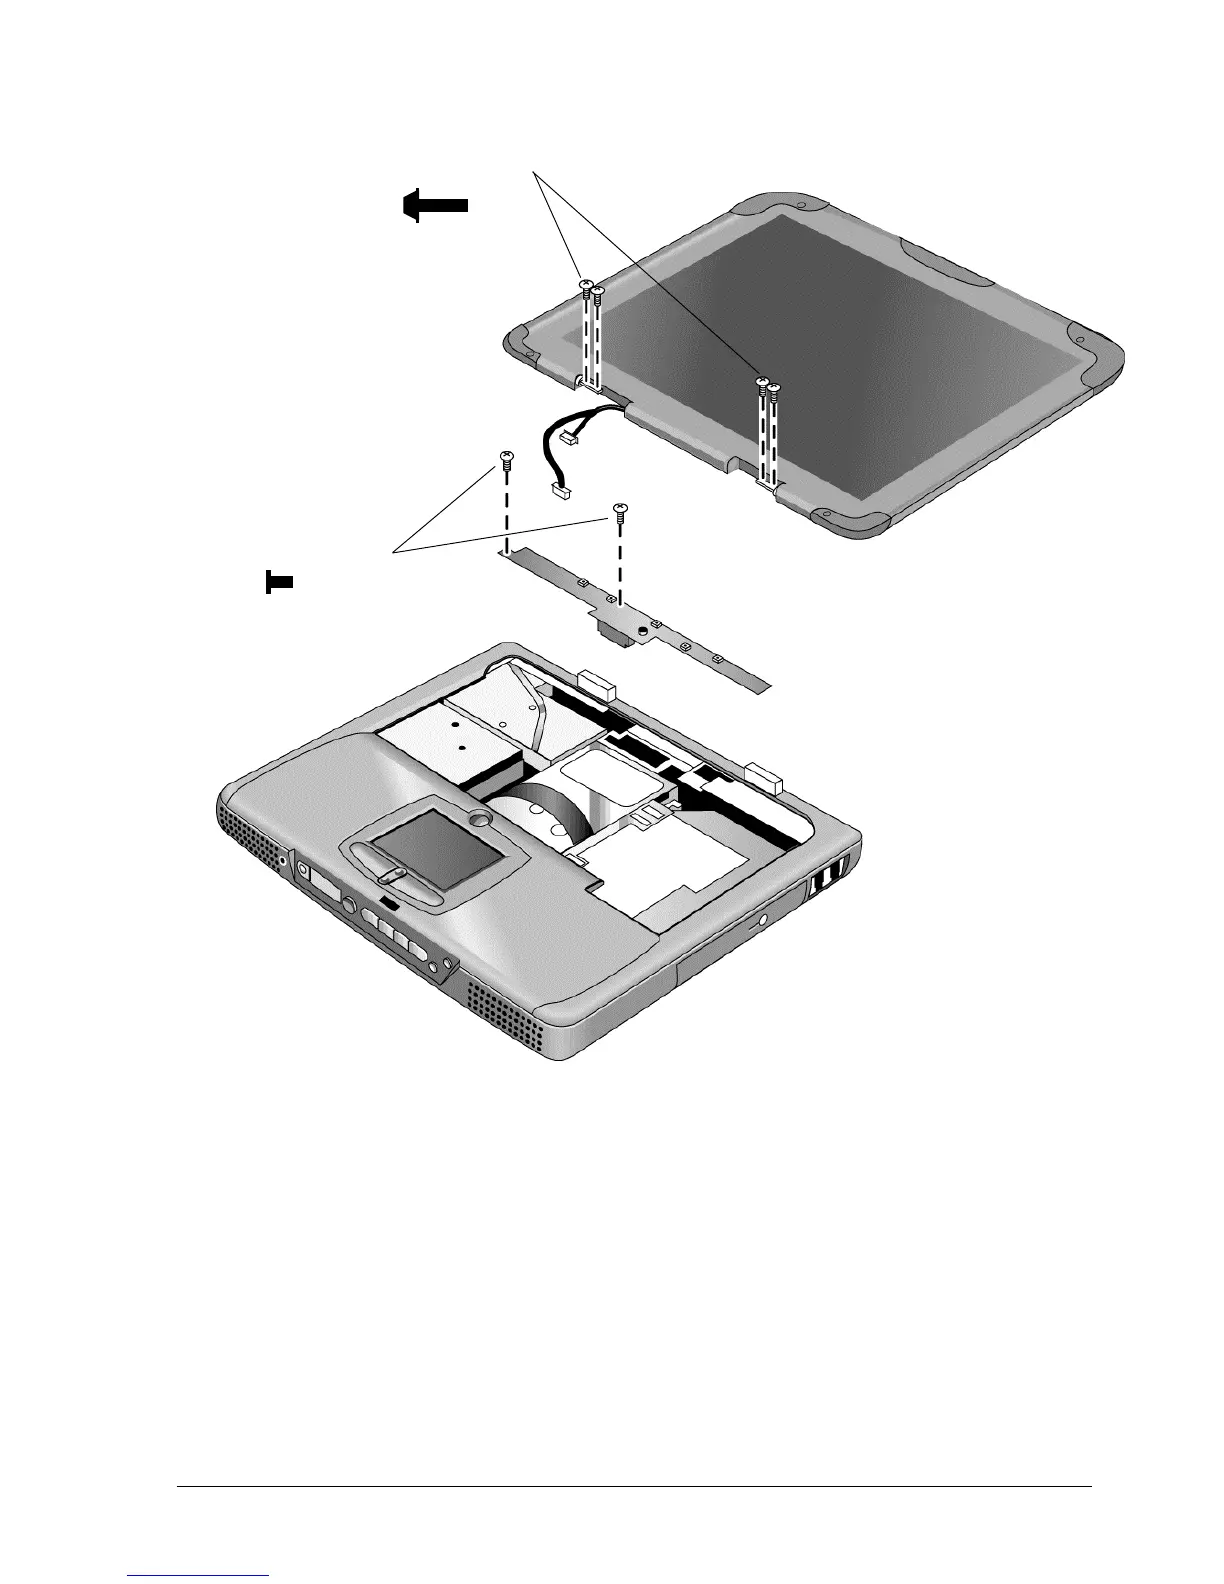
Figure 2-12. Removing the Display
Reassembly Notes
While installing the hinge screws, support the display so that it remains approximately flat.
Before installing the switchboard PCA, make sure the large display cable lies within the notch in
the hinge saddle.
When installing a new display assembly, follow the procedure given in “Installing a New Display
Assembly“ on the following page.
Screws,
M2.5x4 mm
(
2
)
Screws (flanged)
M2.5x8 mm (4)

Table of Contents

Other manuals for HP Omnibook XE3

Questions and Answers:

Question and Answer IconNeed help?

Do you have a question about the HP Omnibook XE3 and is the answer not in the manual?

HP Omnibook XE3 Specifications

General IconGeneral
BrandHP
ModelOmnibook XE3
CategoryLaptop
LanguageEnglish

Related product manuals