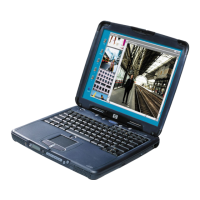
2-40 Removal and Replacement HP Omnibook XE3 (Technology Codes GE and GD)
Removing Notebook Components
(HP Authorized Service Providers Only)
Required Equipment
•
#0 Phillips screwdriver.
•
Small flat-blade screwdriver.
•
5 mm hexagonal socket screwdriver.
Removal Procedure
1.
Unplug the AC adapter, if present, and remove the battery.
2.
Remove the assemblies and follow the additional steps given in the table below.
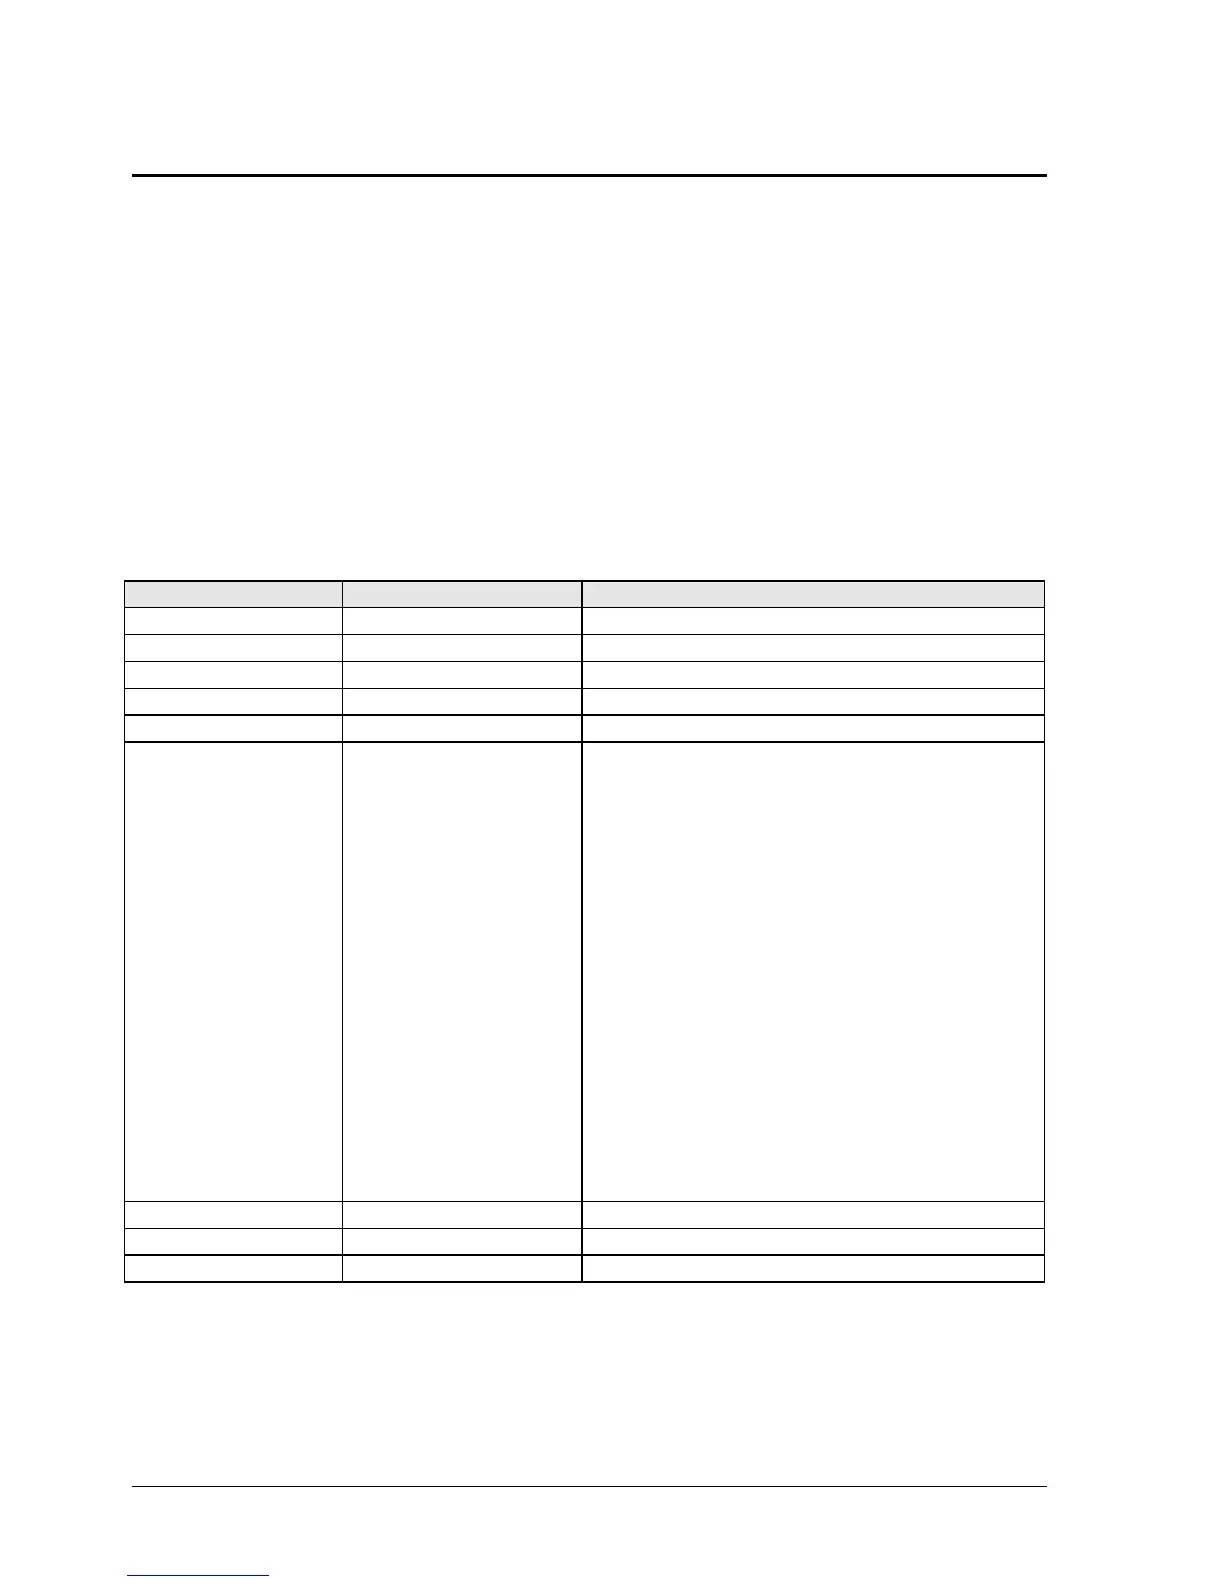
Table 2-11. Removing Notebook Components
Component Removal Procedure Additional Steps
Case, bottom
See page 2-35.
Case, top
See page 2-22.
Cover, keyboard
See page 2-10.
CPU module
See page 2-30.
Display assembly
See page 2-18.
Doors, PCMCIA
Mini-PCI PCA (page 2-7).
Keyboard cover
(page 2-10).
Keyboard (page 2-12).
Hard disk drive
(page 2-14).
Display assembly
(page 2-18).
Top case (page 2-22).
Hinge saddle set
(page 2-25).
Video PCA (page 2-27).
Heatsink assembly
(page 2-29).
CPU module (page 2-30).
Floppy disk drive
(page 2-32).
CD/DVD drive
(page 2-34).
Motherboard (page 2-35).
See the figure on page 2-38.
Drive, CD/DVD
See page 2-34.
Drive, floppy disk
See page 2-32.
Heatsink assembly
See page 2-29.
 Loading...