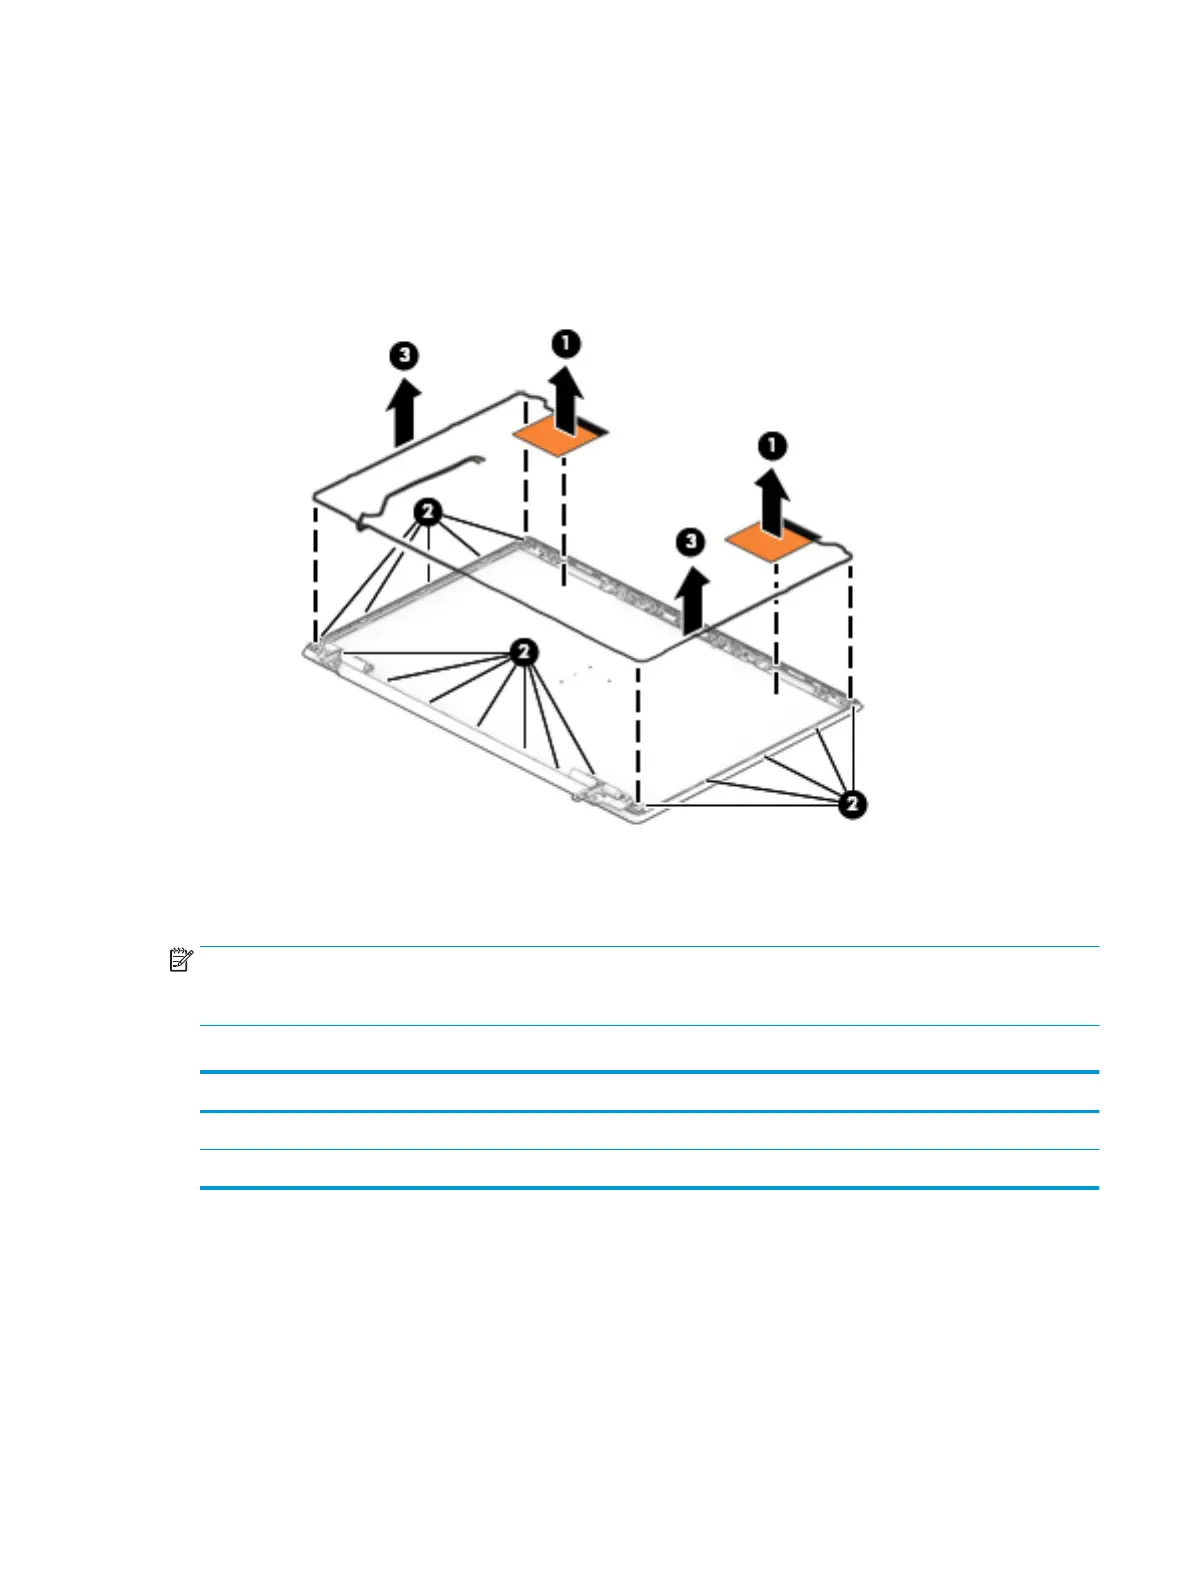
a. Detach the wireless antenna transceivers (1) from the display enclosure. (The wireless antenna
transceivers are attached to the enclosure with double-sided adhesive.)
b. Release the wireless antenna cables from the retention clips and routing channels built into the sides
of the display enclosure (2).
c. Remove the antennas from the display enclosure (3).
The wireless antenna cables and transceivers are available using spare part number L19179-001.
Reverse this procedure to reassemble and install the display assembly.
Hard drive
NOTE: The hard drive spare part kit does not include the hard drive bracket or the hard drive cable. The hard
drive bracket is available using spare part number L19469-001. The hard drive cable is available using spare
part number L19172-001
Table 5-3 Hard drive description and spare part number information
Description Spare part number
1-TB, 5400-rpm, SATA, 7.0 mm 762990-005
500-GB, 5400-rpm, SATA, 7.0 mm 778186-005
Before removing the hard drive, follow these steps:
1. Shut down the computer. If you are unsure whether the computer is o or in Hibernation, turn the
computer on, and then shut it down through the operating system.
2. Disconnect all external devices connected to the computer.
3. Disconnect the power from the computer by rst unplugging the power cord from the AC outlet, and then
unplugging the AC adapter from the computer.
Component replacement procedures 63
 Loading...