Heat sink
NOTE: The heat sink spare part kit includes replacement thermal material.
Table 5-14 Heat sink description and spare part number information
Description Spare part number
Heat sink for use only on computer models equipped with a graphics subsystem with discrete memory L19156-001
Heat sink for use only on computer models equipped with a graphics subsystem with UMA memory and 7th
generation Intel Core processors
L19157-001
Heat sink for use only on computer models equipped with a graphics subsystem with UMA memory and 8th
generation Intel Core processors
L19158-001
Before removing the heat sink, follow these steps:
1. Turn o the computer. If you are unsure whether the computer is o or in Hibernation, turn the computer
on, and then shut it down through the operating system.
2. Disconnect the power from the computer by rst unplugging the power cord from the AC outlet, and then
unplugging the AC adapter from the computer.
3. Disconnect all external devices from the computer.
4. Remove the bottom cover (see Bottom cover on page 51).
5. Remove the battery (see Battery on page 53).
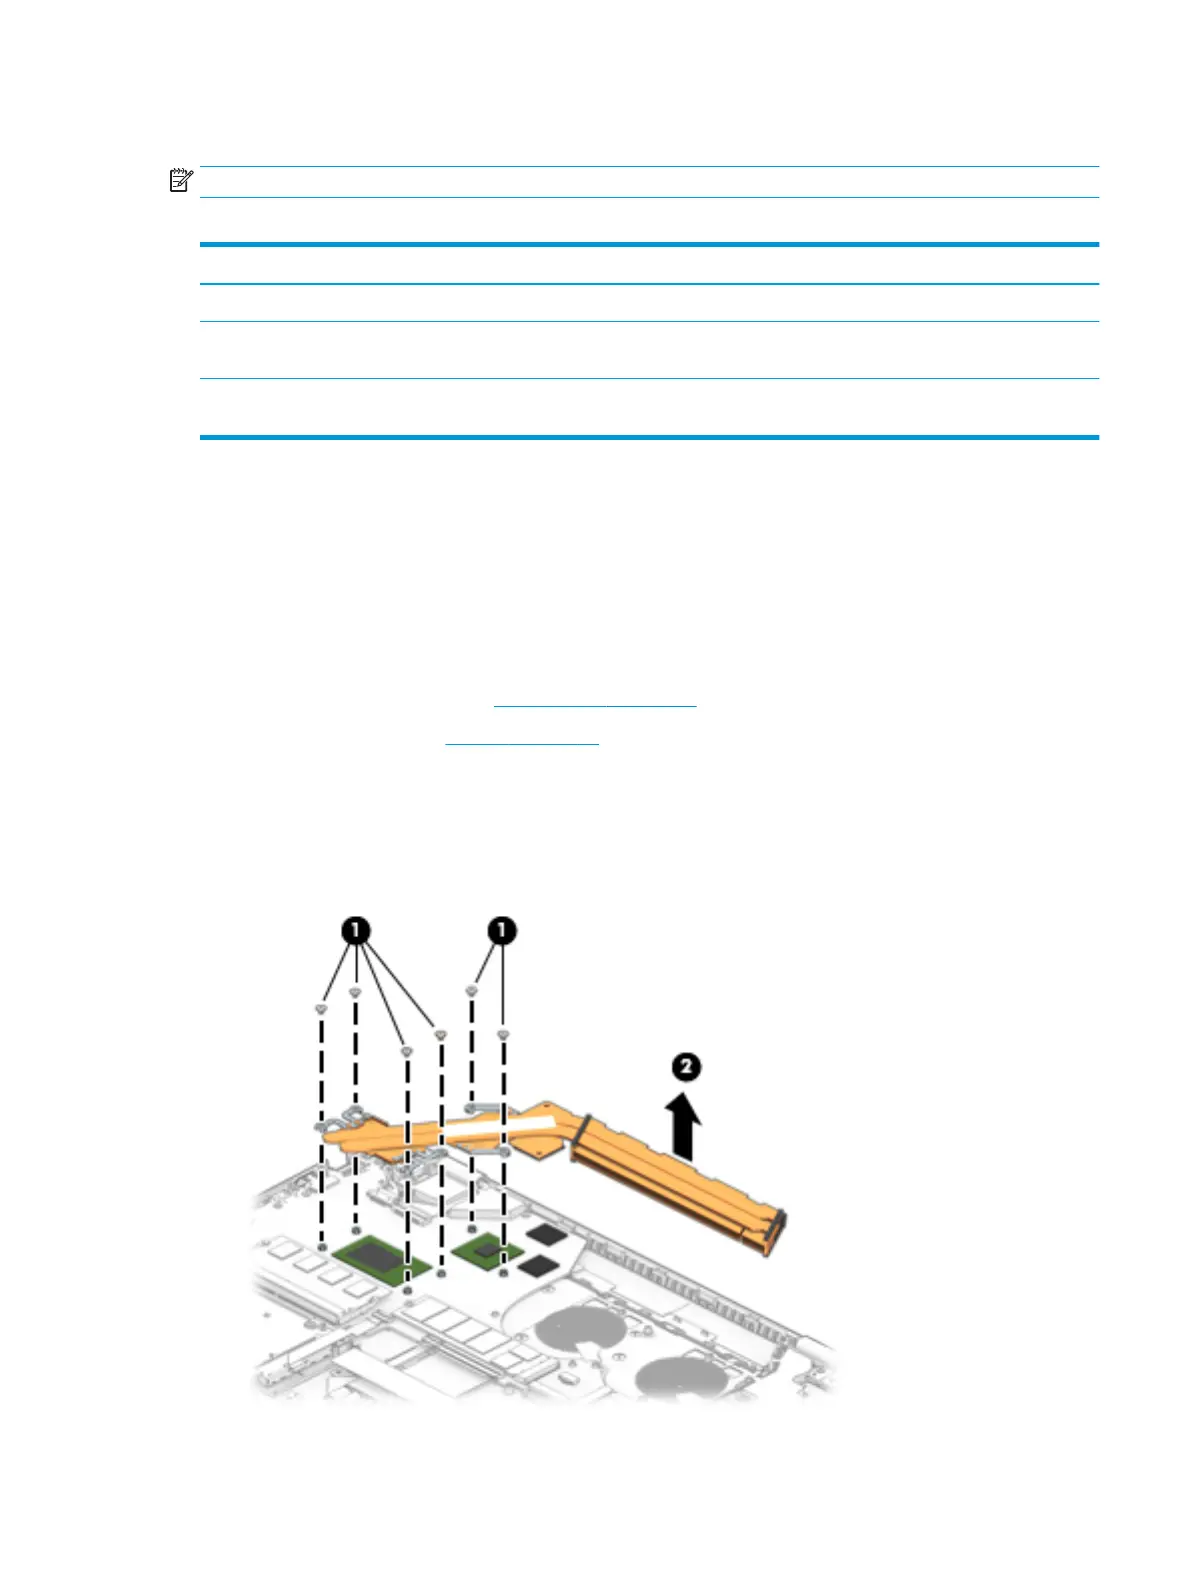
Remove the heat sink:
1. Discrete graphics: In the order indicated on the heat sink, remove the six Phillips M2.0×2.5 screws (1) that
secure the heat sink to the system board.
2. Remove the heat sink (2).
Component replacement procedures 81
 Loading...