Display assembly
NOTE: The display assembly is spared at the subcomponent level. For display assembly spare part
information, see the individual removal subsections.
Before removing the display assembly, follow these steps:
1. Prepare the computer for disassembly (Preparation for disassembly on page 34).
2. Remove the bottom cover (see Bottom cover on page 34).
3. Remove the battery (see Battery on page 37).
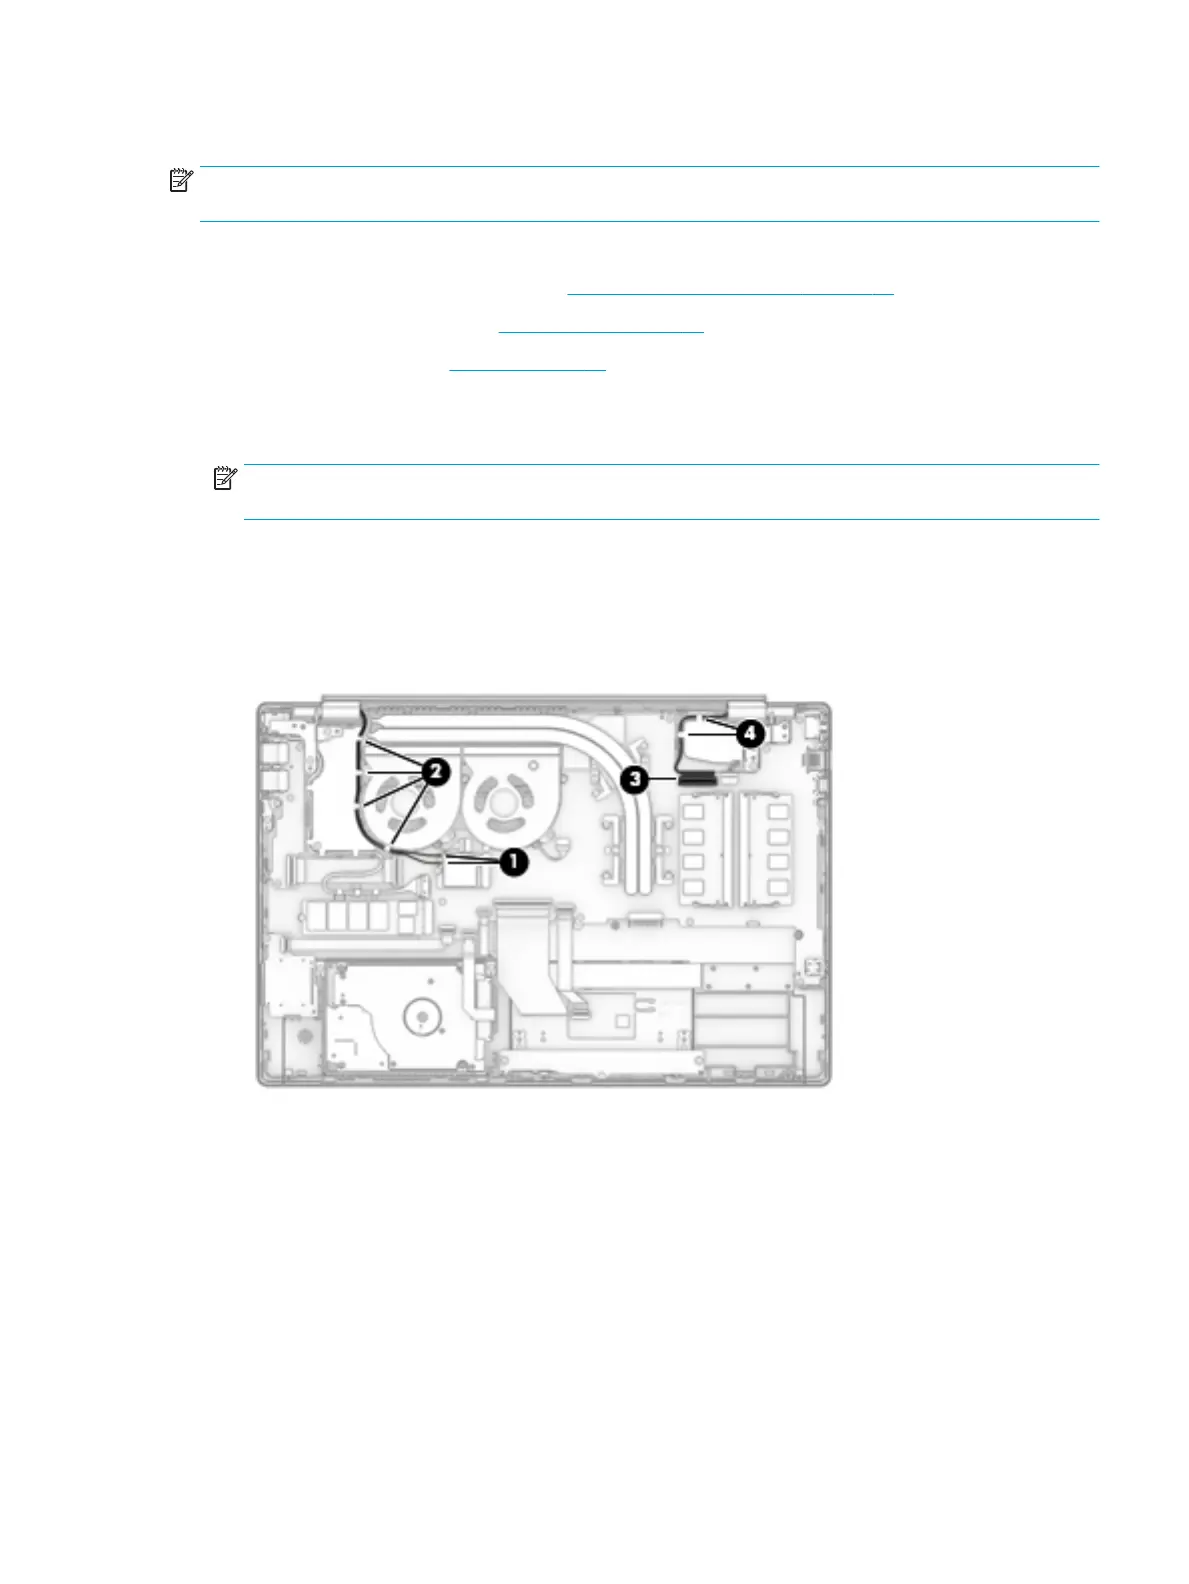
Remove the display assembly:
1. Disconnect the WLAN antenna cables (1) from the terminals on the WLAN module.
NOTE: The WLAN antenna cable labeled "1/MAIN" connects to the WLAN module "Main" terminal. The
WLAN antenna cable labeled "2/AUX" connects to the WLAN module "Aux" terminal.
2. Release the WLAN antenna cables from the retention clips and routing channel built into the right
speaker (2).
3. Disconnect the display cable from the system board ZIF connector (3).
4. Release the display panel from the retention clips and routing channel built into the left speaker (4).
5. Remove the four Phillips M2.5 × 6.0 screws (1) that secure the display assembly to the computer.
6. Open the display to open the hinges (2).
Component replacement procedures 39
 Loading...