2-14
Installing the Switch
Installation Procedures
Installing the Switch
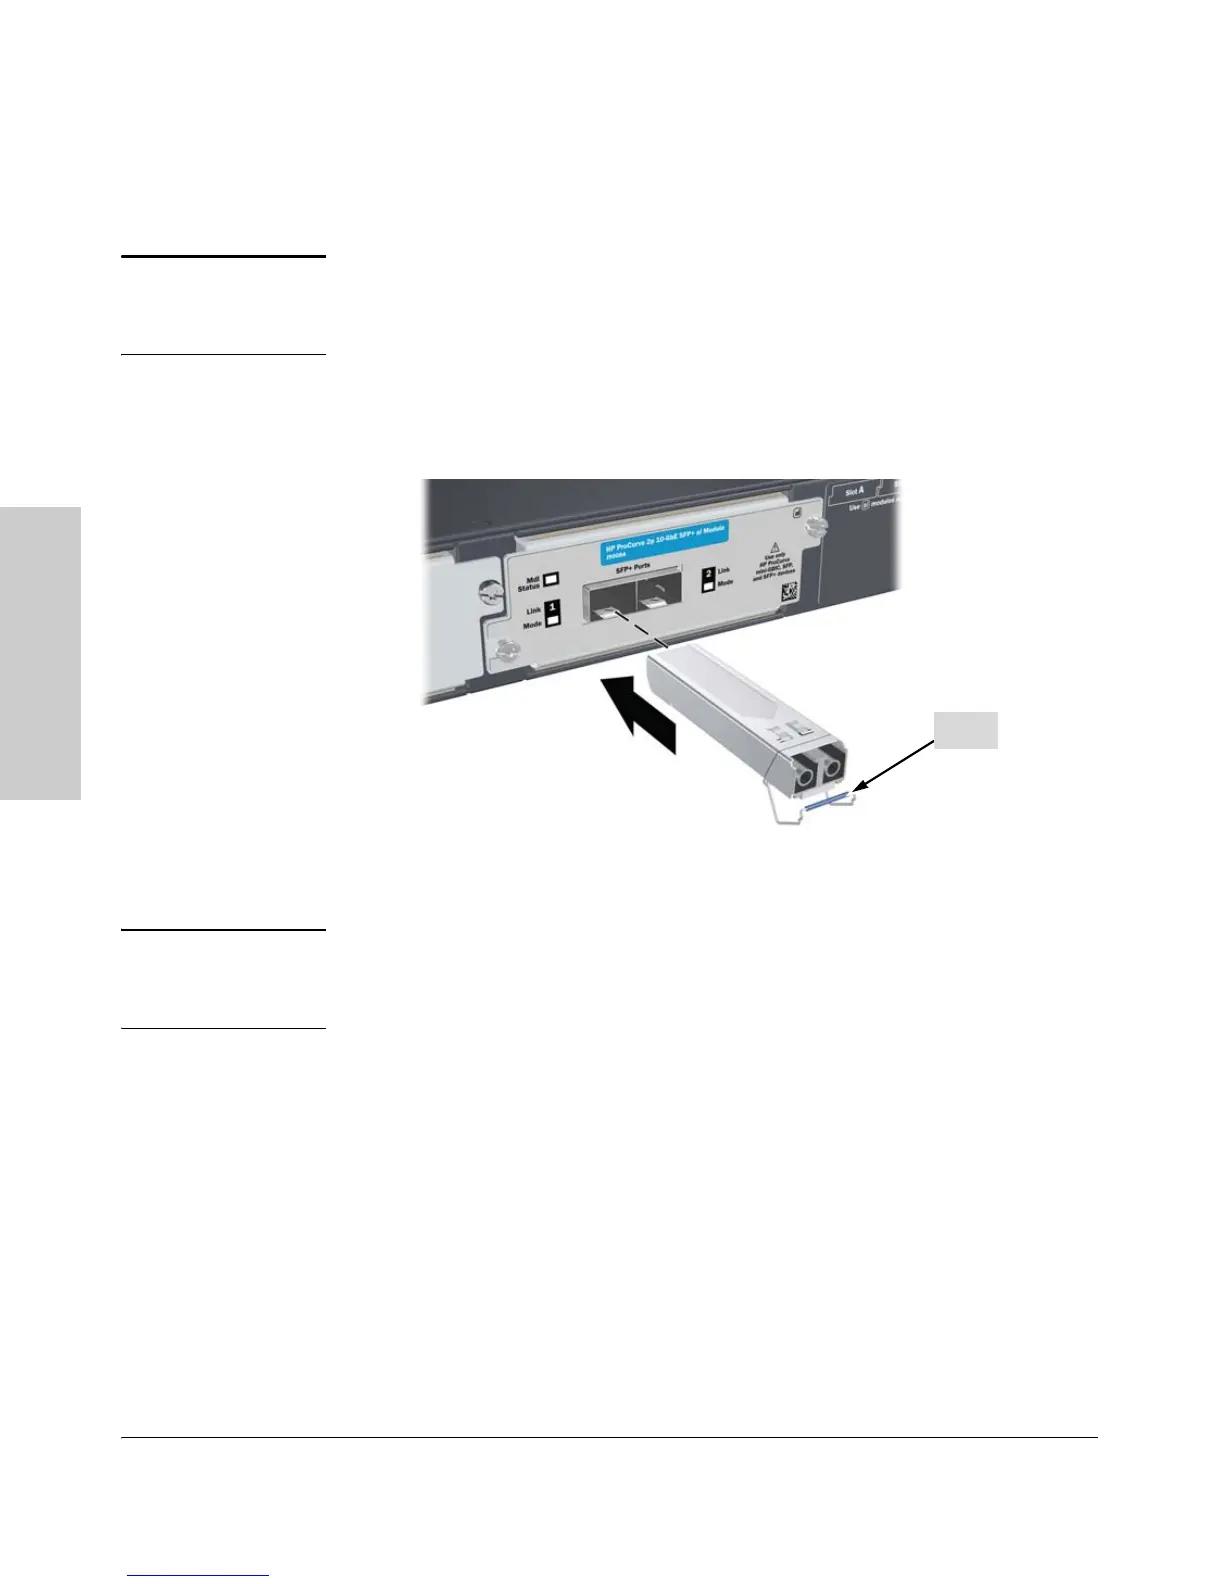
5. (Optional) Install a Transceiver
Note Hot swapping transceivers is supported. You can install or remove a
transceiver with the switch powered on, a reset will not occur. However, rapid
hotswaps are not recommended. Wait 5 seconds between hotswaps.
a. Slide the transceiver in until it stops.
b. Push firmly until the gasket seats against the bulkhead.
Figure 2-11. Installing a transceiver
Note When switch power is on, the Link and Activity LEDs will come on for
approximately two seconds and then go off. This is confirmation the
transceiver is completely seated.
c. If your transceiver has a bail, move the bail up, if not your transceiver is
now completely installed.
To remove the transceiver:
If your transceiver has a bail, lower the bail until it is approximately horizontal,
and then using the bail, pull the transceiver from the slot. If your transceiver
does not have a bail, pull the transceiver straight out.
Bail
 Loading...