Rack Installation
171U Rackmount Tape Enclosure Reference Guide
Caution: It is important to install rack components level. To ensure that the 1U
tape enclosure is installed correctly it may be necessary to measure the height
of the correct mounting holes in the front and rear vertical mounting bars.
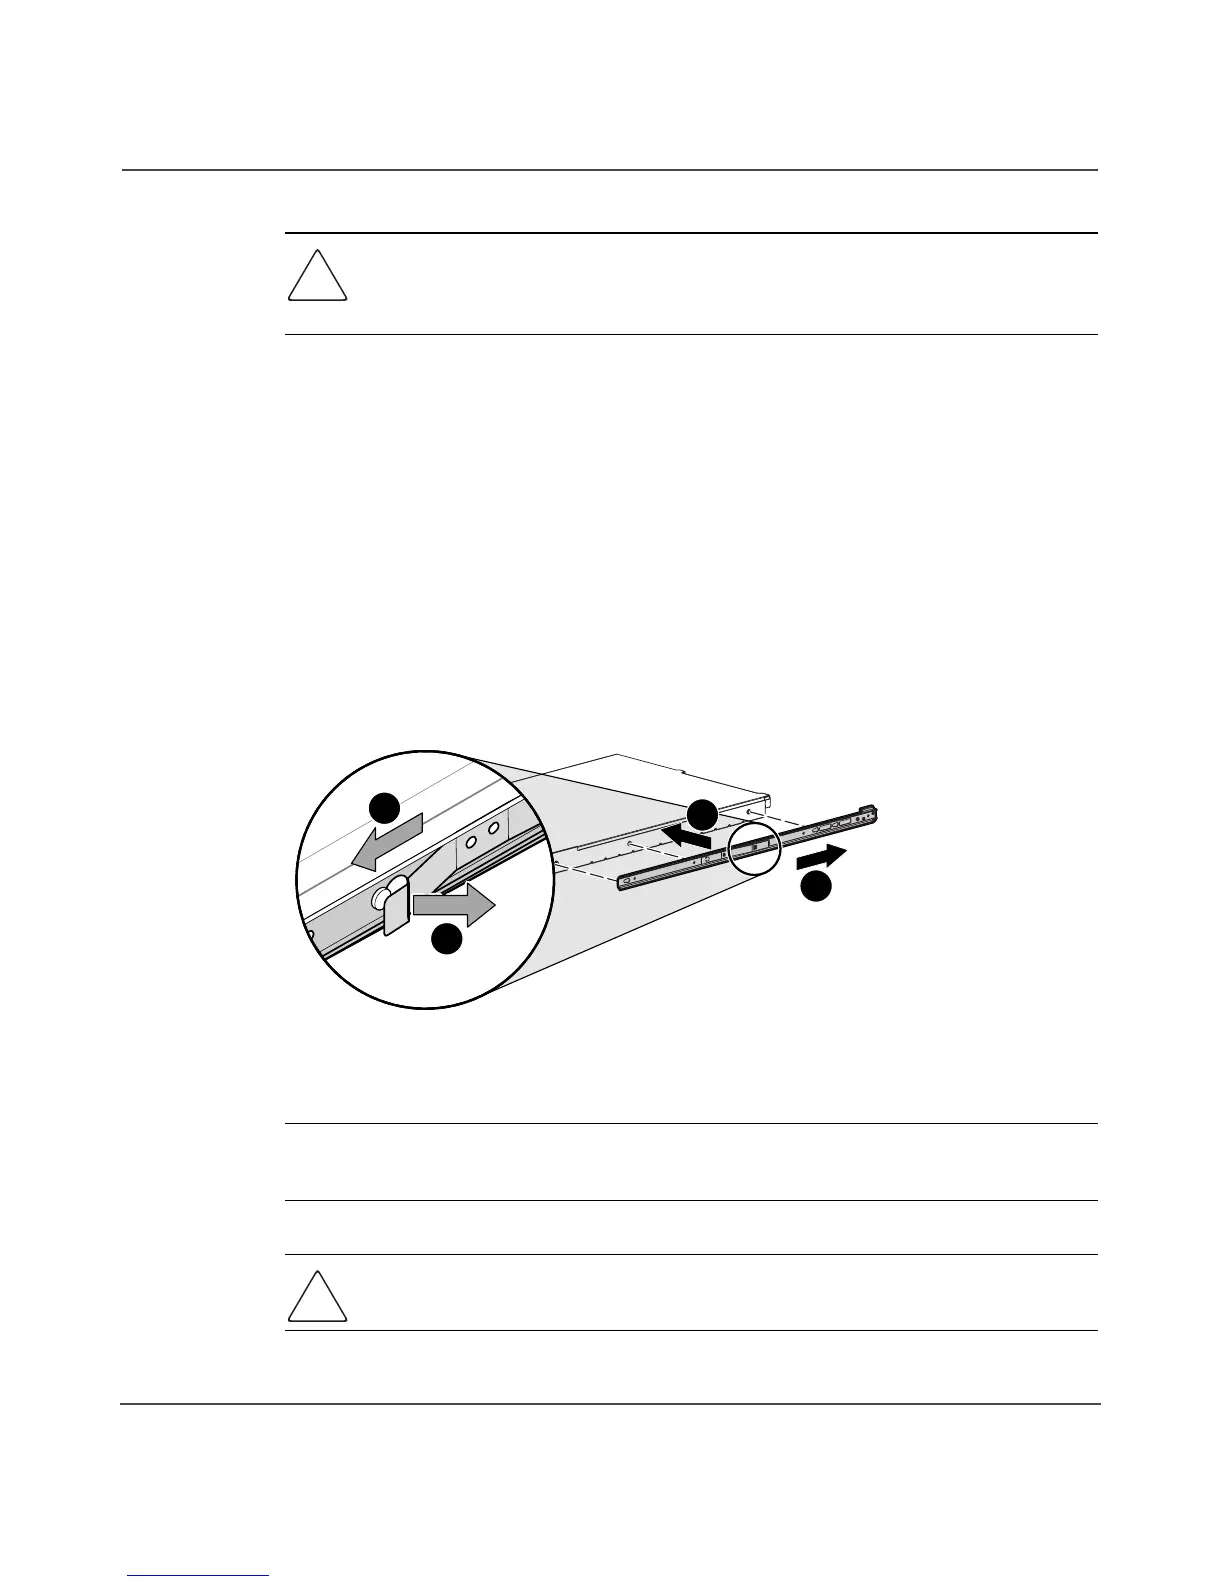
Installing the component rails
Component rails are the inner portion of the rack rail system that attached to the
tape enclosure.
1. Align the slotted holes on the left and right component rails with the three
pins on the sides of the enclosure 1. See Figure 6.
2. Slide the component rails toward the rear of the enclosure 2 until they lock
into place.
Figure 6: Attaching the component rails to the enclosure
Note: To remove the component rail, pull out the spring-loaded tab 3 on the side of
the rail and slide it forward
4.
Caution: If you are returning the 1U Rackmount Tape Enclosure for service, be
sure to remove and save the component rails.
15118
2
3
4
1
 Loading...