ArcGlide THC Replacement Parts Field Service Bulletin 806560 13
2 – Replacing ArcGlide parts
Replacement procedures
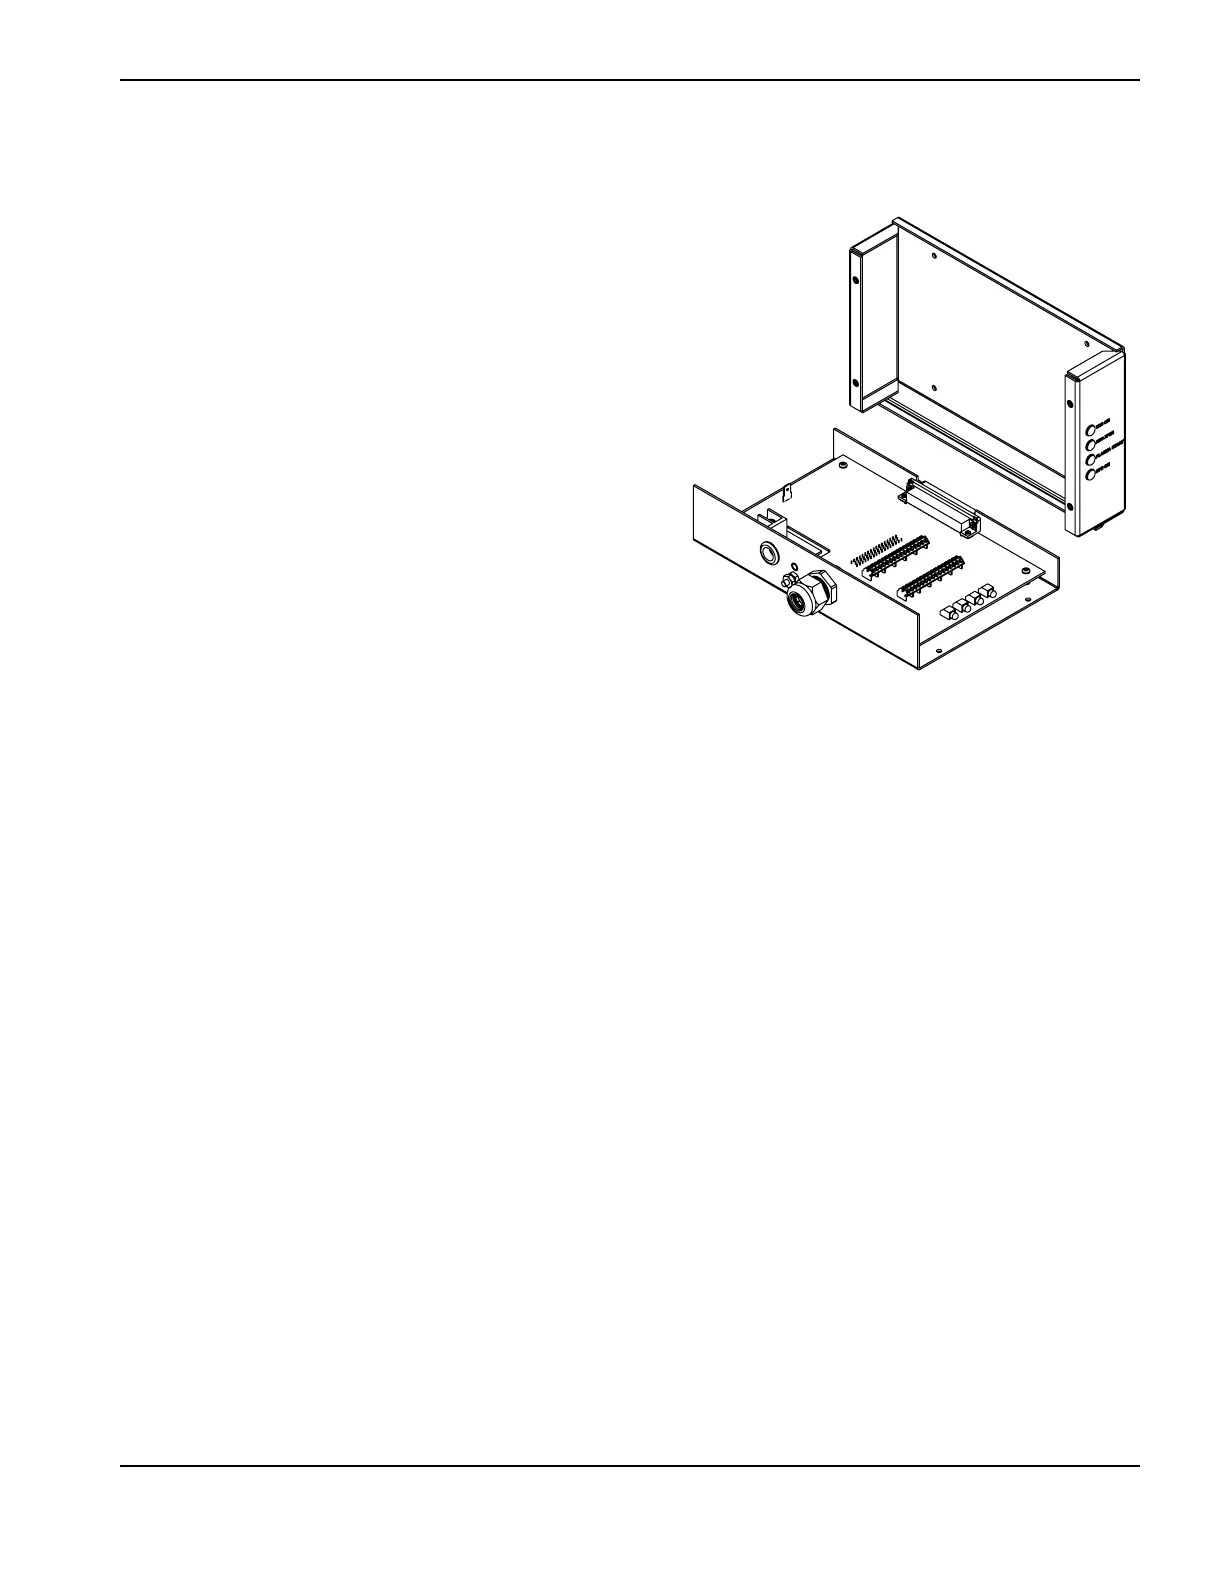
228576 – Plasma interface board
To remove the plasma interface board:
1. T
urn OFF power to the plasma system.
2. Inside the plasma system, remove the 4 screws from the
front of the plasma interface enclosure.
3. Label the wiring at terminal blocks J2 (inputs) and J3
(outputs) to insure that you can rewire them accurately.
4. Disconnect all wires from terminal blocks J2 and J3, the
work and electrode wires from J4, and the ground wire
connector.
5. Remove the 2 standoffs next to each of the two D-sub
connectors on the front and bottom of the enclosure.
6. Remove the 4 screws from the standoffs at the corners of
the plasma interface board.
To replace the plasma interface board:
1. Place the new plasma interface board over the 4 standoffs and fasten the screws. Tighten the screws to 1.12 N·m
(10 lb·in.).
2. Fasten the screws to the standoffs next to each of the two D-sub connectors. Tighten the screws to 0.67 N·m
(6 lb·in.).
3. Fasten the ground wire to the grounding connector. Tighten the connector to 1.12 N·m (10 lb·in.).
4. Replace the work and electrode leads to the work and electrode terminal block (J4).
5. Using your labels, replace the input and output wires to the appropriate connectors on terminal blocks J2 and J3.
6. Replace the front of the enclosure and fasten the 4 screws. Tighten the screws to 1.12 N·m (10 lb·in.).
7. Restore power to the plasma system.
 Loading...