ArcGlide THC Replacement Parts Field Service Bulletin 806560 17
2 – Replacing ArcGlide parts
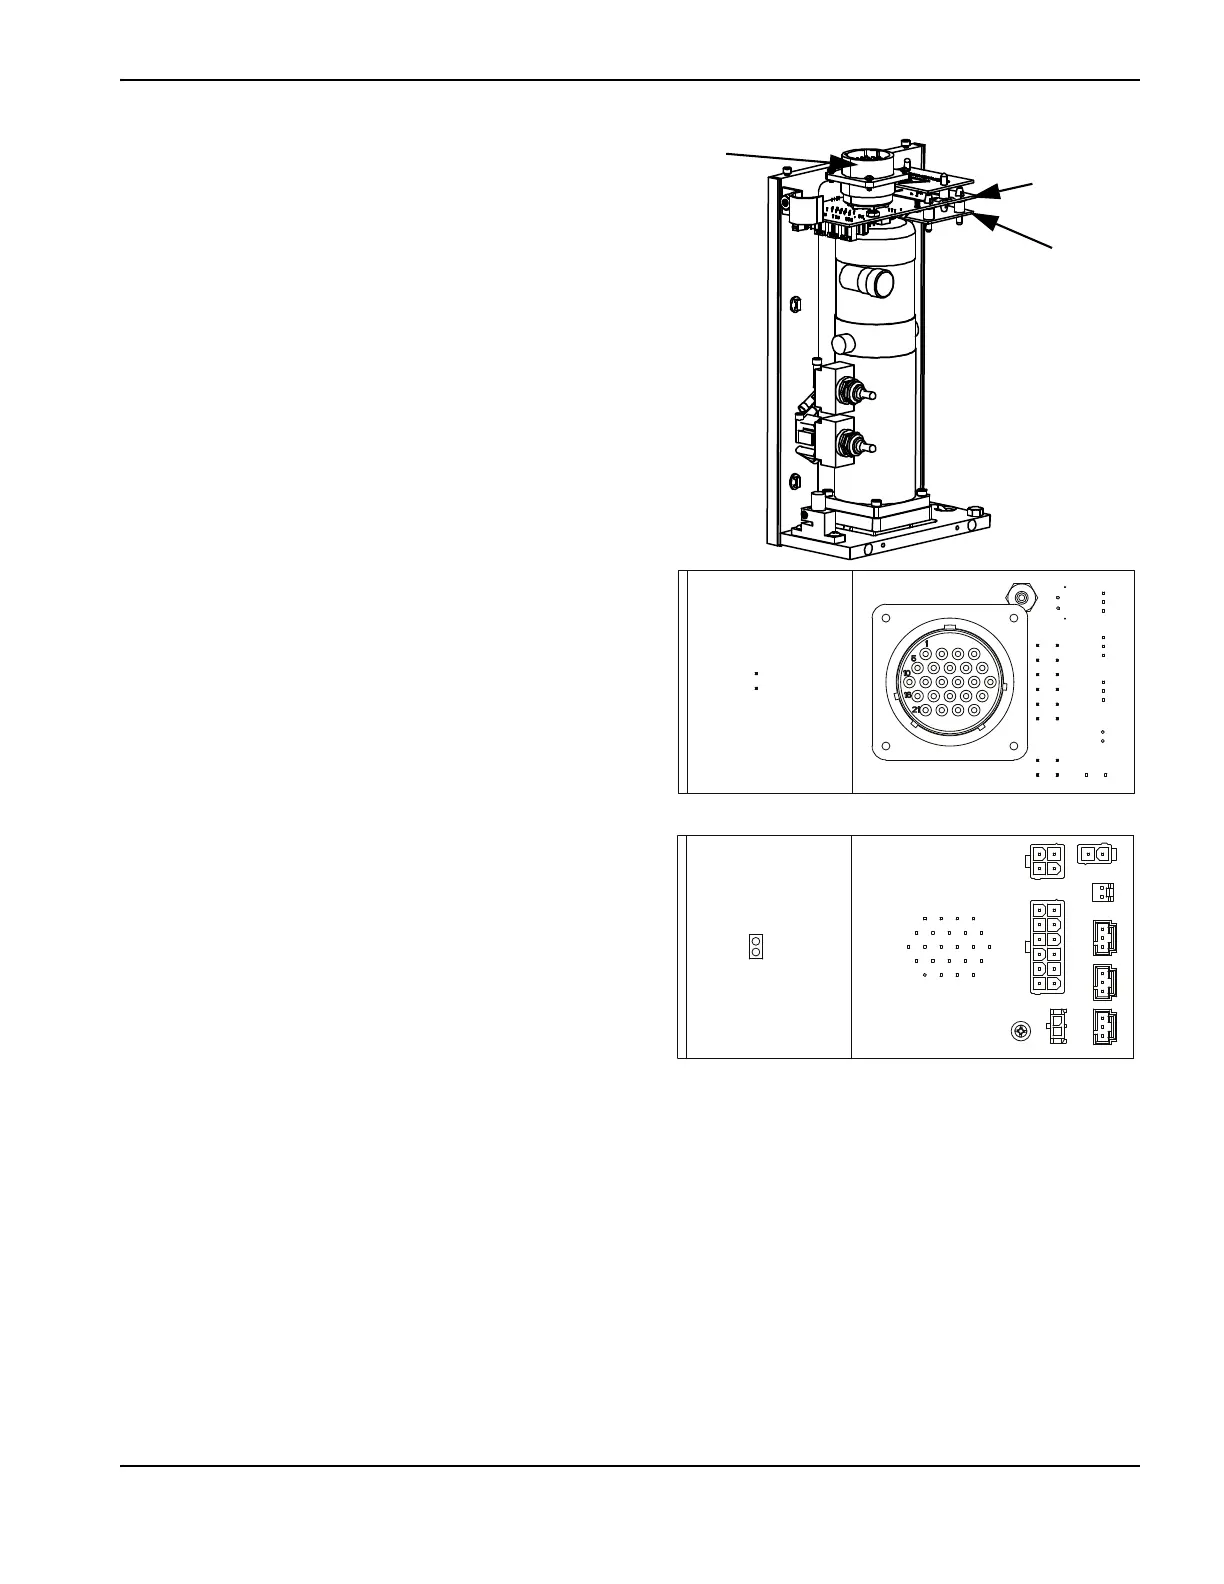
228580 – Lifter interface board
Follow the steps in Accessing lifter parts on page 12 to open
the front cover of the motor enclosure. Set aside all screws and
othe
r hardware for reuse.
To remove the lifter interface board:
1. Remove the
top of the motor enclosure by unfastening the
3 screws on the top of the enclosure and setting them
aside.
2. Remove all cable connectors from the lifter interface board,
except for the connector for the ohmic contact wire in J5.
3. Remove the bottom panel of the board assembly. This
panel has Danger High-Voltage printed on the bottom side.
Use needle-nose pliers to depress the tabs on the
standoffs.
4. Remove the ohmic wire connector from J5.
5. Remove the 4 screws around the circular, lifter cable
connector.
6. Remove the 2 screws from the standoffs.
7. Pull the board from the standoffs.
To replace the lifter interface board:
1. Fit the new board over the standoffs and fasten the 2
screws into the standoffs. Tighten the screws to 1.13 N·m
(10 lb·in.).
2. Fasten the 4 screws around the circular connector. Tighten
the screws to 0.67 N·m (6 lb·in.).
3. Install the ohmic wire in terminal block J5 on the underside
of the lifter interface board.
4. Snap the bottom panel of the board assembly onto the plastic standoffs.
5. Replace the top cover of the motor enclosure and fasten the 3 screws. Tighten the screws to 1.13 N·m (10 lb·in.).
J5
J1
J2
J3
J4
J6
J7
J8J9
Lifter
interface
board
Lifter
cable
connector
Bottom panel
 Loading...