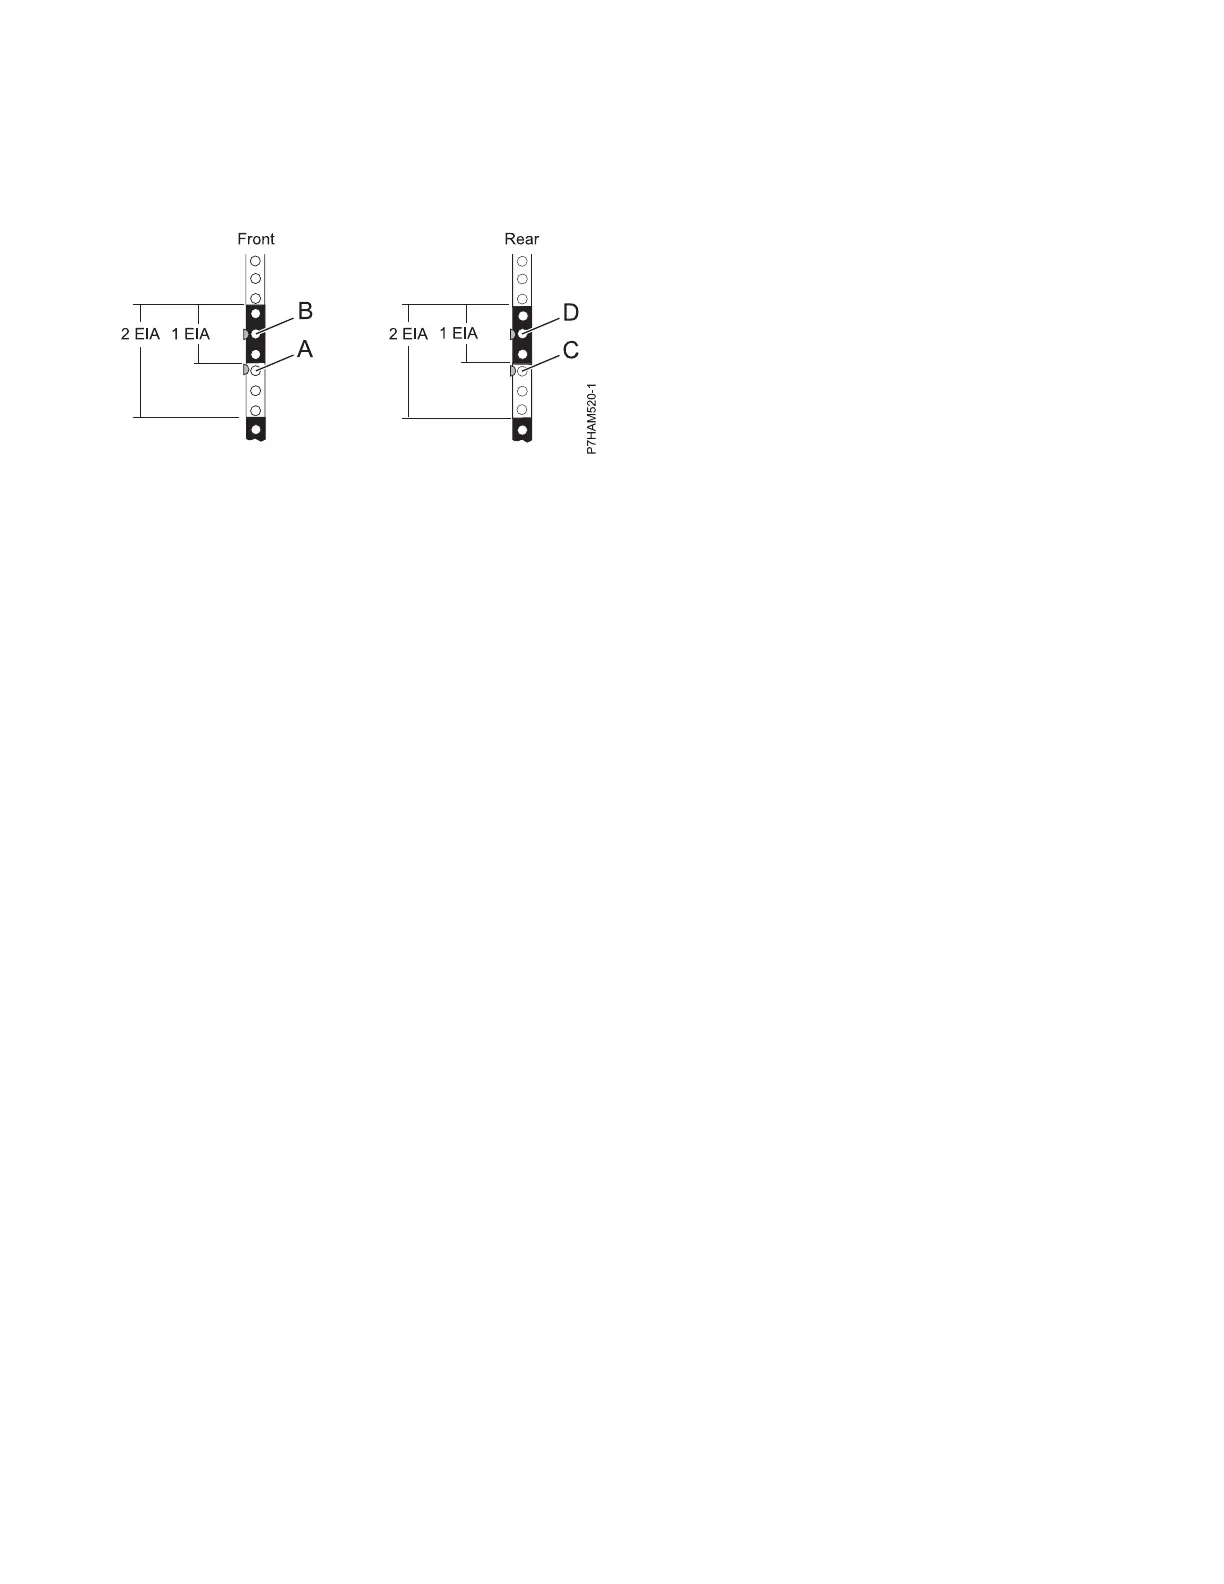
Note: Mark the rack so that these marks can also be seen from the rear of the rack.
c. Count up two holes and place another mark beside that mounting hole (B).
7. Repeat step 6 on page 3 to place two marks on the corresponding mounting holes on the front-right
side of the rack.
8. Go to the rear of the rack and work from the left side to complete the following steps:
a. Find the EIA unit that corresponds to the lowest EIA unit marked on the front of the rack.
b. Use tape, a marker, or a pencil to mark the top mounting hole (C) of the lowest EIA unit.
c. Count up two holes and place another mark beside that mounting hole (D).
9. Repeat step 8 to place two marks on the corresponding mounting holes on the rear-right side of the
rack.
Attaching the mounting hardware to the rack
Learn how to attach the mounting hardware to the rack and then install the rails into the rack. The
information is intended to promote safety and reliable operation, and includes illustrations of the related
hardware components and shows how these components relate to each other.
Attention: To avoid rail failure and potential danger to yourself and to the unit, ensure that you have
the correct rails and fittings for your rack. If your rack has square support flange holes or screw-thread
support flange holes, ensure that the rails and fittings match the support flange holes that are used on
your rack. Do not install mismatched hardware by using washers or spacers. If you do not have the
correct rails and fittings for your rack, contact your IBM reseller.
Important: The rail installation can be completed by one person. However, the installation is easier if one
person is positioned at the front of the rack and one person is positioned at the rear of the rack.
To install the mounting hardware into the rack, complete the following steps:
1. Ensure that you have the electrostatic discharge (ESD) wrist strap attached. If not, attach it now.
2. Select a rail and remove any parts that were taped to it for shipping.
3. Install the spring to the rail by hooking one end to the spring bracket (A) and the other end around
the circular standoff (B) as shown in Figure 3 on page 5.
Note: If your rack has the square mounting holes, remove the rail pins from the rail. Install the
larger rail pins that are provided with the rack installation kit.
Figure 2. Marking the installation locations
4 Power Systems: Installing the 5887 disk drive enclosure
 Loading...