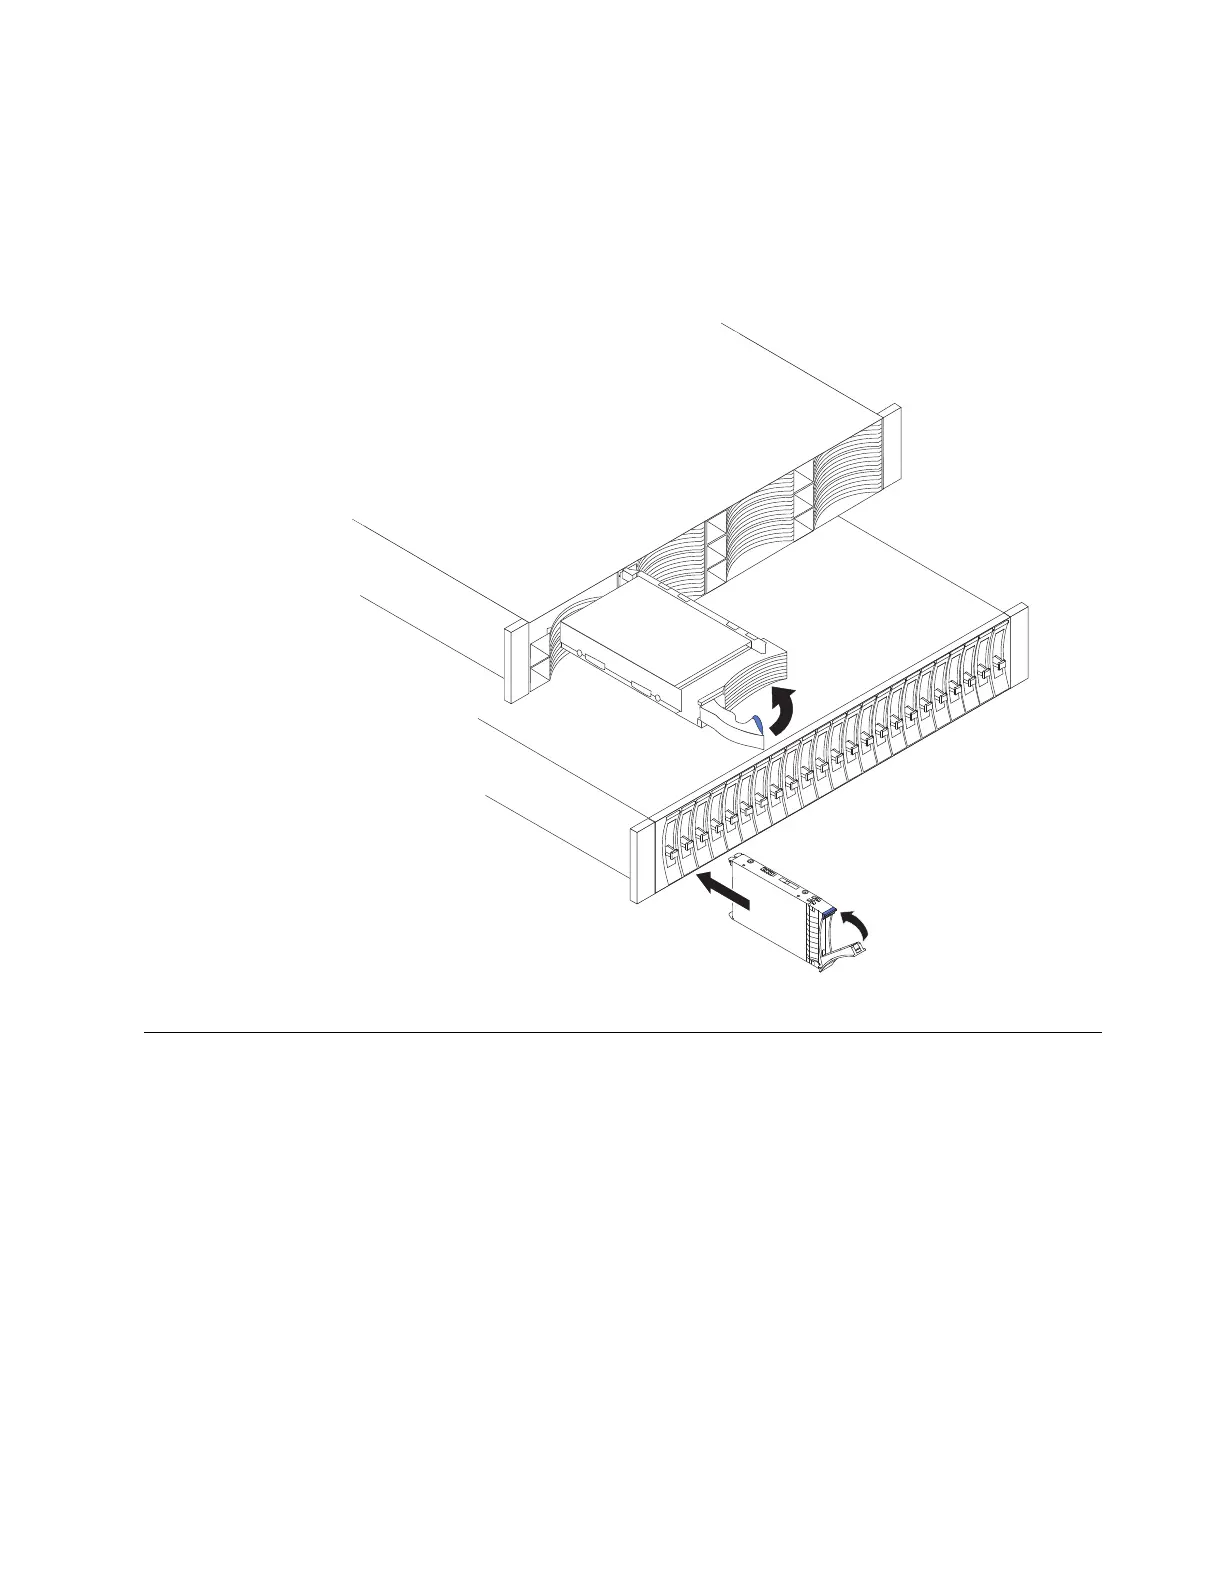
4. Install the drive in the empty slot as shown in Figure 27.
a. Ensure that the drive-tray handle is in the open (unlocked) position.
b. Align the drive assembly with the guide rails in the slot.
c. Gently push the drive assembly into the slot until the drive stops.
d. Rotate the drive handle to the closed (locked) position.
Connecting SAS cables to expansion enclosures
If you have installed expansion enclosures, you must connect them to a control
enclosure.
Before you begin
If you purchased disk drives that were not preinstalled for you, you must install
all of the drives before connecting the SAS cables to the expansion enclosures.
About this task
This task applies if you are installing one or more expansion enclosures. You can
attach up nine expansion enclosures to the control enclosure.
Note: When connecting SAS cables between enclosures, you must follow a list of
guidelines to ensure that your configuration is valid. Do not begin connecting the
cables until you have read the “SAS cabling guidelines” topic.
Figure 27. Installing a drive
Chapter 2. Installing the hardware 41
 Loading...