Attention: Make sure the port connectors on the adapter are aligned
properly with the chassis on the rear of the server. An incorrectly seated
adapter might cause damage to the system board or the adapter.
9. Fasten the thumbscrew.
10. Reinstall the PCI riser-card assembly in PCI riser connector 2 if you have
removed it previously (see “Installing a PCI riser-card assembly” on page 219).
11. Install the cover (see “Installing the cover” on page 206).
12. Slide the server into the rack.
13. Reconnect the power cords and any cables that you removed.
14. Turn on the peripheral devices and the server.
Removing an optional ServeRAID upgrade adapter
Before removing an optional ServeRAID upgrade adapter, complete the following
steps for correct configuration:
1. Boot to webbios and delete all configurations.
2. In controller properties of Webbios, reset to factory defaults.
3. Turn off AC power supply.
For more information about the MegaRAID, go to http://www-947.ibm.com/support/
entry/portal/docdisplay?lndocid=MIGR-5073015.
To remove an optional ServeRAID upgrade adapter, complete the following steps:
1. Read the safety information that begins on page vii and “Installation guidelines”
on page 191.
2. Turn off the server and peripheral devices and disconnect the power cords.
3. Remove the cover (see “Removing the cover” on page 205).
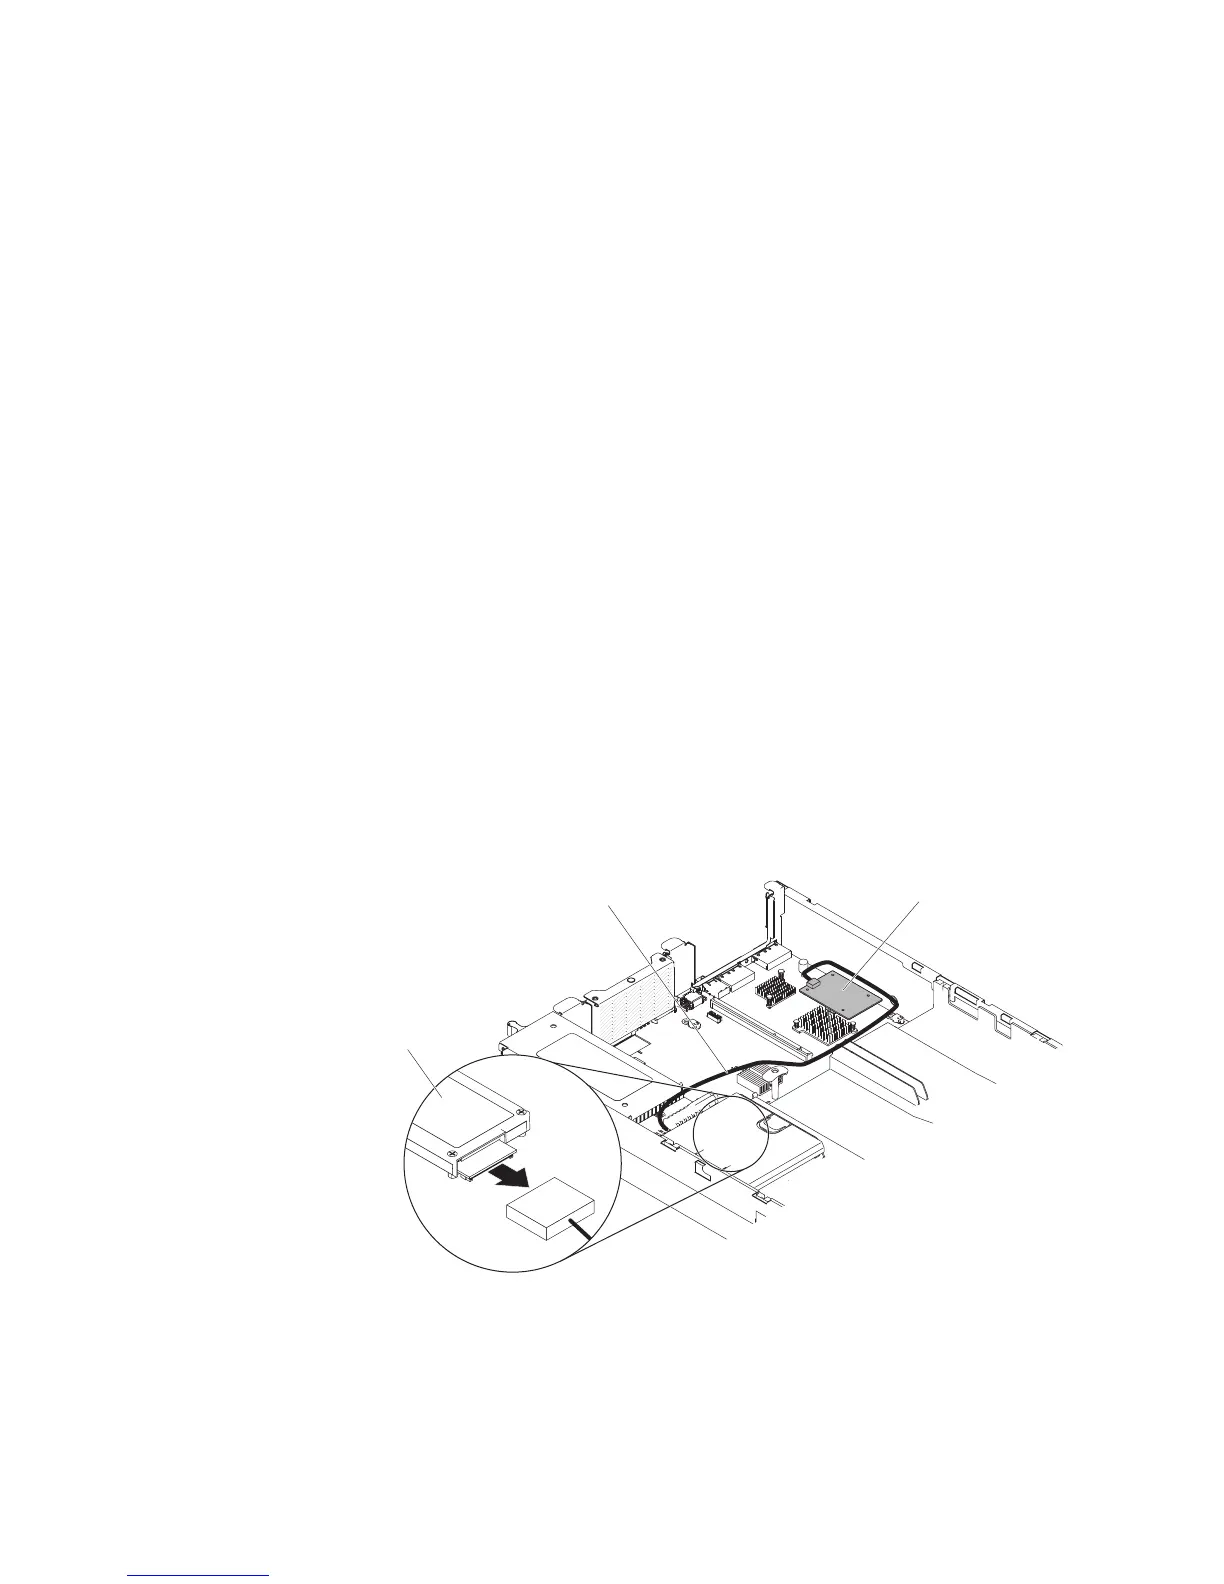
4. Disconnect the supercap cable from the battery.
Battery
Supercab cable
ServeRAID upgrade adapter
5. Remove the ServeRAID upgrade adapter and the three pegs from the system
board.
Chapter 5. Removing and replacing server components 229
 Loading...


