Removing a memory module (DIMM)
To remove a DIMM, complete the following steps.
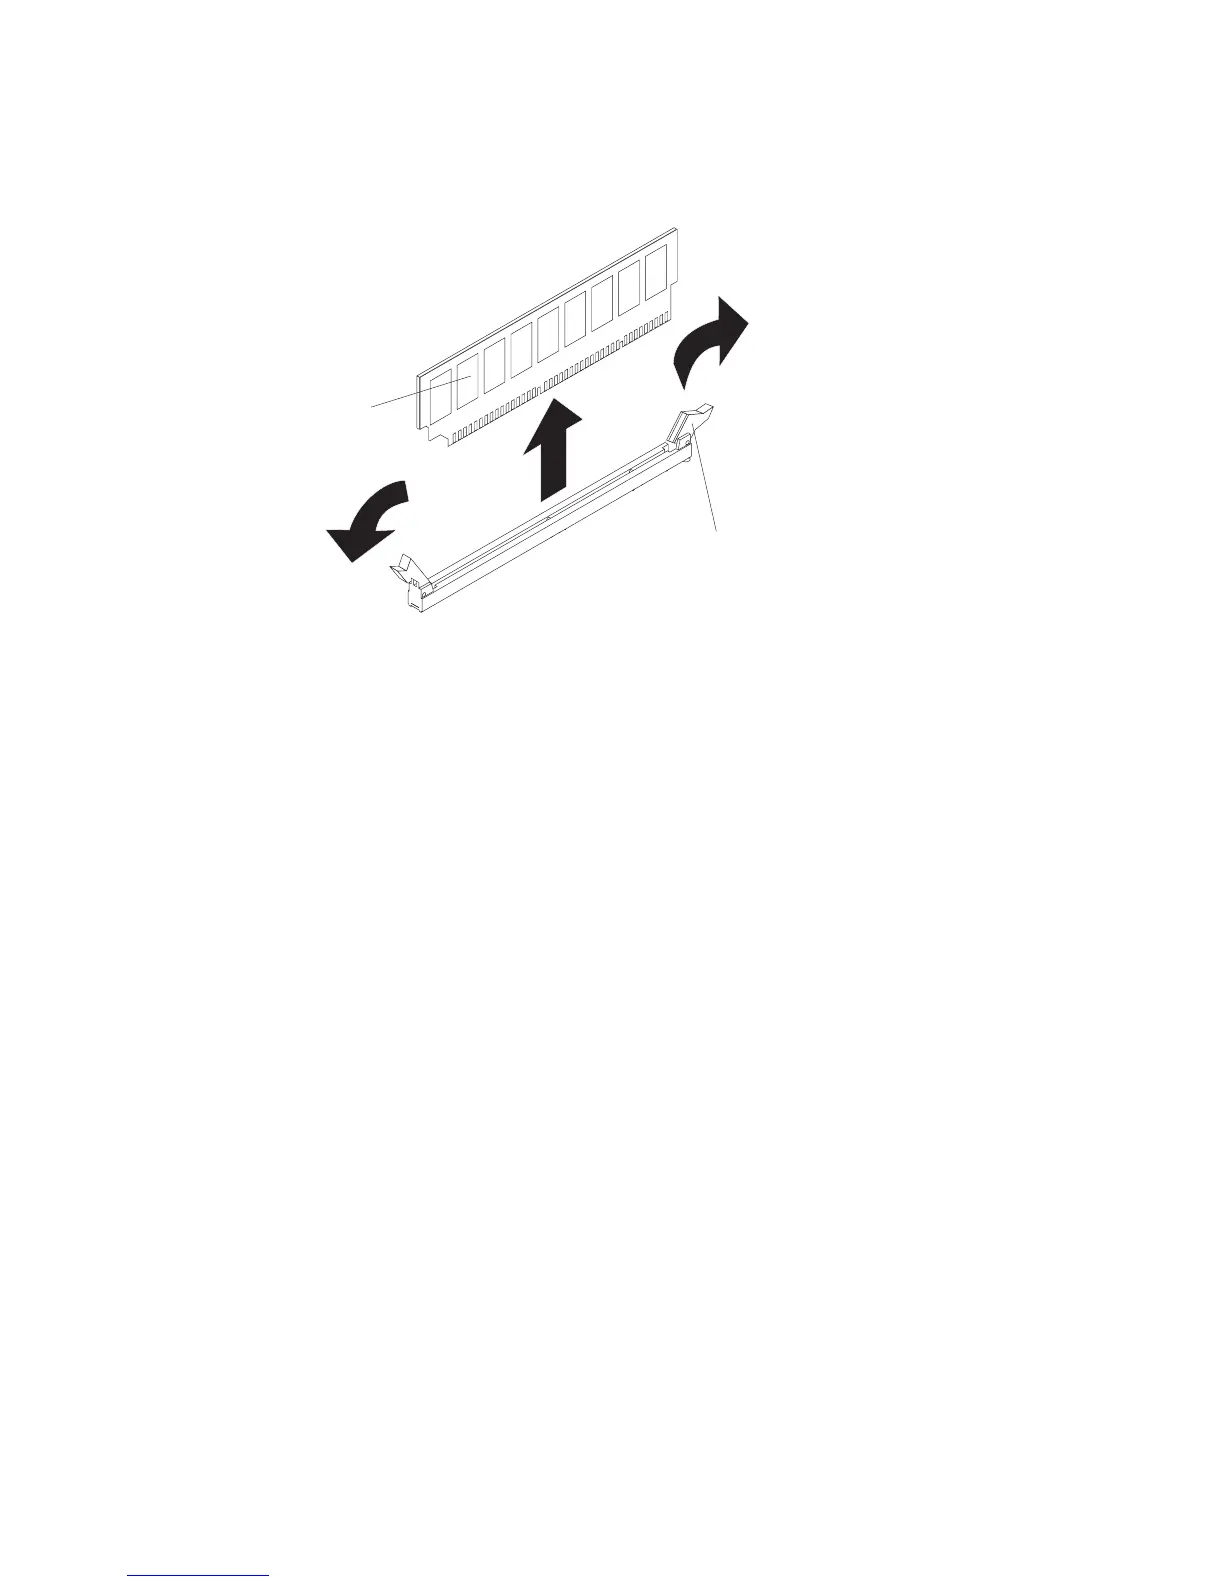
DIMM
Retaining
clip
1. Read the safety information that begins on page vii and “Installation guidelines”
on page 191.
2. Turn off the server and peripheral devices and disconnect all power cords and
external cables.
3. Slide the server out of the rack.
4. Remove the cover (see “Removing the cover” on page 205).
5. If riser-card assembly 1 contains one or more adapters, remove it (see
“Removing a PCI riser-card assembly” on page 218).
6. Remove the air baffle over the DIMMs (see “Removing the air baffle” on page
206).
Attention: To avoid breaking the retaining clips or damaging the DIMM
connectors, open and close the clips gently.
7. Open the retaining clip on each end of the DIMM connector and lift the DIMM
from the connector.
8. If you are instructed to return the DIMM, follow all packaging instructions, and
use any packaging materials for shipping that are supplied to you.
Installing a memory module
The following notes describe the types of DIMMs that the server supports and other
information that you must consider when you install DIMMs.
v When you install or remove DIMMs, the server configuration information
changes. When you restart the server, the system displays a message that
indicates that the memory configuration has changed.
v The server supports industry-standard double-data-rate 3 (DDR3), 1066, 1333, or
1600 MHz, PC3-6400, PC3-8500, PC3-10600, or PC3-12800 registered or
unbuffered, synchronous dynamic random-access memory (SDRAM) dual inline
memory modules (DIMMs) with error correcting code (ECC). See
http://www.ibm.com/systems/info/x86servers/serverproven/compat/us/ for a list of
supported memory modules for the server.
– The specifications of a DDR3 DIMM are on a label on the DIMM, in the
following format.
250 IBM System x3650 M4 Type 7915: Problem Determination and Service Guide
 Loading...


