Removing the simple-swap hard disk drive backplate
To remove the simple-swap hard disk drive backplate, complete the following steps.
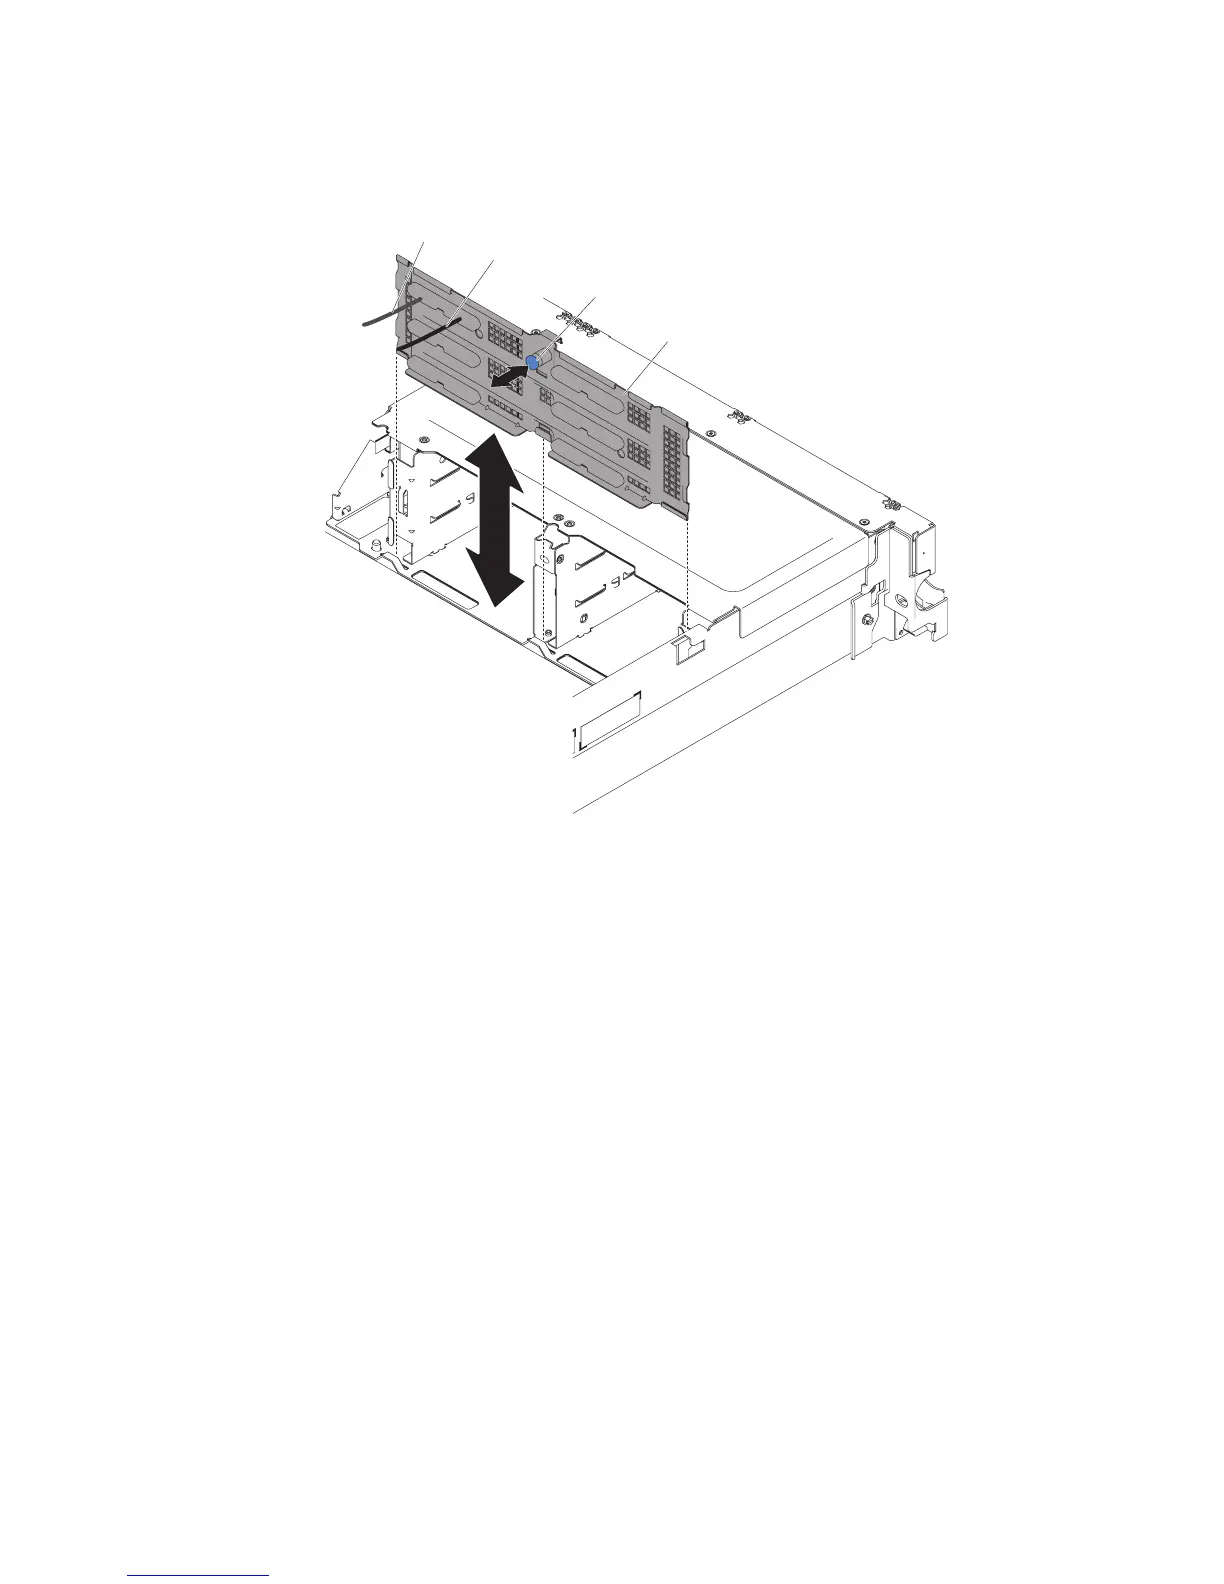
Hard disk drive
backplate
SAS
signal
cable
Power
cable
Latch
1. Read the safety information that begins on page vii and “Installation guidelines”
on page 191.
2. Turn off the server and peripheral devices, and disconnect the power cord and
all external cables.
3. Slide the server out of the rack.
4. Remove the cover (see “Removing the cover” on page 205).
5. Pull the hard disk drives or fillers out of the server slightly to disengage them
from the backplate. See “Removing a simple-swap hard disk drive” on page 238
for details.
6. To obtain more working room, remove the fans (see “Removing a hot-swap
dual-motor hot-swap fan” on page 257).
7. Lift the backplate out of the server by pulling the latch and lifting it up.
8. Disconnect the backplate power, signal, and configuration cables (see “Internal
cable routing and connectors” on page 194).
9. If you are instructed to return the backplate, follow all packaging instructions,
and use any packaging materials for shipping that are supplied to you.
Installing the simple-swap hard disk drive backplate
To install the replacement simple-swap hard disk drive backplate, complete the
following steps.
242 IBM System x3650 M4 Type 7915: Problem Determination and Service Guide
 Loading...


