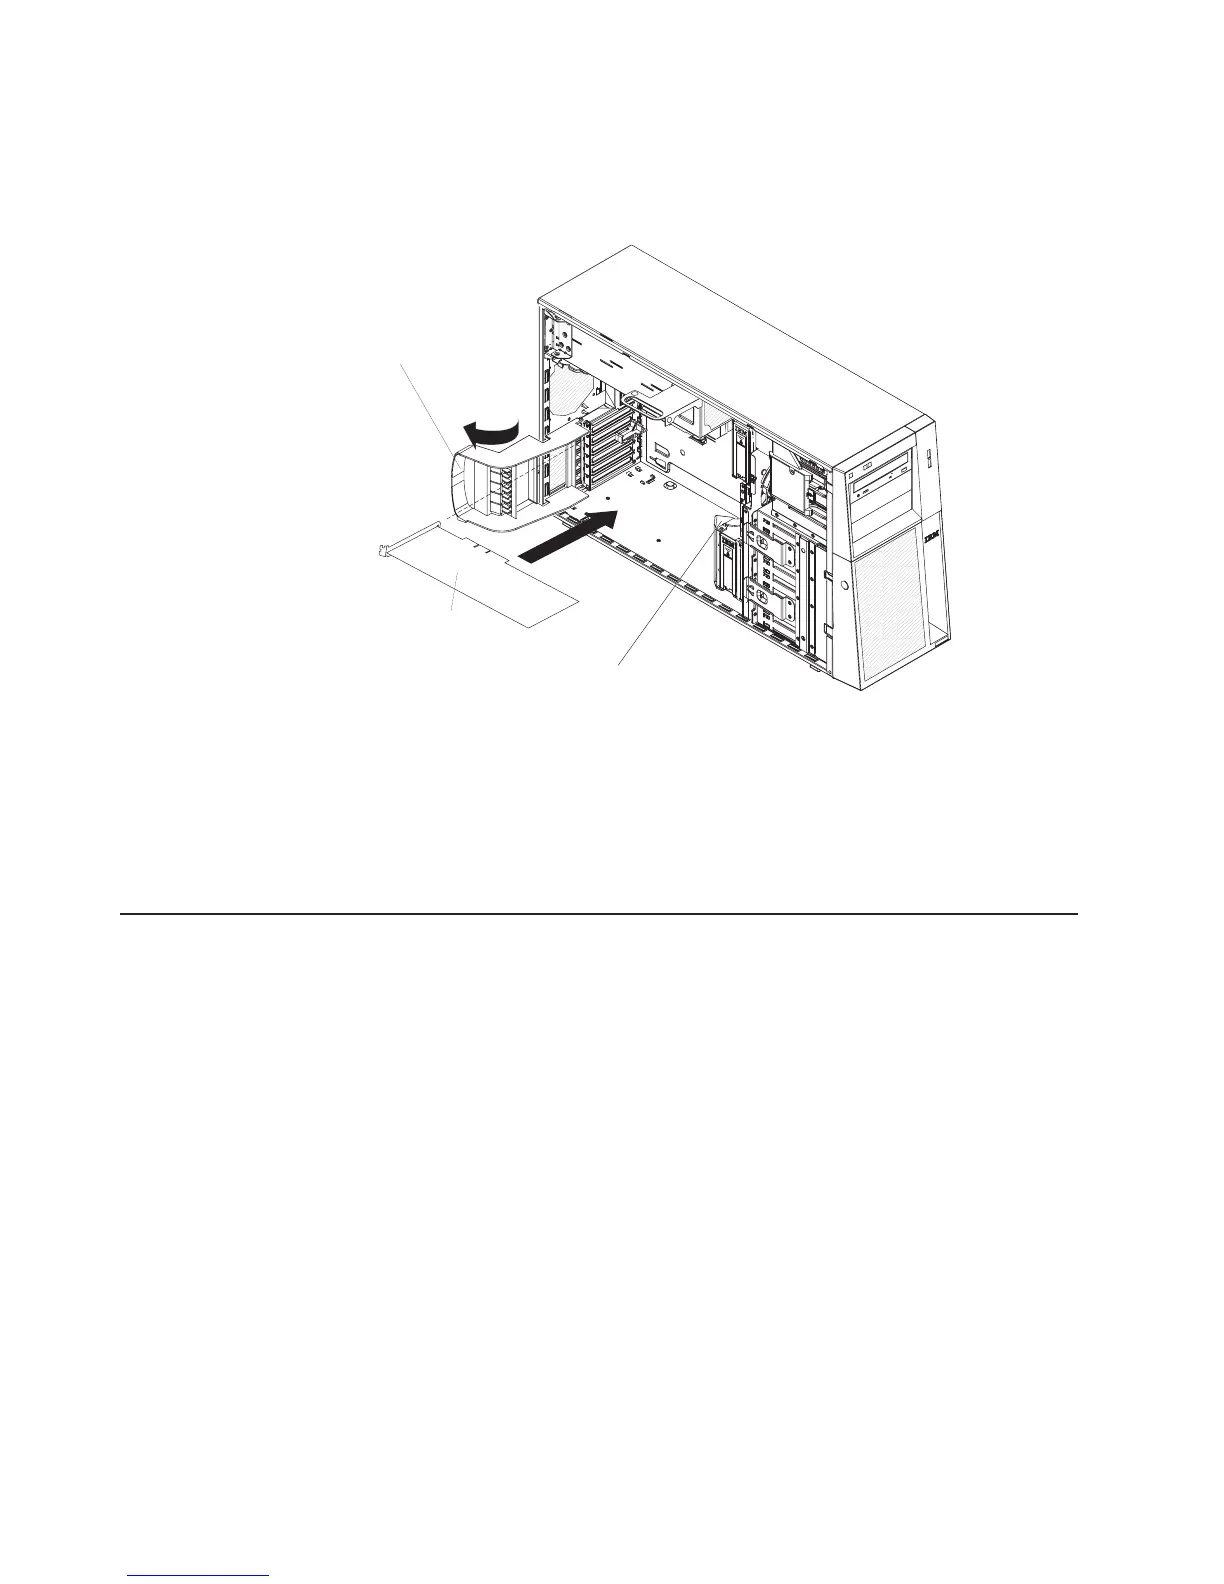
Note: If any adapters in the server are large or have heavy cables attached to
them, you can remove the rear adapter-retention bracket and secure all of the
adapters with expansion-slot screws (the expansion-slot screws are located on
the side of the optical drive cage).
Adapter
Rear adapter
retention bracket
Front adapter
retention bracket
10. Connect required cables to the adapter. Route cables so that they do not block
the flow of air from the fans.
11. Rotate the rear adapter-retention bracket to the closed (locked) position.
12. Rotate the front adapter-retention bracket to the closed (locked) position.
If
you have other options to install or remove, do so now; otherwise, go to
“Completing the installation” on page 68.
Installing a microprocessor
The following notes describe the type of microprocessor that the server supports
and other information that you must consider when installing a microprocessor:
v The server comes with one microprocessor installed, but supports up to two
microprocessors.
Note: A microprocessor must be installed and removed only by a trained service
technician.
v Read the documentation that comes with the microprocessor to determine
whether you have to update the basis input/output system (BIOS) code. To
download the most current level of BIOS code for your server, go to
http://www.ibm.com/support/, and click Downloads and drivers.
v When you install a second microprocessor, you must also install the voltage
regulator module (VRM), which comes with the microprocessor option kit, in the
VRM connector on the system board.
v Some models support dual-core microprocessors or quad-core microprocessors.
Do not mix dual-core microprocessors and quad-core microprocessors in the
same system. Install all dual-core or all quad-core microprocessors in the server.
v To ensure that the server operates correctly, use microprocessors that have the
same cache and type, and the same clock speed. The microprocessor internal
and external clock frequencies must be identical. You can use the
48 System x3400 Types 7973, 7974, 7975, and 7976: User’s Guide
 Loading...