8
USING AN SD CARD
8-8
Backing up the data saved on the SD card onto a PC
You can easily restore data with a backup le even if
the setting data in the SD card is accidentally deleted.
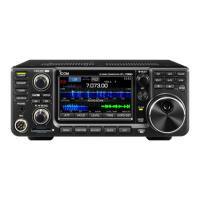
D About the SD card’s folder contents
The folder in the SD card contains the following:
1. IC-7300 folder
The folders created in the IC-7300 are contained
in this folder.
2. Capture folder
The captured screen data is saved in the ‘png’ or
‘bmp’ format.
3. Decode folder
The RTTY decode log folder is created.
4. RTTY folder
The transmitted or received RTTY decode log
data is saved in the ‘txt’ format*.
* You can change the le format to ‘html’ in the
RTTY DECODE LOG SET screen. (p. 4-27)
5. Setting folder
The transceiver’s setting data is saved in the ‘dat’
format.
6. Voice folder
The recorded QSO audio date folders are created.
7. yyyymmdd folder
Recorded audio les are saved in the ‘wav’ format.
The folder name is automatically created in
the following format: yyyymmdd (yyyy:Year,
mm:month, dd:day)
8. VoiceTx folder
Recorded voice audio data for the Voice TX
function is saved in the ‘wav’ format.
6. Voice 7. yyyymmdd
7. yyyymmdd
2. Capture
3. Decode
8. VoiceTx
4. Rtty
5. Setting
1. IC-7300
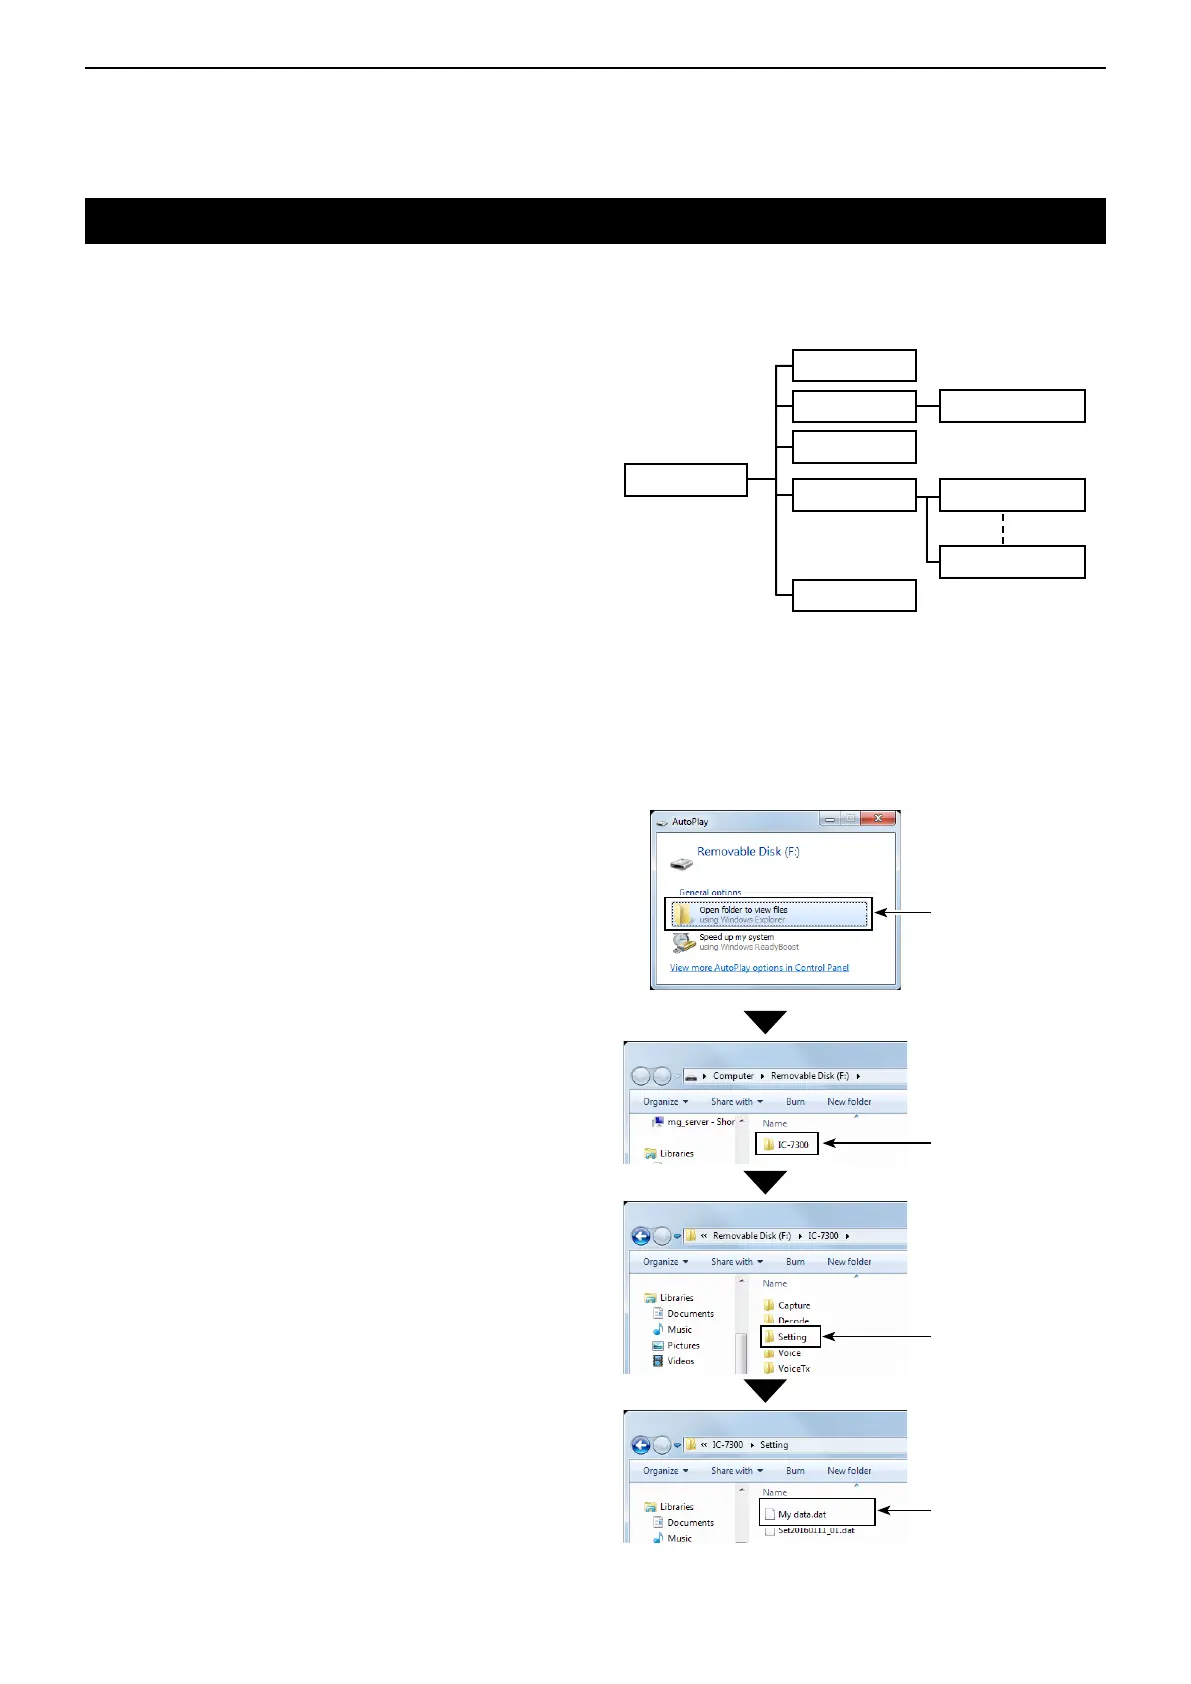
(Example: Selecting the setting data)
When the PC reads the SD card data, the screens
shown below are displayed.
Click
Double-click
Double-click
The setting data
 Loading...