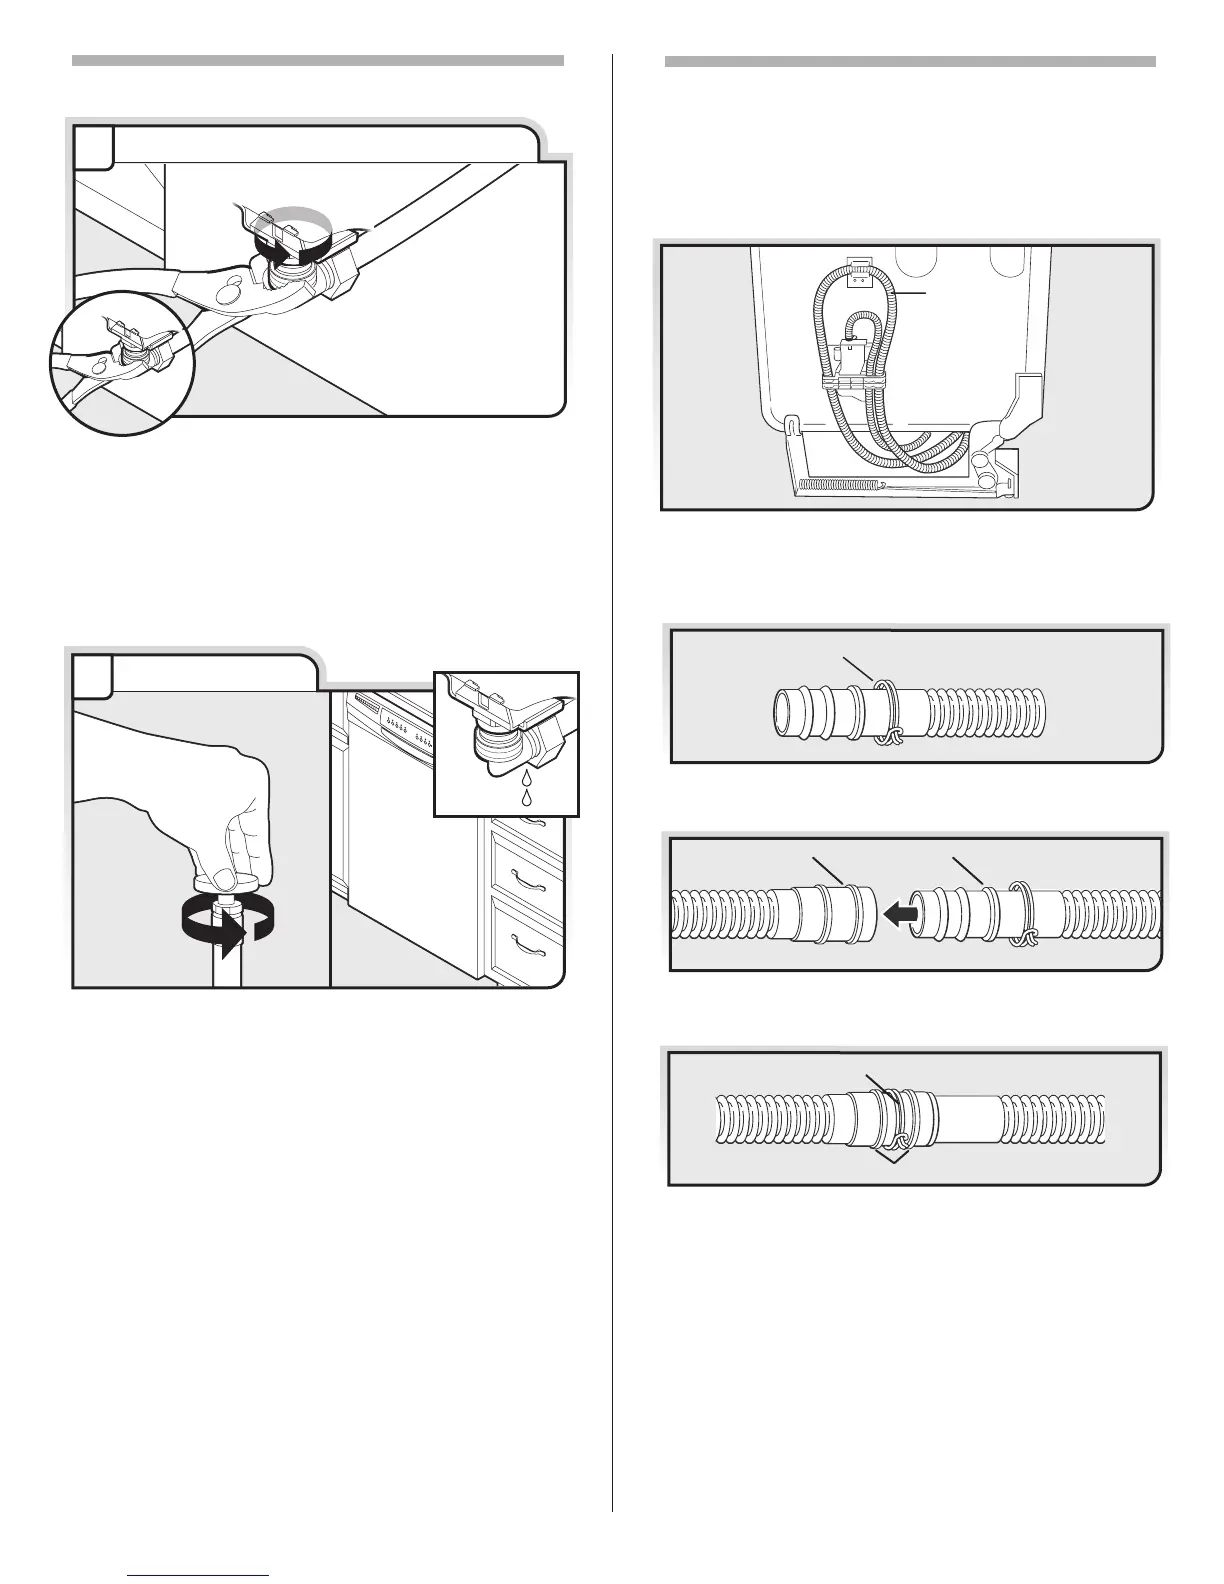
Place paper towel under 90° elbow fitting. Turn on water
supply and check for leaks. If leak occurs, repeat
previous step.
If needed, see website for animated representation
of this step.
Be sure rubber washer is properly seated in fitting. Slide
the ³⁄₄" fitting up to the valve and hand tighten to avoid
cross-threading. Hand tighten until the coupling is tight.
Using pliers, check the tightness of the coupling. An
additional ¹⁄₄ to ¹⁄₂ turn may be required to seal the rubber
gasket.
NOTE: Do not overtighten. Damage to the coupling can
result.
1. To help minimize vibration, route drain hose to avoid
contact with motor, door springs, water line, cabinet,
flooring or the edge of the hole where it passes through
the cabinet.
2. Do not remove drain loop from side of dishwasher.
3. Place pan under end of drain hose. Pan will collect any
water in drain hose.
4. Place the smaller drain hose clamp onto the small end
of the drain hose.
5. Push the drain hose into the connector up to the stop
on the drain hose.
6. Use pliers to open clamp and slide clamp onto
connector between stops on connector as shown.
 Loading...