Auto-Time Correction:
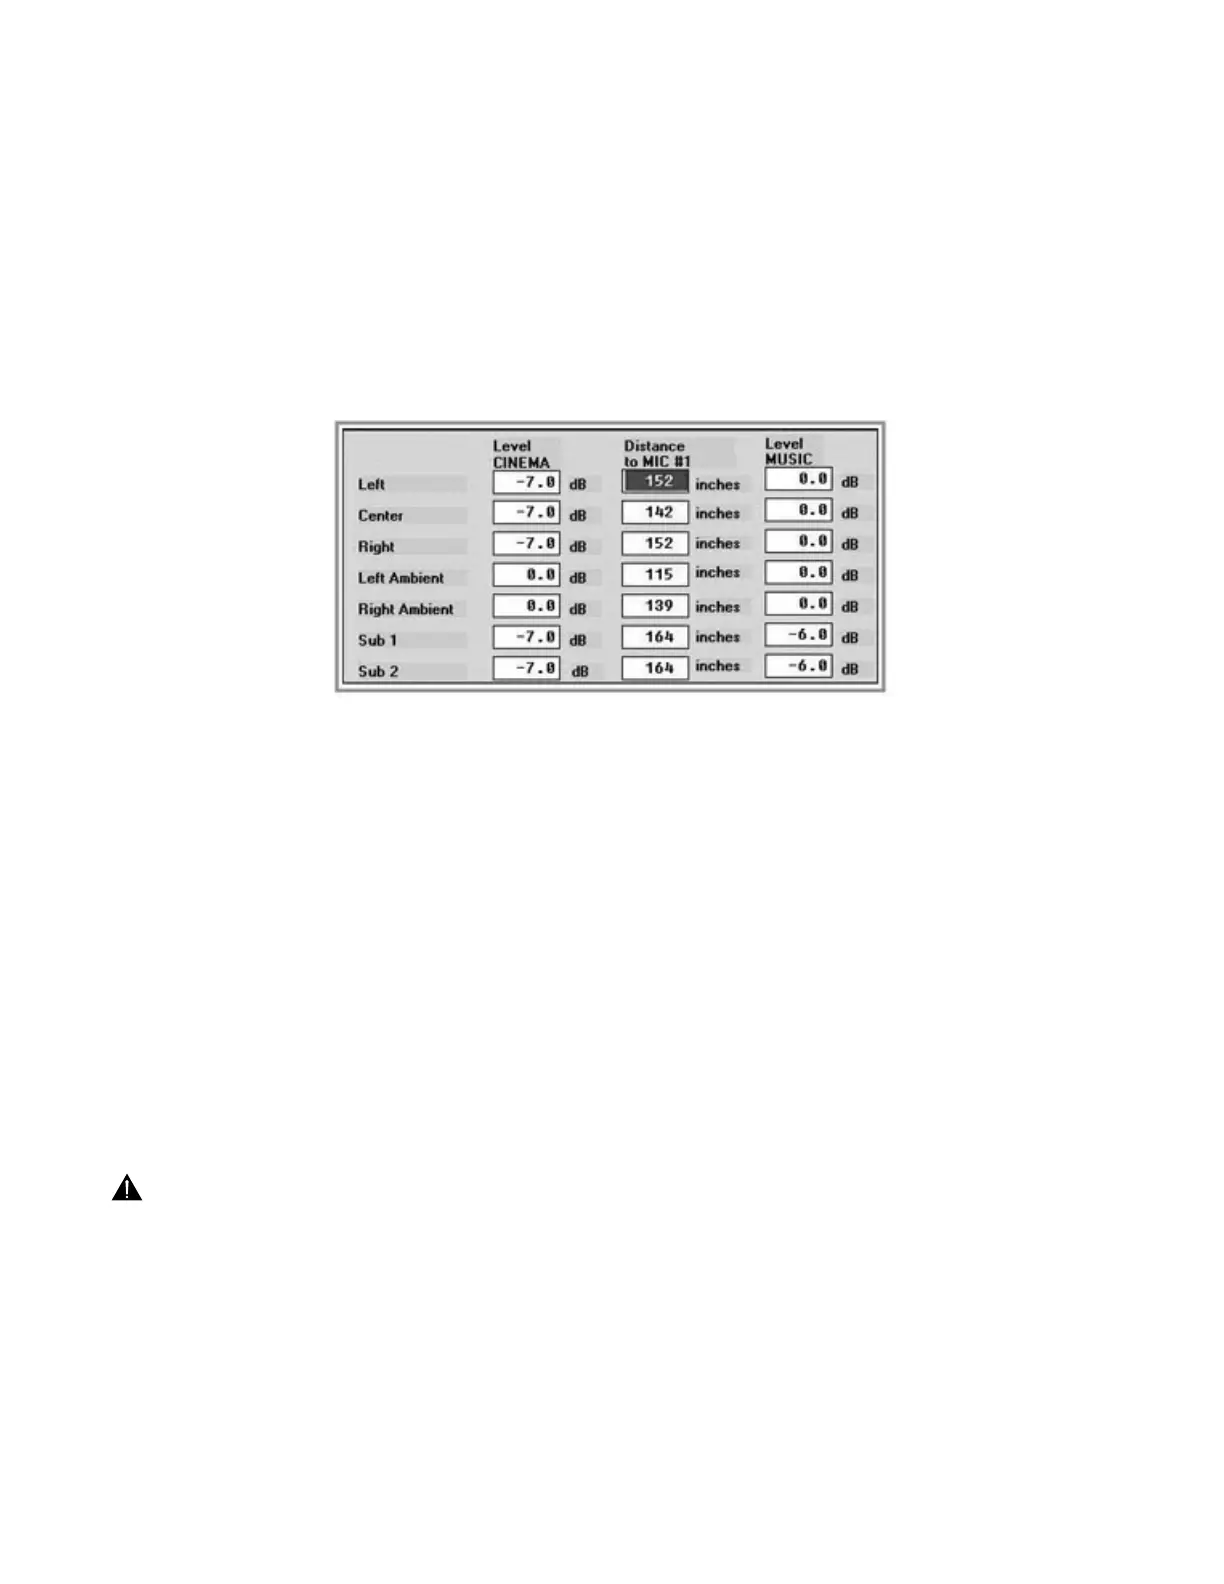
The first test you will perform, Auto-Time Correction, will briefly stimulate each speaker to determine the distance from
microphone #1 to each speaker. Press [Ctrl]+[T] to run the test. Immediately after the test a dialog box, which reports the
measurement results, will appear.
Figure 28:
Auto-Time Correction Dialog Box
Gain and distance information for all channels is displayed. Along the left, arranged vertically, is a list of channels. The left
and right columns display the gain settings for each channel. The center column displays the results of the Auto-Time test.
In some circumstances, the measured distance may be incorrect. It is recommended that you take a moment to confirm
that the measurements are correct. A normal tolerance for these measurements is +/
–
6". Typically, if there is an error, it
will be quite large, so it is easy to spot. As an example, If all of the speakers are about 200" from MIC #1, one channel
might report 360" or 0".
If one or more channels are misreported, simply use a tape measure to determine the correct distance (from MIC #1 to the
grille of the speaker) and manually enter the correct distance for that channel.
When this dialog box occurs, the left channel distance entry field is already highlighted. If this channel requires correc-
tion, you can type it in. If one of the other channels requires editing, press [TAB] key as often as necessary to advance
to the desired channel. Or press the [TAB] key repeatedly until the correct entry field is highlighted. Now type in the
correct distance.
When you are finished, press [F8] to clear this dialog box.
The gain settings found here may or may not be needed at a later time. In any event, they are not to be changed from their
current settings now.
4.7
CALIBRATION WALK-THROUGH
47
 Loading...